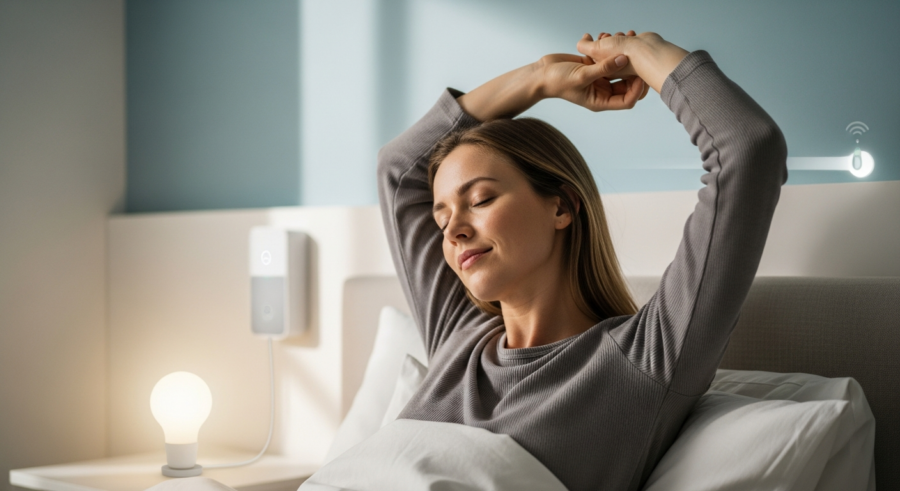
Imagine waking up to a gentle, gradually brightening light, mimicking the sunrise. This isn’t just a pleasant way to start the day, it’s a way to align your body clock with the natural world. With Home Assistant Sunrise Automation, you can transform your bedroom into a personal sunrise simulator, promoting a healthier and more natural wake-up routine.
This article will guide you through setting up your own Home Assistant Sunrise Automation. We’ll cover everything from understanding the science behind it to the practical steps for configuring your system, ensuring you wake up refreshed and ready to tackle the day ahead.
Say goodbye to jarring alarm clocks and hello to a more peaceful and energized morning. Let’s explore how to create your own personalized sunrise experience using Home Assistant, bringing the benefits of natural light indoors.
Understanding Circadian Rhythm and Home Automation
Our bodies operate on a roughly 24-hour cycle known as the circadian rhythm. This internal clock regulates various physiological processes, including sleep-wake cycles, hormone release, and body temperature.
Disruptions to this rhythm, often caused by artificial light and irregular schedules, can lead to sleep problems, mood disorders, and other health issues. Light plays a crucial role in regulating the circadian rhythm.
Home automation offers a unique opportunity to synchronize our living environments with these natural rhythms. By mimicking the sunrise with gradually increasing light, we can signal to our bodies that it’s time to wake up gently and naturally. This is where Home Assistant Sunrise Automation comes into play.
This type of light automation can improve sleep quality, increase alertness, and boost overall well-being. It’s about creating a more harmonious relationship between our indoor environments and our natural biology.
The circadian rhythm is influenced by external cues, most notably light. When the sun rises, our bodies naturally suppress the production of melatonin, a hormone that promotes sleepiness.
Conversely, as darkness falls, melatonin production increases, preparing us for sleep. Modern lifestyles, with their reliance on artificial light and screen time, can significantly disrupt this natural process.
Home automation, particularly sunrise simulation, can help to mitigate these disruptions. By gradually increasing the light in your bedroom before your desired wake-up time, you can gently signal to your body that it’s time to wake up.
This gradual awakening process can be much more effective than a jarring alarm clock, which can shock your system and leave you feeling groggy. A simulated sunrise allows your body to naturally adjust to the increasing light, promoting a smoother and more pleasant transition from sleep to wakefulness.
Furthermore, the benefits extend beyond just feeling more awake. Improved sleep quality, reduced stress levels, and enhanced mood are all potential outcomes of aligning your circadian rhythm with natural light patterns. Home Assistant provides the tools to achieve this synchronization.
Essential Components for Sunrise Automation
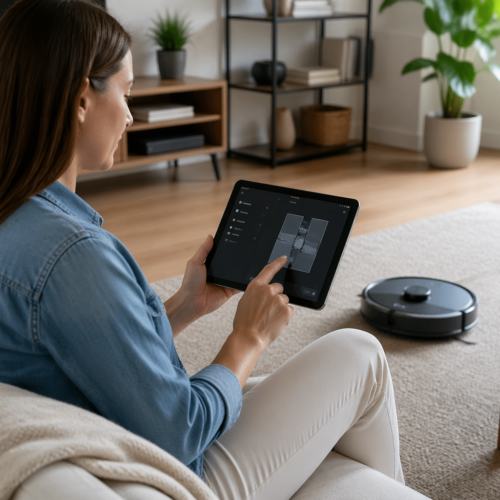
To create a Home Assistant Sunrise Automation, you’ll need a few key components. First, you’ll need a smart bulb or a smart dimmer switch connected to a dimmable light.
The most important thing is that it must be compatible with Home Assistant. Philips Hue, LIFX, and Zigbee bulbs are popular choices, but there are many other options available.
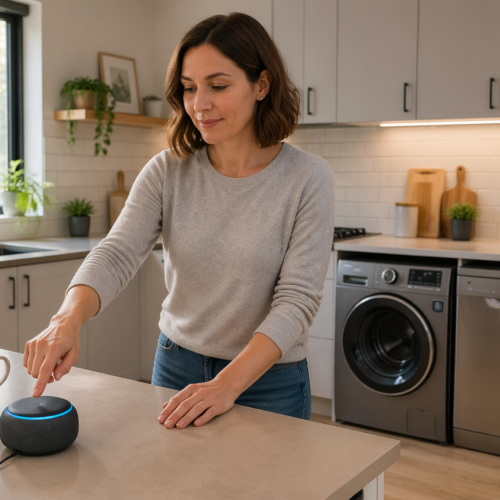
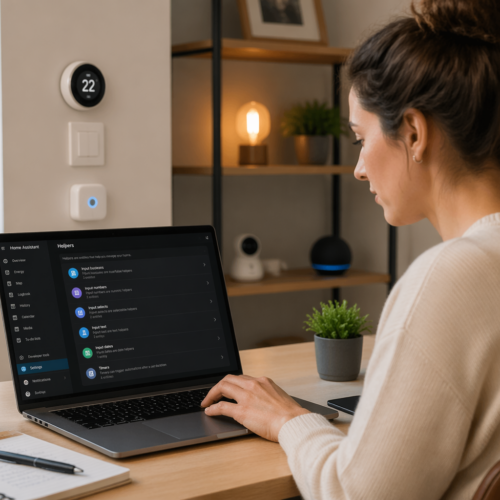
Next, you’ll need a Home Assistant instance set up and running. This could be on a Raspberry Pi, a dedicated server, or even a virtual machine.
Finally, you’ll need to integrate your chosen smart bulb or dimmer switch with Home Assistant. This usually involves installing an integration or using a compatible hub.
Choosing the right smart bulb or dimmer switch is crucial for a successful sunrise automation. Consider factors such as brightness range, color temperature control, and compatibility with Home Assistant.
A bulb with a wide brightness range allows for a more gradual and subtle sunrise effect. The ability to adjust color temperature is also important, as you’ll want to start with a warm, reddish hue and gradually shift to a cooler, more natural daylight color.
Setting up Home Assistant can seem daunting at first, but there are many resources available to guide you through the process. The Home Assistant website provides detailed installation instructions for various platforms.
Once Home Assistant is up and running, you’ll need to integrate your smart bulb or dimmer switch. This usually involves installing an integration from the Home Assistant Add-ons store or configuring a compatible hub, such as a Philips Hue Bridge or a Zigbee gateway.
Ensure all components are properly connected and communicating with each other before proceeding with the automation setup. This will save you time and frustration in the long run.
Setting Up the Automation in Home Assistant
Now that you have the necessary components, it’s time to set up the automation in Home Assistant. You can create a new automation by navigating to the “Configuration” panel and selecting “Automations & Scenes.”
Click the “Add Automation” button to start creating your sunrise automation. You can choose to start with a blank automation or use a blueprint, if one is available for sunrise simulation.
| Component | Description | Example |
|---|---|---|
| Trigger | The event that starts the automation | Time (e.g., 30 minutes before sunrise) |
| Condition | Optional criteria that must be met for the automation to run | Check if it’s a weekday |
| Action | The actions to be performed when the trigger and conditions are met | Gradually increase the brightness of the light |
| Target Light | The specific light to be controlled | Bedroom Lamp |
The most important part of setting up the automation is selecting the trigger. For a sunrise automation, the most common trigger is a time-based trigger, set to a specific time or offset from sunrise.
When creating your automation, consider using a descriptive name that clearly identifies its purpose. This will make it easier to manage and troubleshoot your automations in the future.
The trigger is the event that initiates the automation. For a sunrise automation, you’ll typically use a time-based trigger. You can specify a specific time of day or use an offset from sunrise or sunset.
Conditions are optional criteria that must be met for the automation to run. For example, you could add a condition to only run the automation on weekdays, or to only run it if you are home.
The actions are the steps that are performed when the trigger and conditions are met. In the case of a sunrise automation, the primary action is to gradually increase the brightness of the light.
Target Light specifies which light to control. This should correspond to the smart bulb or dimmer switch you intend to use for your sunrise simulation. Be sure to select the correct entity from the list of available devices.
Configuring the Light Transition
The key to a successful sunrise automation is the gradual light transition. Instead of simply turning on the light, you want to slowly increase the brightness over a set period of time.
Home Assistant provides several ways to achieve this. One method is to use the “Light: Turn on” action with the “Transition” parameter.
The “Transition” parameter specifies the time, in seconds, over which the light should transition to the desired brightness. For example, a transition of 1800 seconds (30 minutes) will gradually increase the light’s brightness over 30 minutes.
You can also set the initial brightness and color temperature of the light. Start with a low brightness (e.g., 1%) and a warm color temperature (e.g., 2200K) to mimic the early morning sun.
Experiment with different transition times to find what works best for you. A longer transition time (e.g., 45 minutes or an hour) may be more effective for some people, while others may prefer a shorter transition time (e.g., 20-30 minutes).
The initial brightness should be very low, almost imperceptible. The goal is to create a subtle and gradual increase in light, rather than a sudden burst of brightness.
The color temperature is measured in Kelvin (K). Lower Kelvin values (e.g., 2200K) correspond to warmer, more reddish light, while higher Kelvin values (e.g., 6500K) correspond to cooler, more bluish light.
Starting with a warm color temperature mimics the early morning sun and can help to promote a more natural and gentle awakening. Gradually shifting to a cooler color temperature as the light brightens can further enhance the effect.
Advanced Transition Techniques
For a more realistic sunrise effect, you can use multiple actions to gradually increase the brightness and adjust the color temperature. This involves creating a series of actions that incrementally increase the brightness and shift the color temperature from warm to cool.
For example, you could have an action that increases the brightness by 5% every 5 minutes and another action that gradually shifts the color temperature. This creates a more dynamic and natural-feeling sunrise.
Another advanced technique is to use a script to define the sunrise sequence. A script allows you to define a series of steps that are executed in order, providing more control over the automation.
You can use the “wait_template” to pause the script for a specific amount of time between each step. This enables you to create a smooth and gradual sunrise effect.
Using multiple actions allows for finer-grained control over the light transition. You can adjust the brightness and color temperature in smaller increments, creating a smoother and more natural-looking sunrise.
When using multiple actions, be sure to space them out evenly over the desired transition time. This will ensure that the light gradually increases in brightness and shifts in color temperature, rather than jumping abruptly.
Scripts provide even more flexibility and control over the sunrise automation. You can define a series of steps that are executed in order, allowing you to create complex and customized light transitions.
The “wait_template” function is particularly useful for creating smooth and gradual transitions. It allows you to pause the script for a specific amount of time between each step, ensuring that the light changes gradually over time.
Testing and Troubleshooting Your Sunrise Automation
Once you’ve set up your sunrise automation, it’s crucial to test it to ensure it works as expected. You can manually trigger the automation from the Home Assistant interface to see if the light transitions correctly.
Pay attention to the speed and smoothness of the transition. Does the light gradually increase in brightness, or does it jump abruptly?
- Check the logs for errors
- Verify device connectivity
- Adjust transition times
- Confirm the trigger is firing
- Review the automation configuration
If the automation isn’t working, check the Home Assistant logs for any error messages. These logs can provide valuable clues about what’s going wrong.
Testing your automation is a critical step in the setup process. Don’t skip it! It’s much better to identify and fix any issues before relying on the automation to wake you up in the morning.
When testing, pay close attention to the smoothness of the light transition. If the light jumps abruptly, you may need to adjust the transition time or use more granular control over the brightness and color temperature.
The Home Assistant logs can be a valuable resource for troubleshooting automation issues. They often contain error messages that can help you identify the root cause of the problem.
Double-check that your smart bulb or dimmer switch is properly connected to your network and integrated with Home Assistant. A common issue is that the device is offline or not communicating correctly with Home Assistant.
Customizing Your Sunrise Automation
One of the great things about Home Assistant is its flexibility. You can customize your sunrise automation to fit your specific needs and preferences.
For example, you can add conditions to the automation to only run on weekdays or weekends. This allows you to have different wake-up routines for different days of the week.
You can also integrate other smart home devices into your sunrise automation. For example, you could have the automation gradually increase the volume of your favorite music as the light brightens.
Another customization option is to adjust the duration and intensity of the sunrise effect. Experiment with different transition times and brightness levels to find what works best for you.
Consider your personal preferences and lifestyle when customizing your sunrise automation. Do you prefer a longer or shorter sunrise? Do you like to wake up to music or nature sounds? Do you need different wake-up routines for weekdays and weekends?
Adding conditions to your automation can make it more intelligent and responsive to your needs. For example, you could add a condition to only run the automation if you are home, or to skip the automation if you are on vacation.
Integrating other smart home devices can create a more immersive and personalized wake-up experience. For example, you could have your smart coffee maker start brewing coffee as the light brightens, or have your smart blinds gradually open to let in natural light.
Don’t be afraid to experiment with different settings and customizations until you find what works best for you. The goal is to create a wake-up routine that is both effective and enjoyable.
Integrating Sound and Other Sensory Elements
To further enhance your wake-up experience, consider integrating sound and other sensory elements into your sunrise automation. This could involve playing gentle nature sounds, such as birds chirping or waves crashing, as the light gradually brightens.
You can use a smart speaker integrated with Home Assistant to play these sounds. Set the volume to gradually increase along with the light, creating a more immersive and natural wake-up experience.
Another option is to incorporate aromatherapy into your sunrise routine. Use a smart diffuser to release a calming scent, such as lavender or chamomile, as the light transitions.
You could also integrate a smart coffee maker into your automation. Have it start brewing your coffee a few minutes before the light reaches full brightness, so you wake up to the aroma of freshly brewed coffee.
The integration of sound can be a powerful addition to your sunrise automation. Choose sounds that are calming and relaxing, such as nature sounds, ambient music, or gentle melodies.
Aromatherapy can also enhance the wake-up experience by stimulating your sense of smell. Choose scents that are known to be calming and uplifting, such as lavender, chamomile, or citrus.
Consider the timing of each sensory element. For example, you might want to start playing the nature sounds a few minutes before the light starts to brighten, and then gradually increase the volume as the light transitions.
The aroma of freshly brewed coffee can be a great way to start your day. By integrating your smart coffee maker into your sunrise automation, you can wake up to the enticing aroma of coffee, making it easier to get out of bed.
Optimizing for Different Seasons and Locations
The sunrise time varies throughout the year depending on your location and the season. To ensure your sunrise automation remains effective, you may need to adjust it periodically.
Home Assistant provides several ways to handle this. One option is to use the “sun” integration, which provides information about sunrise and sunset times based on your location.
You can use this information to dynamically adjust the trigger time of your sunrise automation. For example, you could set the automation to start 30 minutes before sunrise, regardless of the time of year.
Another approach is to create multiple automations with different trigger times for different seasons. You can then enable or disable the appropriate automation based on the time of year.
The “sun” integration is a powerful tool for creating dynamic automations that adapt to changing sunrise and sunset times. It provides several entities that you can use in your automations, such as “sunrise,” “sunset,” and “solar_noon.”
Using an offset from sunrise is a simple and effective way to ensure that your sunrise automation starts at the same relative time each day, regardless of the season. For example, you could set the automation to start 30 minutes before sunrise.
Creating multiple automations for different seasons allows for more fine-grained control over the sunrise effect. For example, you could create a separate automation for winter that starts earlier and has a longer transition time, to compensate for the shorter days.
Consider the impact of daylight saving time on your sunrise automation. You may need to adjust the trigger time by one hour when daylight saving time begins or ends.
Troubleshooting Common Issues
Even with careful planning, you may encounter issues with your sunrise automation. Here are some common problems and how to troubleshoot them.
If the light doesn’t turn on at all, check that your smart bulb or dimmer switch is properly connected to your network and integrated with Home Assistant. Also, make sure the automation is enabled and the trigger is firing correctly.
If the light turns on but doesn’t transition smoothly, check the “Transition” parameter in your automation. Make sure it’s set to a reasonable value (e.g., 1800 seconds) and that your smart bulb or dimmer switch supports smooth transitions.
If the colors are off, be sure that you have a color-capable bulb. If your light turns on at the wrong time, double-check the trigger settings in your automation. Make sure the time is correct and that any conditions are properly configured.
A common issue is that the smart bulb or dimmer switch is not properly connected to your Wi-Fi network. Check the device’s configuration and ensure that it is connected to the correct network.
Another common issue is that the Home Assistant integration for your smart bulb or dimmer switch is not properly configured. Check the integration settings and ensure that it is properly connected to your device.
If the automation is not triggering at the correct time, double-check the trigger settings in your automation. Ensure that the time is correct and that any conditions are properly configured.
If the light is not transitioning smoothly, try increasing the “Transition” parameter in your automation. This will give the light more time to gradually increase in brightness.
Conclusion
Home Assistant Sunrise Automation offers a simple yet powerful way to improve your sleep and wake-up routine. By mimicking the natural sunrise, you can align your body clock with the natural world, promoting a healthier and more energized start to your day.
With the steps outlined in this article, you can easily set up your own personalized sunrise experience using Home Assistant. Experiment with different settings and customizations to find what works best for you, and enjoy the benefits of a more natural and peaceful wake-up routine.
Embrace the power of light automation and transform your bedroom into a personal sunrise simulator. Wake up naturally and start your day feeling refreshed and ready to take on the world with Home Assistant Sunrise Automation and circadian rhythm optimization.
By implementing a Home Assistant Sunrise Automation, you are taking a proactive step towards improving your overall well-being. The benefits of a natural and peaceful wake-up routine extend far beyond just feeling more awake in the morning.
Remember to experiment with different settings and customizations to find what works best for you. There is no one-size-fits-all approach to sunrise automation. The key is to find a routine that is both effective and enjoyable.
With Home Assistant’s flexibility and power, you can create a truly personalized sunrise experience that will help you start your day feeling refreshed, energized, and ready to take on the world.