If you run Home Assistant for local-first smart home automation, you probably care about two things, reliability and control. Home Assistant automation blueprints can deliver both, but only if you treat them like reusable templates, not magic spells.
I like blueprints because they let you borrow a proven automation pattern in minutes, then tweak the inputs to match your house. I dislike blueprints when people import random YAML from the internet and assume it cannot hurt anything.
This guide walks through how to find, import, and customize blueprints without turning your setup into a brittle mess. You will also see automation blueprint examples, learn how to import blueprint Home Assistant the safe way, and know when it is time to edit blueprint YAML or move on.
What blueprints are and when you should use them
A blueprint is a parameterized automation template that Home Assistant can reuse for many automations. Instead of writing triggers, conditions, and actions from scratch, you fill in inputs like entities, times, and thresholds.
In practice, a blueprint is just YAML with a defined set of inputs and selectors that the UI can render. When you create an automation from it, Home Assistant generates a normal automation that references the blueprint and stores your chosen inputs.
Blueprints shine when you want the same logic in multiple rooms, like motion lighting for a hallway, kitchen, and laundry room. They also work well when you are copying a community pattern that has already handled edge cases like “motion stops” timing and manual overrides.
They are also useful when you want consistency, because you can apply the same behavior to a dozen sensors without copying and pasting. If you later decide the timeout should be 4 minutes instead of 3, you can adjust each automation’s inputs without rewriting the structure.
I reach for a blueprint when the automation logic is common and boring, and I do not want to re-litigate it every time. A good example is a “turn on lights with motion, turn off after X minutes, but only when it is dark” pattern.

Another good fit is anything that needs the same guardrails everywhere, like “do not run if a manual override is active” or “do not spam notifications more than once per hour.” A blueprint can encode those rules once so you do not forget them in the tenth copy.
I avoid a blueprint when the behavior is unique to my house or depends on a lot of custom helper entities. If you already know you will need custom Jinja templates, complex choose blocks, or multiple parallel triggers, a blueprint can become a straightjacket.
I also avoid blueprints when the automation is more about orchestration than a single pattern, like coordinating lights, media, and HVAC across multiple floors. Those automations tend to evolve quickly, and a fixed input list becomes friction instead of help.
A subtle downside is that blueprints can hide complexity until something breaks, because you are not staring at the YAML every time you edit. If you want to learn Home Assistant deeply, writing a few automations from scratch is still the fastest way to build intuition.
How to find and import a blueprint without breaking your setup
Start with sources you can evaluate, like the official Home Assistant forums, a well-maintained GitHub repo, or a creator whose blueprints you have used before. If the blueprint has not been updated in a year and it touches core services like alarms or locks, treat it as suspect.
I also look at the issue tracker or forum thread to see if people are reporting bugs that match my environment. If the comments are full of “works for me” but nobody posts traces, versions, or fixes, I assume I will be the one debugging it.
Before you import anything, read the README and scan the YAML for what it controls. If you see services like lock.lock, alarmcontrolpanel.alarmarmaway, or notify.* firing without clear constraints, do not install it until you understand the guardrails.
Pay attention to whether the blueprint uses device triggers or entity triggers, because device triggers can be brittle across integrations and hardware revisions. If a blueprint is hardcoded to a specific device model, it may not expose the entity selectors you need.
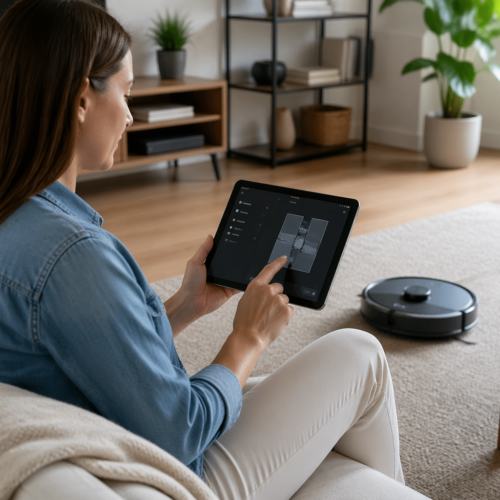
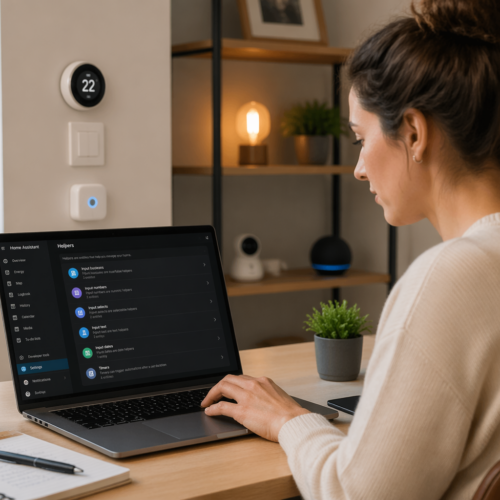
To import blueprint Home Assistant, go to Settings, Automations and scenes, Blueprints, then click Import Blueprint and paste the URL. Home Assistant downloads the YAML into your config under the blueprints folder, so you can inspect it after import.
If the URL points to GitHub, prefer the raw file link so you are importing the actual YAML and not an HTML page. If the blueprint author provides a one-click import link, still open it in a browser once so you know what you are pulling in.
After import, I open the blueprint and check the metadata block, especially the name, domain, and input definitions. If the input list is vague, like “target” with no description, I expect the UI setup to be confusing and I plan extra time to test.
My rule is to create a test automation from the blueprint first, scoped to a safe entity like a lamp, not your whole house. If the blueprint is for presence, locks, or heating, test it with a helper boolean or a dummy input before you connect it to real devices.
I also test at a time when I can watch it, because the worst failures are the quiet ones that only show up overnight. If a blueprint can turn things off, I temporarily enable notifications or a logbook entry so I can see when it runs.
One more safety step is to confirm you can disable the created automation quickly from the UI. If you are experimenting with something that might loop or spam, keep the Automations page open in another tab so you can hit the toggle fast.
Understanding inputs: triggers, conditions, and actions
Blueprint inputs are the knobs you turn, and they map directly to the automation engine you already know. When you choose entities for a trigger input, you are basically filling in the trigger section of a normal automation.
The difference is that the blueprint author decided which knobs you get, and which ones are hidden inside the template. That is why two motion blueprints can feel totally different even if they both “do motion lights.”
Most home assistant automation blueprints expose inputs for triggers, optional conditions, and one or more action targets. The best blueprints also expose timing inputs like “cooldown,” “no motion timeout,” or “minimum on time,” because those values vary by room.
When a blueprint does not expose timing, you end up compensating by changing sensor settings or adding extra helpers, which is backwards. A hallway and a bathroom can use the same logic, but they rarely want the same off delay.
Selectors matter more than people think, because they determine what the UI will let you pick. A target selector that accepts a device might block you from selecting a light group entity, and that can be the difference between clean setup and a frustrating workaround.
Another thing to watch is whether the blueprint expects a binary sensor, a motion sensor device class, or any entity with on/off states. If you feed it a sensor that reports “detected” instead of “on,” the blueprint might never trigger or might never stop.
Conditions in blueprints are often optional, but optional does not mean harmless. If you leave a condition blank, the blueprint might skip that check entirely, or it might apply a default that you did not notice in the description.
Actions are where opinionated blueprints show their personality, like using scenes, transitions, or adaptive lighting calls. If you want simple service calls, look for blueprints that let you choose between scene activation and direct light.turn_on data.
Timing and limits inputs are also about reliability, not just comfort, because they prevent thrashing. A cooldown can stop a door sensor from firing five times during a windy day, and a minimum on time can stop lights from flickering when a sensor is chatty.
| Input type | What you pick in the UI | What it becomes in YAML |
|---|---|---|
| Trigger input | Motion sensor entity, door contact, schedule, or event | trigger: platform state, device, time, or event |
| Condition input | Sun elevation, presence boolean, time window, or zone | condition: sun, state, time, numericstate, or template |
| Action target | Light, switch, scene, script, or notification service | action: service call with target and data |
| Timing and limits | Delay minutes, transition seconds, retries, or cooldown | delay, waitfor_trigger, repeat, or choose branches |
If you ever feel lost, open the created automation’s YAML view and look for the blueprint input mapping. Seeing your chosen entities injected into the underlying structure makes the blueprint feel less like a black box.
It also helps to remember that the blueprint is not “running” by itself, your automation is. The blueprint is a recipe, and your automation is the cooked dish with your ingredients.
Customizing a blueprint the safe way (without forking yourself into a corner)
The safest customization path is to keep the blueprint untouched and adjust behavior through inputs, helpers, and wrapper scripts. If a blueprint supports a “manual override” boolean, use it instead of editing the blueprint on day one.
Helpers are underrated here, because they let you add state that the blueprint can read without changing its code. A simple input_boolean like “guest mode” can become the switch that changes how a dozen automations behave.
When inputs are not enough, consider adding a script and calling that script from the blueprint’s action input. That gives you a place to do your messy logic while the blueprint stays a clean, upgradeable template.
This pattern also makes testing easier, because you can run the script manually from Developer Tools to verify the action logic. If the script works but the automation does not, you know the bug is in the trigger or condition path.
Another safe approach is to wrap the blueprint with a second automation that gates it, like using a helper boolean to enable or disable the blueprint-driven automation based on context. It is not as elegant as a single automation, but it keeps the blueprint stock.
If you truly need to edit blueprint YAML, make a copy under a new name and change the blueprint metadata so you can tell them apart later. Treat your copy like a mini project, and write a short comment near each change that explains why you did it.
Be disciplined about what “need” means, because most early edits are really impatience with the UI. If you cannot explain the change as “I am exposing a missing input” or “I am fixing a bug,” you are probably building a custom automation in disguise.
I also keep a “diff note” in a text file or Git commit message that links to the upstream blueprint version I started from. When the upstream author fixes a bug, you will be able to reapply your changes instead of guessing what you touched six months ago.
Even if you do not use Git, you can store a short note in a local file like “blueprints-notes.txt” with the URL and date you imported it. That tiny bit of documentation saves you from redoing detective work later.
If you are editing YAML, keep the input names stable once you have created automations from it. Renaming an input can break existing automations or force you to reselect entities, which is annoying when you have deployed it to many rooms.
Finally, resist the urge to turn one blueprint into a universal monster that handles every scenario. A small, focused blueprint that you understand beats a feature-complete one that you are afraid to touch.
Automation blueprint examples that work well in real homes
Motion lighting is the classic win, especially when the blueprint includes a brightness cap, a night mode, and a graceful off timer. In a hallway, I set a short timeout and a low night brightness because full power at 2 a.m. is rude.
In bathrooms, I like motion blueprints that support a longer timeout and a “keep on if humidity is high” option, because showers are basically motion-free zones. If the blueprint cannot do that, I route the action through a script that checks a humidity sensor.
Motion lighting also benefits from blueprints that handle re-triggers correctly, so the off timer resets when motion returns. If the blueprint does not reset cleanly, you get the classic problem where the light turns off while you are still in the room.
A second good category is “door opens, do X,” like turning on an entry light or pausing a robot vacuum when a front door opens. These automation blueprint examples stay readable because the trigger is simple and the actions are obvious.
For doors and windows, I also like blueprints that include a “door left open” reminder with a configurable delay and a snooze option. The snooze matters because sometimes you are airing out the house and you do not want a notification every five minutes.
Another practical example is mailbox or gate notifications, where the blueprint can debounce noisy sensors and only notify once per event. If it supports a cooldown input, you can stop the spam when the sensor bounces.
Battery and device health blueprints are also useful, but I only trust the ones that let me set thresholds per device class. A coin cell contact sensor at 25 percent is fine, while a smart lock at 25 percent is a weekend problem.
I also prefer battery blueprints that can group notifications into one message instead of sending a separate ping per device. If your house has 40 sensors, the difference between one digest and 40 alerts is the difference between useful and ignored.
Some health blueprints also check availability and last_seen, which is more valuable than raw battery percentage for certain devices. A sensor that is “unavailable” is an immediate problem even if it claims 90 percent battery.
Presence-based HVAC is where I get picky, because a bad blueprint can short cycle equipment or fight your thermostat. If you use a climate blueprint, pick one that supports minimum run time, hysteresis, and a clear “vacation mode” input.
I also like climate blueprints that separate “home/away” from “sleep/awake,” because those are different comfort targets. If the blueprint forces a single away temperature, you end up hacking around it with extra conditions.
Lighting scene and button-controller blueprints are another strong category, especially for Zigbee remotes and wall controllers. A good blueprint maps button presses to actions cleanly and lets you swap actions without rewriting the event logic.
Finally, I have seen solid blueprints for leak sensors that shut off a valve and notify, as long as they include a test mode and a manual reset input. Anything that can shut off water should make it obvious how to recover safely.
Common blueprint pitfalls and how to fix them
The first pitfall is importing a blueprint that assumes your entities look like the author’s entities, especially with device triggers and areas. If the blueprint fails to save or shows missing selectors, open the YAML and check the input selector types and required fields.
This often shows up when a blueprint expects a light entity but you pick a switch that controls a light, or when it expects a climate entity but you have a thermostat exposed differently. The fix is sometimes as simple as using a different entity, like the actual light domain entity instead of the switch.
The second pitfall is a blueprint that uses mode: single when it should use restart or queued. If you see missed motion events or lights turning off while someone is still moving, changing the automation mode in your created automation often fixes it without touching the blueprint.
Mode problems can also look like random behavior, because the automation “works” but ignores later triggers while it is waiting in a delay. If you have a blueprint with long delays, queued mode can be safer, but it can also stack runs if you are not careful.
A third pitfall is hardcoded entityids inside the blueprint, which defeats the whole point of inputs. If you see the author referencing their own light.kitchen or inputboolean.some_flag directly, assume you will need to edit it or avoid it.
Another common issue is time logic that does not match your expectations, like using the sun condition in a way that behaves differently across seasons. If your lights never turn on in winter afternoons, check whether the blueprint uses sun elevation, sunrise/sunset, or a fixed time window.
Notification blueprints can also be noisy if they do not include throttling, grouping, or acknowledgement. If you find yourself muting your phone, the blueprint is failing its job even if the YAML is technically correct.
- Test with a lamp entity before using locks or HVAC
- Check automation mode, single vs restart vs queued
- Confirm input selectors match your entity types
- Watch traces to see where it stops or branches
- Set sane defaults for delays and cooldowns
- Replace hardcoded entity_ids with inputs where possible
If a blueprint is close but not quite, try to fix the problem at the edges first, like swapping the target entity or adding a helper that normalizes state. Editing the blueprint should be the last step, not the first.
If you cannot explain the pitfall in plain language, you are not done debugging yet. The goal is to understand what it is doing, not just to make the symptom go away.
How to debug a blueprint using traces and logs
Home Assistant’s trace view is your best friend because it shows what path the automation took and what data it saw. Open the automation you created from the blueprint, click Traces, and pick a run that behaved badly.
I like to reproduce the problem once, then immediately check the latest trace while the context is fresh. If you wait a day, you will forget what you did and you will start guessing.
When you see a choose block, expand it and look for the first condition that evaluated true. If none matched, the trace usually tells you which input or entity state did not meet the condition.
Also look at the trigger section in the trace, because it will tell you exactly what fired the automation. If you assumed motion fired it but it was actually a state change from “unavailable” to “off,” you just found your real issue.
Logs help when the blueprint calls a service that fails, like a light entity that no longer exists or a script you renamed. I search Settings, System, Logs for “Service not found” and “Entity not found,” then I fix the broken reference in the automation inputs.
The logbook can also be useful for understanding timing, because it shows when entities changed and when automations ran. If your motion sensor reports late, the automation might be fine and the sensor is the bottleneck.
If the blueprint uses templates, temporarily add a persistent notification action that prints variables like trigger.entityid or trigger.tostate.state. It is a blunt tool, but it makes invisible state changes obvious when you are chasing a flaky sensor.
You can also use Developer Tools, Template to evaluate the same expressions the blueprint uses, especially if it relies on states() and is_state() checks. If the template returns something surprising, fix the data source before you blame the blueprint.
Another debugging trick is to temporarily reduce delays and cooldowns so you can iterate quickly. Once it behaves correctly, restore realistic timings so you are not optimizing for a test environment that never happens in real life.
Finally, remember that traces show what Home Assistant decided, not what your devices actually did. If the trace says light.turn_on succeeded but the bulb stayed dark, you are looking at a device or network problem, not blueprint logic.
How to edit blueprint YAML without making upgrades painful
When you edit blueprint YAML, the biggest risk is that you silently diverge from upstream fixes. That is why I only edit after I have tried inputs, helpers, and scripts, and after I can explain the change in one sentence.
I also assume that if I edit it once, I might be responsible for it for years. That mindset stops me from making clever changes that I will not understand later.
Make your edits small and local, like adding a missing condition input or exposing a delay as an input field. Avoid rewiring the whole action section unless you are ready to maintain it like your own automation forever.
Small edits are easier to rebase on top of upstream updates, because you can search for the exact block you changed. If you rewrite everything, every upstream update becomes a manual merge project.
Use a version tag in the blueprint name, like “Motion Lights v1.3 custom,” and keep the original imported blueprint installed for reference. When the author releases v1.4, you can compare files side by side and decide if you want the changes.
It also helps to keep the blueprint file name stable once you deploy it, because moving or renaming files can confuse future-you when you are searching the config directory. A clear naming scheme like vendorblueprintnamecustom.yaml is boring but effective.
If you manage Home Assistant in Git, commit the blueprint file and your notes together, then link the upstream URL in the commit message. That one habit makes “why did I change this” questions much easier to answer later.
If you do not use Git, you can still copy the original upstream YAML into a comment-free backup file next to your custom version. When you need to compare, a simple diff tool will show you exactly what changed.
When you add new inputs, use good descriptions and sensible defaults, because you are now the blueprint author for your household. If you cannot understand your own input list at a glance, you will misconfigure it later.
After editing, reload automations and run a quick test trace so you know it still executes. A blueprint can validate in YAML terms and still fail at runtime if you introduced a bad service call or a missing variable.
When to switch from a blueprint to a custom automation
Switch when you have stacked so many workarounds around a blueprint that the logic lives everywhere except the automation itself. If you have three helper booleans, two scripts, and a bunch of “only if” conditions just to make it behave, write the automation directly.
At that point, the blueprint is not saving you time, it is adding indirection. You will debug faster when the triggers, conditions, and actions are all in one place.
Another sign is when you need multiple distinct trigger paths with different actions, like “motion does one thing, door does another, and time of day changes both.” Blueprints can do this, but the UI inputs get confusing fast and you end up afraid to touch anything.
If you find yourself writing a separate document just to remember how to configure the blueprint, that is a smell. A custom automation can be self-documenting if you name your choose branches and keep the YAML readable.
Performance and reliability can also push you toward custom YAML, especially for fast motion sensors and light groups. If you see delays from heavy choose blocks or repeated template evaluations, a straightforward automation can run cleaner.
Sometimes it is not raw performance, but predictability, because a custom automation can be tuned to your specific sensors and your specific quirks. Blueprints often aim for generality, and generality usually means extra branches and extra assumptions.
I also switch when the blueprint author’s opinions clash with mine, like forcing a specific light transition, using scenes when I want direct brightness, or bundling notifications into everything. Your house should match your preferences, not somebody else’s defaults.
There is also a learning angle, because writing the custom automation teaches you what the blueprint was doing behind the scenes. After you build a few yourself, you will be better at spotting good blueprints and rejecting bad ones quickly.
If you do switch, you can still keep the blueprint automation disabled as a reference for a week or two. It is easier to migrate when you can compare traces and confirm the new automation covers the same edge cases.
The goal is not to avoid blueprints, it is to use them where they reduce effort without reducing clarity. When a blueprint stops being clear, it stops being a tool and starts being technical debt.
Conclusion
Home assistant automation blueprints are a practical way to scale automations across rooms while keeping everything local and fast. The trick is to import carefully, test in a safe sandbox, and rely on inputs and helpers before you edit blueprint YAML.
If you treat blueprints like code you are adopting, not just clicking, you will avoid most surprises. Use automation blueprint examples as starting points, and switch to custom automations when your logic stops being reusable.
Once you get comfortable, you will start recognizing which patterns belong in blueprints and which ones belong in your own YAML. That is the sweet spot where Home Assistant feels both powerful and calm.