Imagine stepping into a home where your plants not only survive but thrive, all thanks to a bit of clever technology. With Home Assistant, this vision becomes a reality, offering a seamless and automated approach to plant care that fits right into your smart home ecosystem.
This article will guide you through setting up a Home Assistant Plant Monitoring Automation system, ensuring your green companions receive the attention they need, precisely when they need it. Let’s transform your home into a smart gardening oasis, one automated task at a time.
By leveraging plant sensors and the power of Home Assistant, you can monitor soil moisture, light levels, temperature, and even automate watering and fertilizing. Say goodbye to guesswork and hello to happy, healthy plants.
Choosing the Right Plant Sensors
Selecting the appropriate plant sensor is the first step in creating an effective Home Assistant Plant Monitoring Automation system. Not all sensors are created equal, so it’s important to consider your specific needs and the types of plants you’re caring for.
Consider factors like accuracy, range, and compatibility with Home Assistant when making your selection. Some sensors use Bluetooth, while others rely on Wi-Fi or Zigbee, each offering different advantages in terms of range and integration.
For beginners, a simple soil moisture sensor that provides basic readings can be a great starting point. More advanced users may want to invest in sensors that also measure light intensity, temperature, and even fertilizer levels.
Popular options include the Xiaomi Mi Flora, the Parrot Flower Power (though harder to find now), and various DIY solutions using ESP32 boards. Researching reviews and comparing specifications will help you find the perfect plant sensor for your needs.
When choosing a sensor, consider the environment where your plants reside. Indoor plants might benefit from sensors with a focus on light and humidity, while outdoor plants might need sensors that can withstand varying weather conditions and measure soil temperature.
The cost of plant sensors can vary greatly, so it’s essential to set a budget before you start shopping. Remember to factor in the cost of batteries or power supplies, as well as any necessary accessories for integration with Home Assistant.
Think about the number of plants you want to monitor. If you have a large collection, you might consider purchasing a multi-sensor hub or opting for sensors with a longer range to avoid connectivity issues.
Don’t overlook the importance of user reviews and community feedback. Learning from the experiences of other users can help you avoid common pitfalls and choose a sensor that’s reliable and easy to use.
Consider the ease of calibration and maintenance when selecting a sensor. Some sensors require regular calibration to maintain accuracy, while others are more or less maintenance-free.
Also, check if the sensor provides historical data logging. This feature allows you to track changes in environmental conditions over time, providing valuable insights into your plants’ health and growth patterns.
Finally, ensure that the sensor is compatible with your existing Home Assistant setup and other smart home devices. A seamless integration will make the automation process much smoother and more efficient.
Integrating Plant Sensors into Home Assistant
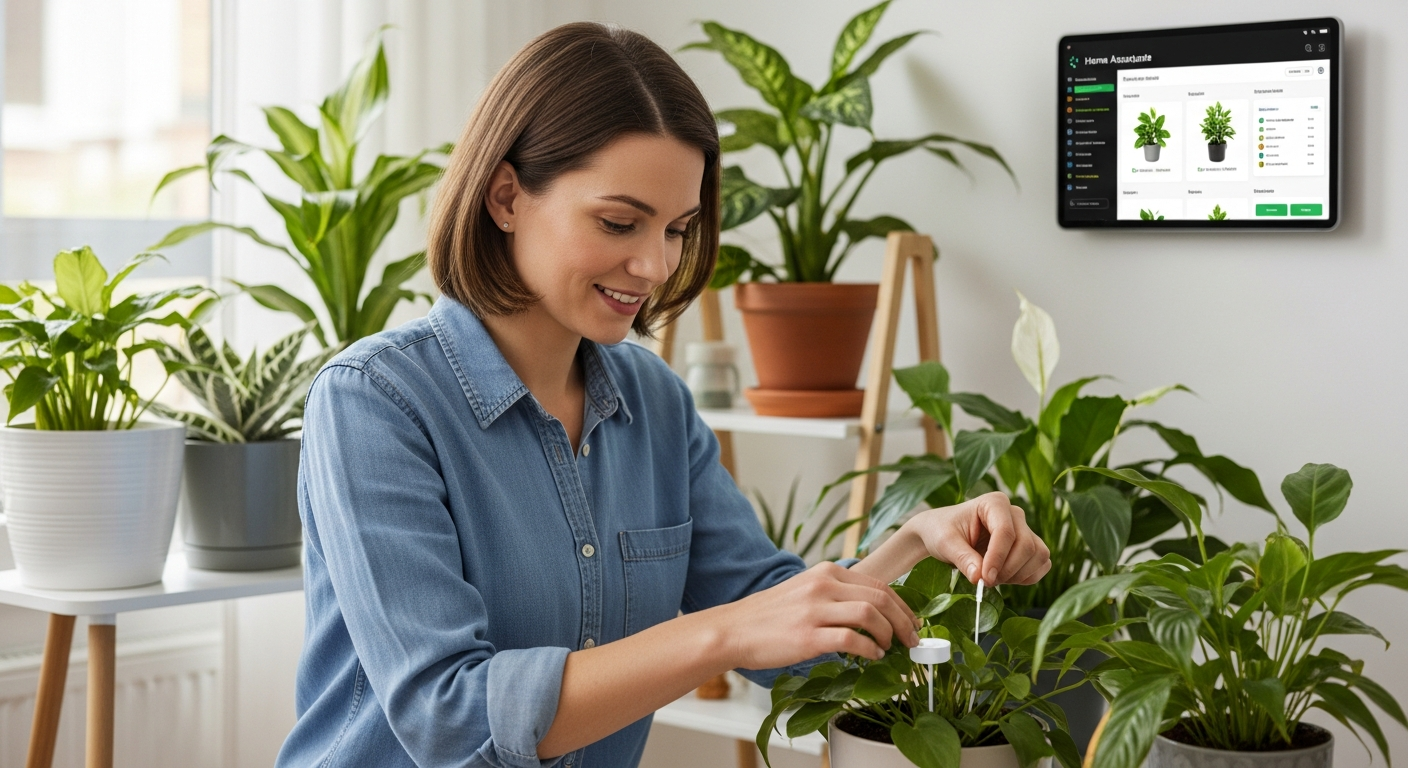
Once you’ve chosen your plant sensors, the next step is integrating them into your Home Assistant setup. This process typically involves adding the sensor as a device in Home Assistant and configuring it to display the relevant data.
Many popular plant sensors have dedicated integrations available within Home Assistant, making the setup process relatively straightforward. For example, the Xiaomi Mi Flora sensor can be easily integrated using the Xiaomi Gateway or a Bluetooth connection directly to your Home Assistant server.
For DIY sensors or those without official integrations, you may need to use MQTT or create custom integrations using Python. While this requires a bit more technical knowledge, it offers greater flexibility and control over your plant monitoring system.
Regardless of the integration method, it’s crucial to ensure that your plant sensors are properly calibrated and providing accurate readings. This may involve adjusting sensor settings or creating custom templates within Home Assistant to correct for any inaccuracies.
Before starting the integration process, make sure your Home Assistant instance is up-to-date. This will ensure compatibility with the latest sensor integrations and features.
Consult the Home Assistant documentation for specific instructions on integrating your chosen sensor. The documentation usually provides step-by-step guides and troubleshooting tips.
If you’re using a Bluetooth sensor, ensure that your Home Assistant server has a Bluetooth adapter and that Bluetooth is enabled. You might need to install additional Bluetooth packages or drivers.
For Wi-Fi sensors, make sure they are connected to the same network as your Home Assistant server. You may need to configure the sensor’s Wi-Fi settings using a mobile app or web interface.
After adding the sensor to Home Assistant, give it a meaningful name and assign it to the appropriate room or area. This will make it easier to identify and manage your sensors.
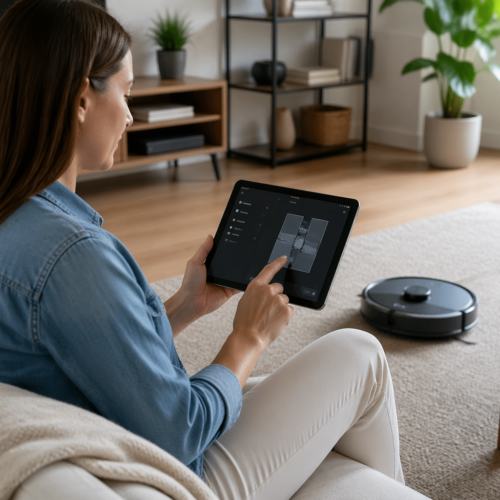
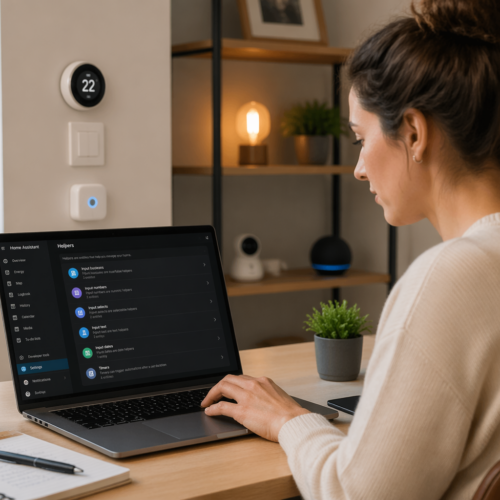
Create custom dashboards or views in Home Assistant to display the data from your plant sensors. This will allow you to easily monitor the environmental conditions affecting your plants.
Consider using the Home Assistant recorder component to store historical data from your plant sensors. This will enable you to track trends and identify potential problems over time.
Monitoring Soil Moisture, Light, and Temperature
With your plant sensors integrated into Home Assistant, you can now start monitoring key environmental factors affecting your plants. Soil moisture, light levels, and temperature are critical indicators of plant health and can help you identify potential problems early on.
Home Assistant allows you to visualize this data through graphs and charts, providing a clear overview of your plants’ needs over time. By tracking these trends, you can fine-tune your watering and fertilizing schedules to optimize plant growth.
| Sensor Type | Data Measured | Importance |
|---|---|---|
| Soil Moisture Sensor | Soil water content | Essential for preventing over or under-watering |
| Light Sensor | Light intensity (Lux or Foot-candle) | Important for plants requiring specific light conditions |
| Temperature Sensor | Ambient temperature | Critical for plants sensitive to temperature fluctuations |
| Humidity Sensor | Air humidity level | Helpful for tropical plants needing high humidity |
Regularly check the data from your plant sensors to identify any deviations from the ideal ranges for your plants. Early detection of problems can prevent serious damage or even plant death.
Use the historical data from your sensors to understand how environmental conditions change over time. This will help you anticipate your plants’ needs and adjust your care routines accordingly.
Consider creating custom alerts in Home Assistant to notify you when soil moisture levels are too low or temperatures are too high. This will ensure that you’re always aware of your plants’ needs, even when you’re not actively monitoring the data.
Pay attention to the correlation between different environmental factors. For example, low soil moisture levels combined with high temperatures can indicate that your plants need more water.
Use the data from your light sensors to optimize the placement of your plants. Ensure that they’re receiving the appropriate amount of light for their specific needs.
Monitor the temperature of your plants’ environment to ensure that they’re not exposed to extreme heat or cold. Adjust your heating or cooling systems as needed to maintain a comfortable temperature.
Consider using a combination of different sensor types to get a more comprehensive understanding of your plants’ needs. For example, combining soil moisture and humidity sensors can provide valuable insights into your watering practices.
Automating Watering and Fertilizing
The real power of Home Assistant Plant Monitoring Automation lies in its ability to automate tasks like watering and fertilizing. By connecting your plant sensors to smart plugs or irrigation systems, you can create automated routines that respond to your plants’ specific needs.
For example, you can set up an automation that turns on a smart plug connected to a water pump when the soil moisture level drops below a certain threshold. Similarly, you can automate the release of fertilizer based on time intervals or sensor readings.
It’s important to start with conservative settings and gradually adjust them based on your observations and plant responses. Overwatering or over-fertilizing can be just as harmful as underwatering or under-fertilizing, so careful monitoring is key.
Consider using different automation routines for different types of plants, as their watering and fertilizing needs may vary significantly. Home Assistant’s flexible automation engine allows you to create complex scenarios tailored to your specific smart gardening setup.
Before automating watering, ensure your smart plugs and water pumps are properly installed and tested. A malfunction could lead to overwatering and damage your plants.
When automating fertilizing, use a dispensing system that can accurately measure and release the appropriate amount of fertilizer. Avoid using concentrated fertilizers that could burn your plants’ roots.
Create separate automation routines for different seasons. Plants typically require less water and fertilizer during the winter months.
Monitor the weather forecast and adjust your automation routines accordingly. If heavy rain is expected, you may want to temporarily disable your automated watering system.
Consider using a rain sensor to automatically disable your watering system when it’s raining. This will help conserve water and prevent overwatering.
Regularly inspect your plants for signs of overwatering or underwatering, such as wilting leaves or yellowing foliage. Adjust your automation routines as needed to maintain optimal soil moisture levels.
Keep a record of your automation settings and plant responses. This will help you fine-tune your routines over time and create a more efficient and effective plant care system.
Setting Up Notifications for Plant Needs
Even with automated watering and fertilizing, it’s helpful to receive notifications when your plants require attention. Home Assistant can send you alerts via email, SMS, or push notifications when soil moisture levels are too low, temperatures are too high, or other critical parameters deviate from their ideal ranges.
These notifications can serve as a valuable backup, ensuring that you’re always aware of your plants’ needs, even when you’re away from home. Customize the notification thresholds to match the specific requirements of your plants and avoid unnecessary alerts.
- Low soil moisture alerts
- High temperature warnings
- Low light level notifications
- Fertilizer reminder alerts
- Customizable thresholds for each plant
Choose the notification method that works best for you. Email is a reliable option, while SMS and push notifications provide more immediate alerts.
Set different notification levels for different parameters. For example, you might want to receive a warning when soil moisture levels are slightly low and a critical alert when they’re dangerously low.
Customize the notification messages to provide specific information about the plant and the parameter that’s out of range. This will help you quickly identify the problem and take appropriate action.
Consider using the Home Assistant mobile app to receive push notifications. The app allows you to customize the notification sound and priority level.
Avoid setting up too many notifications, as this can lead to alert fatigue. Focus on the most critical parameters and set reasonable thresholds.
Regularly review your notification settings and adjust them as needed. As your plants grow and their needs change, you may need to update your notification thresholds.
Test your notifications to ensure that they’re working correctly. Send test alerts to yourself to verify that you’re receiving them and that the messages are clear and informative.
Creating Custom Plant Care Schedules
Every plant has unique needs, and Home Assistant Plant Monitoring Automation allows you to tailor your care routines accordingly. Instead of relying on generic watering schedules, you can create custom schedules based on the specific requirements of each plant species.
For example, succulents may require infrequent watering and bright sunlight, while ferns may prefer consistently moist soil and shade. By creating separate automation routines for each plant type, you can ensure that each one receives the optimal care.
Consider factors like seasonal changes and plant growth stages when designing your custom schedules. Plants may require more water during the summer months or when they’re actively growing, so adjust your automation routines accordingly.
Experiment with different settings and carefully observe your plants’ responses to fine-tune your custom care schedules. Over time, you’ll develop a deep understanding of your plants’ needs and be able to provide them with the perfect environment for thriving.
Start by researching the specific needs of each plant species you own. Consult online resources, gardening books, or local nurseries for information on watering, light, and fertilizer requirements.
Create a spreadsheet or database to track the care requirements of each plant. Include information such as watering frequency, light exposure, fertilizer type, and preferred temperature range.
Use the Home Assistant scheduler to create custom watering schedules for each plant. Set different watering times and durations based on their individual needs.
Consider using a combination of sensor data and scheduled events to trigger watering and fertilizing routines. For example, you could schedule a watering event to occur every three days, but only if the soil moisture level is below a certain threshold.
Adjust your custom schedules based on the age and size of your plants. Younger plants may require more frequent watering and fertilization than mature plants.
Monitor your plants closely for signs of stress or nutrient deficiencies. Adjust your custom schedules as needed to address any problems.
Document your custom schedules and plant responses. This will help you refine your routines over time and create a more personalized and effective plant care system.
Troubleshooting Common Issues
Even with a well-designed Home Assistant Plant Monitoring Automation system, you may encounter occasional issues. Connectivity problems, sensor inaccuracies, and automation failures are all potential challenges that can arise.
Start by checking the basics, such as ensuring that your plant sensors are properly connected to your network and that their batteries are charged. Verify that your Home Assistant integrations are up to date and that your automation routines are correctly configured.
If you’re experiencing sensor inaccuracies, try calibrating your sensors or creating custom templates within Home Assistant to correct for any discrepancies. Consult the documentation for your specific plant sensors and Home Assistant integrations for troubleshooting tips.
Don’t be afraid to seek help from the Home Assistant community if you’re stuck. Online forums and communities are filled with experienced users who can offer valuable advice and assistance.
If a sensor is not connecting, check your Wi-Fi or Bluetooth connection. Ensure the sensor is within range of your network or Home Assistant hub.
For inaccurate sensor readings, try recalibrating the sensor according to the manufacturer’s instructions. Sometimes a simple reset can solve the problem.
If automations are failing, review the automation configuration in Home Assistant. Check for typos, incorrect sensor values, or conflicting conditions.
Make sure your Home Assistant instance is running the latest version. Updates often include bug fixes and improvements that can resolve common issues.
Check the Home Assistant logs for error messages or warnings related to your plant sensors or automations. These logs can provide valuable clues about the cause of the problem.
If you’re using MQTT, ensure that your MQTT broker is running and properly configured. Verify that your sensors are publishing data to the correct topics.
Consider using a network analyzer to monitor the traffic between your sensors and Home Assistant. This can help you identify network connectivity issues.
Expanding Your Smart Garden
Once you’ve mastered the basics of Home Assistant Plant Monitoring Automation, you can start exploring more advanced features and integrations. Consider adding additional sensors to monitor factors like humidity, CO2 levels, or even leaf wetness.
Integrate your smart gardening system with other smart home devices, such as smart lights or climate control systems, to create a fully automated ecosystem. For example, you can automatically adjust the lighting based on the amount of sunlight your plants are receiving.
Experiment with machine learning algorithms to predict plant needs and optimize your automation routines. Home Assistant’s flexibility allows you to create sophisticated smart gardening solutions tailored to your specific environment and plant collection.
Share your experiences and creations with the Home Assistant community to inspire others and contribute to the growing body of knowledge on plant monitoring and automation. Together, we can create a world where every plant receives the care it needs to thrive.
Consider adding a camera to monitor your plants remotely. This can be helpful for identifying pests or diseases early on.
Integrate your smart garden with a weather service to automatically adjust watering schedules based on the forecast.
Experiment with different types of soil and fertilizer to optimize plant growth. Track the results using your plant sensors and Home Assistant.
Use machine learning to predict plant diseases based on sensor data. This can help you take preventative measures before the disease spreads.
Create a virtual assistant integration to control your smart garden using voice commands. This can make it even easier to manage your plants.
Share your smart garden data with other researchers or gardeners. This can help advance the field of plant monitoring and automation.
Develop a mobile app to remotely monitor and control your smart garden. This will allow you to manage your plants from anywhere in the world.
The Benefits of Automated Plant Care
Automating plant care with Home Assistant offers numerous benefits, from saving time and effort to improving plant health and reducing waste. No longer will you need to rely on guesswork or inconsistent routines.
By precisely monitoring and responding to your plants’ needs, you can minimize the risk of overwatering, underwatering, and nutrient deficiencies. This leads to healthier, more vibrant plants that are better able to resist pests and diseases.
Automated watering systems can also help conserve water by delivering it directly to the roots, reducing evaporation and runoff. This is especially beneficial in arid climates or during periods of drought.
Ultimately, Home Assistant Plant Monitoring Automation empowers you to become a more informed and effective plant caregiver, creating a thriving indoor or outdoor garden that brings joy and beauty to your life.
Enjoy more free time knowing your plants are well cared for, even when you’re away. The automated system takes the daily burden off your shoulders.
Reduce plant loss due to neglect or inconsistent care. The constant monitoring and automated responses ensure your plants receive what they need, when they need it.
Contribute to a more sustainable lifestyle by conserving water and reducing fertilizer waste. The precision of the system minimizes unnecessary resource consumption.
Gain a deeper understanding of your plants’ needs and preferences. The data collected by the sensors provides valuable insights into their growth patterns and environmental requirements.
Create a more beautiful and thriving indoor or outdoor space. Healthy, well-cared-for plants enhance the aesthetic appeal of your home.
Experience the satisfaction of growing healthy, vibrant plants with minimal effort. The automated system allows you to enjoy the beauty of nature without the stress of constant care.
Increase the value of your home with a well-maintained and automated garden. A thriving landscape can significantly enhance your property’s curb appeal.
Conclusion
Implementing Home Assistant Plant Monitoring Automation can seem daunting at first, but the rewards are well worth the effort. By carefully selecting the right plant sensors, integrating them into Home Assistant, and creating custom automation routines, you can transform your home into a smart gardening paradise.
Embrace the power of technology to simplify your plant care routine, improve plant health, and create a more sustainable and beautiful living environment. Happy gardening.
Start small and gradually expand your smart garden as you gain experience. Don’t be afraid to experiment and try new things.
Join the Home Assistant community and connect with other plant enthusiasts. Share your knowledge and learn from others.
Continuously monitor and refine your automation routines. Plant care is an ongoing process, and there’s always room for improvement.
Enjoy the beauty and tranquility of your thriving smart garden. Let the power of technology enhance your connection with nature.