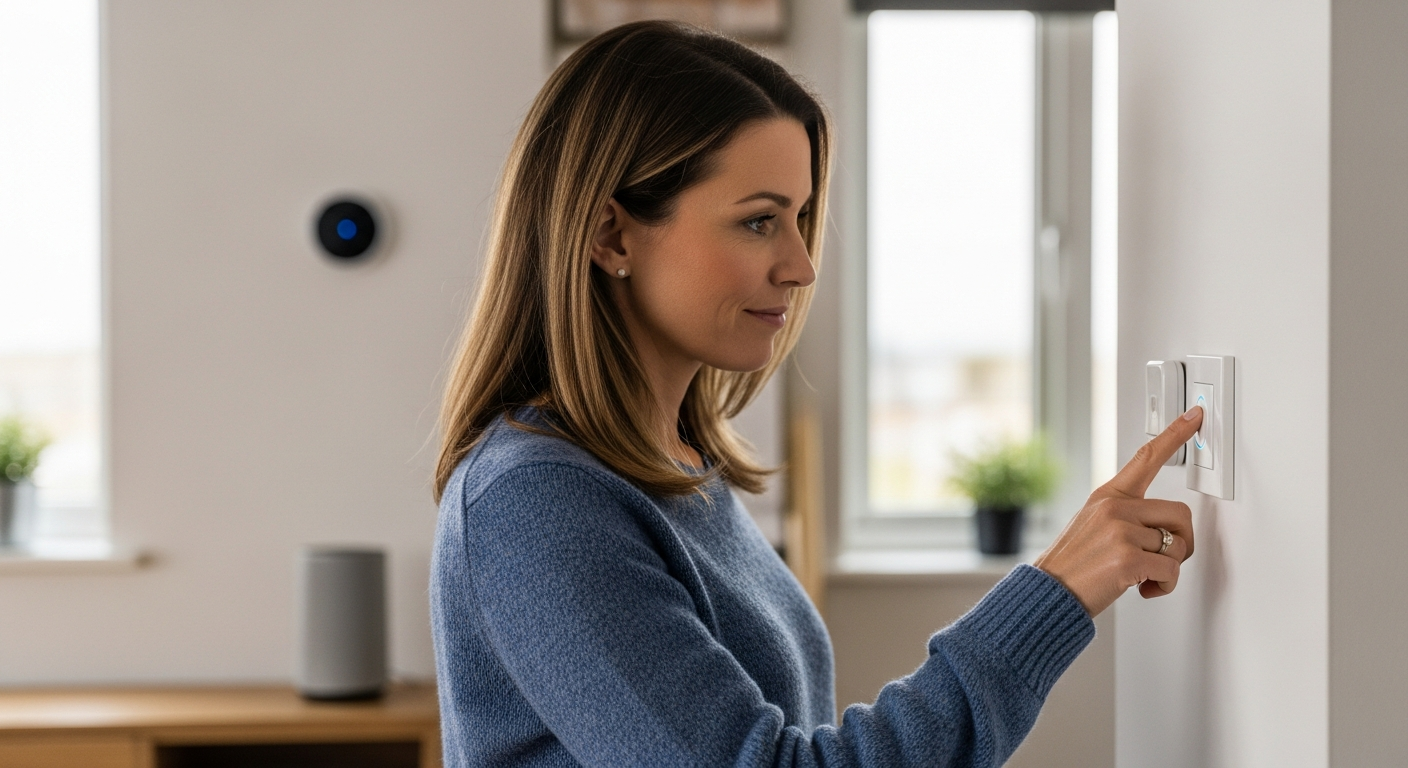
Smart home automation is about simplifying your life. Imagine controlling your lights, music, and more with just a single press of a button. This is the power of Home Assistant Button Press Automation, a simple yet effective way to streamline your daily routines.
With a smart button and Home Assistant, you can create custom actions that trigger with a single, double, or long press. This eliminates the need to fumble with your phone or voice commands, especially when you need quick, reliable control.
In this article, we will explore how to set up Home Assistant Button Press Automation to manage various aspects of your home. We will cover everything from choosing the right smart button to creating custom scenes and even using buttons for emergency situations.
Choosing the Right Smart Button
Selecting the right smart button is the first step in creating your Home Assistant Button Press Automation. With so many options available, it is important to consider several factors to ensure you choose the best one for your needs.
One of the primary considerations is compatibility with Home Assistant. Not all smart buttons work seamlessly with Home Assistant, so it is important to check the compatibility list or community forums before making a purchase.
Another important factor is the communication protocol used by the smart button. Zigbee and Z-Wave are popular choices due to their reliability and low power consumption, making them ideal for battery-powered devices.
Wi-Fi buttons are also available, but they tend to consume more power and rely on your Wi-Fi network’s stability. Consider the button’s size, shape, and tactile feel, as you will be interacting with it frequently.
Durability is also key, especially if the button will be used in a high-traffic area or by children. Look for buttons that are built to withstand frequent use and accidental drops. Some buttons are even water-resistant, making them suitable for use in bathrooms or kitchens.
Think about the aesthetics of the button as well. You’ll want something that blends in with your home decor or is visually appealing. Some smart buttons come in a variety of colors and styles, allowing you to choose one that matches your personal taste.
The battery life of the smart button is another important consideration. You don’t want to be constantly replacing batteries, so look for buttons with long battery life or those that use easily replaceable batteries. Some buttons even offer rechargeable options.
Finally, consider the price of the smart button. Prices can vary widely, so set a budget and look for buttons that offer the best value for your money. Remember to factor in the cost of any necessary hubs or gateways.
Integrating the Smart Button into Home Assistant
Once you have selected your smart button, the next step is to integrate it into Home Assistant. The integration process varies depending on the type of button and the communication protocol it uses.
For Zigbee and Z-Wave buttons, you will need a compatible hub or gateway connected to your Home Assistant instance. Popular options include the Conbee II, Sonoff Zigbee 3.0 USB Dongle Plus, or a Z-Wave USB stick.
Once the hub is set up, you can use the ZHA (Zigbee Home Automation) or Z-Wave JS integration in Home Assistant to add the button. Follow the instructions provided by the integration to pair the button with your system.
For Wi-Fi buttons, you may need to install a custom integration or use MQTT to communicate with Home Assistant. Check the button’s documentation or online resources for specific instructions on how to integrate it.
Before you begin, ensure that your Home Assistant instance is up to date. This will ensure compatibility with the latest integrations and features. It’s also a good idea to back up your Home Assistant configuration before making any changes.
During the integration process, you may be prompted to enter a pairing code or press a button on the smart button. Follow the instructions carefully to ensure that the button is successfully paired with Home Assistant. If you encounter any issues, consult the button’s documentation or online resources.
After the button is paired, you should be able to see it as a device in Home Assistant. You can then rename the device and assign it to a specific area or room in your home. This will make it easier to manage and control the button in Home Assistant.
Once the button is integrated, test it thoroughly to ensure that it is working correctly. Press the button and verify that the corresponding event is registered in Home Assistant. If the button is not working as expected, double-check the integration settings and try re-pairing the button.
Setting Up Single, Double, and Long Press Actions
One of the key features of smart buttons is their ability to trigger different actions based on the type of press. Most smart buttons support single, double, and long press actions, allowing you to create a variety of automations with a single device.
To configure these actions in Home Assistant, you will need to create automations that respond to the button’s events. These events are typically triggered when the button is pressed, double-pressed, or held down for a certain duration.
| Press Type | Event Trigger | Example Action |
|---|---|---|
| Single Press | `eventtype: zhaevent` or `eventtype: zwavejsevent` | Turn on/off a light |
| Double Press | `eventtype: zhaevent` or `eventtype: zwavejsevent` | Adjust volume of a speaker |
| Long Press | `eventtype: zhaevent` or `eventtype: zwavejsevent` | Activate a scene |
| Triple Press | `eventtype: zhaevent` or `eventtype: zwavejsevent` | Start a routine |
In the automation’s trigger section, you can specify the event type and the button’s device ID to listen for button presses. In the action section, you can define what should happen when the button is pressed, such as turning on a light, playing music, or activating a scene.
When creating automations, use descriptive names to easily identify them later. This will help you manage your automations as your smart home grows. Consider using a naming convention that includes the button’s location and the action it triggers.
Experiment with different press durations for the long press action. Some users prefer a shorter duration for quicker activation, while others prefer a longer duration to avoid accidental triggers. Find the duration that works best for you.
You can also use the “condition” section in the automation to add additional criteria for triggering the action. For example, you could set up a button to turn on the lights only if it’s dark outside or if someone is home. This adds an extra layer of intelligence to your button automations.
Don’t be afraid to get creative with your button automations. Think about the tasks you perform regularly and how a smart button could simplify them. The possibilities are endless, and you can tailor the button’s actions to suit your specific needs and preferences.
Controlling Lights, Music, and More with a Button Press
Home Assistant Button Press Automation can be used to control a wide range of devices and services in your smart home. One of the most common use cases is controlling lights, allowing you to turn them on, off, or adjust their brightness with a simple button press.
You can also use smart buttons to control your music system. A single press could start or pause the music, a double press could skip to the next track, and a long press could adjust the volume.
Beyond lights and music, smart buttons can be used to control other devices such as thermostats, fans, and even garage doors. You could set up a button to adjust the thermostat to your preferred temperature or open the garage door as you approach your home.
The possibilities are endless, and you can customize the button’s actions to suit your specific needs and preferences. Consider assigning different actions to single, double, and long presses to maximize the button’s functionality.
Imagine using a button to control your smart blinds. A single press could open them, a double press could close them, and a long press could adjust them to a specific position. This is especially useful in bedrooms or living rooms where you want to easily control the amount of natural light.
You could also use a button to control your smart TV. A single press could turn it on or off, a double press could change the channel, and a long press could adjust the volume. This is a convenient way to control your TV without having to use a remote.
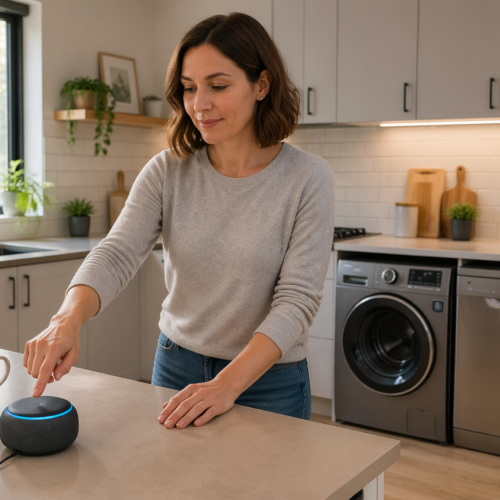
Smart buttons can also be used to control your smart appliances. You could set up a button to start your dishwasher, turn on your oven, or even start your washing machine. This is a great way to automate your household chores.
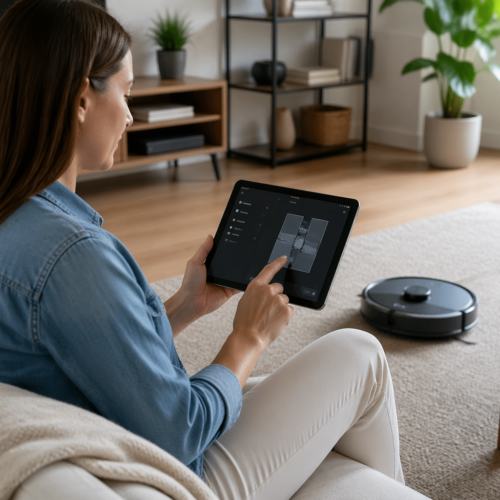
Consider using a smart button to control your robot vacuum. A single press could start it, a double press could pause it, and a long press could send it back to its charging station. This is a convenient way to keep your floors clean without having to manually control the vacuum.
Creating Custom Button-Based Scenes
Scenes are a powerful feature in Home Assistant that allows you to control multiple devices with a single command. By combining scenes with smart buttons, you can create custom button-based scenes that transform your home with a single press.
For example, you could create a “Movie Night” scene that dims the lights, turns on the TV, and adjusts the thermostat to a comfortable temperature. Assigning this scene to a button press allows you to instantly create the perfect movie-watching environment.
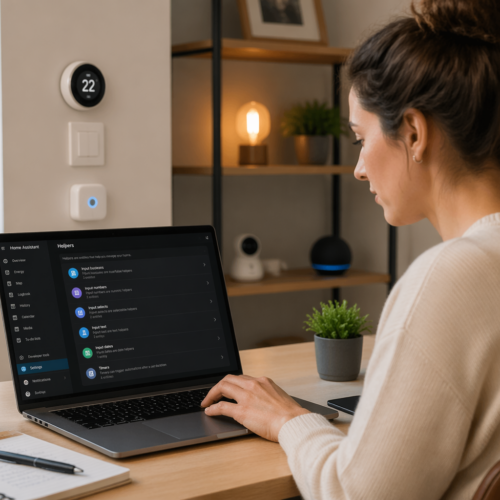
To create a scene, navigate to the “Configuration” panel in Home Assistant and select “Scenes.” Define the desired state for each device in the scene, such as the brightness of the lights, the volume of the speakers, and the temperature of the thermostat.
Once the scene is created, you can create an automation that triggers the scene when the button is pressed. This allows you to activate the scene with a single, double, or long press, depending on your preference.
Think about creating a “Goodnight” scene that turns off all the lights, locks the doors, and sets the alarm. Assigning this scene to a button press near your bed allows you to easily secure your home for the night with a single press.
You could also create a “Wake Up” scene that gradually brightens the lights, turns on the radio, and starts the coffee maker. Assigning this scene to a button press on your nightstand allows you to start your day off right with a single press.
Consider creating a “Guest Mode” scene that adjusts the lighting, temperature, and music to create a welcoming atmosphere for your guests. Assigning this scene to a button press near your front door allows you to easily prepare your home for visitors.
You can also create a “Work Mode” scene that adjusts the lighting, temperature, and sound to create a productive work environment. Assigning this scene to a button press on your desk allows you to easily focus on your work.
Automating Actions with Smart Buttons
The power of smart buttons lies in their ability to automate various actions around your home. By configuring different button presses to trigger specific tasks, you can simplify your daily routines and enhance your smart home experience.
Consider using a smart button to automate tasks such as turning off all the lights when you leave the house. You could also set up a button to start your coffee maker in the morning or to lock the front door at night.
- Turning off all lights when leaving
- Starting the coffee maker in the morning
- Locking the front door at night
- Adjusting thermostat based on time of day
- Triggering a security alarm
The key is to identify tasks that you perform regularly and that could be simplified with a button press. By automating these actions, you can save time and effort, making your smart home even more convenient.
Think about using a smart button to control your irrigation system. You could set up a button to start watering your lawn, pause watering, or adjust the watering schedule. This is a convenient way to manage your lawn care without having to manually control the system.
You could also use a button to control your pool or spa. A single press could turn on the heater, a double press could turn on the jets, and a long press could adjust the temperature. This is a great way to automate your pool or spa experience.
Consider using a smart button to control your holiday lights. You could set up a button to turn on the lights, turn them off, or adjust their brightness. This is a convenient way to manage your holiday decorations without having to manually plug and unplug them.
You can also use a button to control your air purifier. A single press could turn it on, a double press could turn it off, and a long press could adjust the fan speed. This is a convenient way to improve your indoor air quality without having to manually control the purifier.
Using Buttons for Emergency Situations
Smart buttons can also be used for emergency situations, providing a quick and easy way to trigger alerts or call for help. By configuring a button to send a notification to your phone or to call emergency services, you can ensure that help is always just a press away.
Consider placing a smart button near your bed or in other easily accessible locations. In case of an emergency, a single press could send a notification to your family members or neighbors, alerting them to the situation.
You can also integrate smart buttons with your home security system. Pressing the button could trigger an alarm, turn on all the lights, and even send a signal to a monitoring service.
For elderly or disabled individuals, smart buttons can provide an added layer of security and peace of mind. A button press could alert caregivers or family members, allowing them to respond quickly to any emergency.
Think about configuring a button to send a text message to your emergency contacts with your location. This can be especially useful if you are out walking alone or if you have a medical condition that requires immediate assistance.
You could also set up a button to trigger a voice announcement throughout your home, alerting everyone to the emergency. This can be particularly helpful in situations where you are unable to speak or move freely.
Consider using a smart button to unlock your front door remotely, allowing emergency responders to enter your home quickly. This can be especially useful if you are unable to reach the door yourself.
You can also integrate smart buttons with your smart watch or other wearable devices. This allows you to trigger emergency alerts even when you are away from your home.
Advanced Button Automation Techniques
Beyond basic on/off control, you can use advanced techniques to create more sophisticated button automations. Conditional logic allows you to trigger different actions based on the current state of your home or other variables.
For example, you could set up a button to turn on the lights only if it’s dark outside. You could also use a button to toggle between different scenes, such as “Movie Night” and “Reading Mode,” depending on the time of day.
Another advanced technique is using variables to store and recall information. You could use a button to increment or decrement a variable, allowing you to control the brightness of a light or the volume of a speaker with multiple presses.
Experiment with different techniques to create custom automations that meet your specific needs. The possibilities are endless, and you can tailor the button’s actions to suit your unique smart home setup.
Consider using the “choose” action in Home Assistant to create complex conditional automations. This allows you to define multiple conditions and actions, creating a highly customized button experience.
You can also use the “wait_template” action to pause an automation until a specific condition is met. This can be useful for creating automations that respond to changes in your home’s environment.
Think about using the “service_template” action to call different services based on the current state of your home. This allows you to create dynamic automations that adapt to your changing needs.
You can also integrate smart buttons with other smart home platforms, such as IFTTT or Google Assistant. This allows you to create even more complex automations that span multiple devices and services.
Troubleshooting Common Button Automation Issues
While Home Assistant Button Press Automation is generally reliable, you may encounter some issues during setup or operation. One common problem is the button not responding to presses, which could be due to a dead battery, a weak signal, or a configuration error.
First, check the button’s battery and replace it if necessary. If the battery is not the issue, try moving the button closer to the hub or gateway to improve the signal strength.
Next, verify that the button is properly paired with Home Assistant and that the automation is configured correctly. Check the logs for any error messages or warnings that could indicate a problem.
If you are still having trouble, consult the Home Assistant community forums or online resources for assistance. There are many experienced users who can help you troubleshoot common button automation issues.
Make sure the button is within the range of your Zigbee or Z-Wave hub. Walls and other obstacles can interfere with the signal. Try moving the hub closer to the button or adding a repeater to extend the range.
Check the Home Assistant logs for any errors related to the button or the automation. The logs can provide valuable clues about what is going wrong. Look for error messages or warnings that indicate a problem with the button’s configuration or communication.
If you are using a custom integration for the button, make sure it is up to date. Outdated integrations can cause compatibility issues and prevent the button from working correctly. Check the integration’s documentation for instructions on how to update it.
Try restarting Home Assistant to see if that resolves the issue. Sometimes a simple restart can fix minor glitches and restore the button’s functionality. This can clear any temporary errors that may be preventing the button from working correctly.
Conclusion
Home Assistant Button Press Automation offers a simple and effective way to control your smart home. With a smart button and a little configuration, you can streamline your daily routines and enhance your smart home experience.
From controlling lights and music to creating custom scenes and automating tasks, the possibilities are endless. Consider integrating smart buttons into your Home Assistant setup to simplify your life and make your home even smarter.
Don’t forget the added layer of security smart buttons can provide in emergency situations. By strategically placing buttons and configuring them to send alerts, you can ensure help is always within reach.
Experiment with different button configurations and automation techniques to find what works best for you. Home Assistant Button Press Automation is a powerful tool that can transform your home into a truly smart and responsive environment.
Embrace the convenience and control that smart buttons offer. They are a small investment that can make a big difference in your daily life. With a little creativity, you can create a truly personalized and automated smart home experience.
Remember to regularly review and update your button automations. As your needs and preferences change, you may want to adjust the button’s actions to better suit your lifestyle. This will ensure that your smart home remains responsive and relevant.
Share your button automation ideas with the Home Assistant community. By sharing your experiences and learning from others, you can discover new and innovative ways to use smart buttons to enhance your smart home.
Continue to explore the possibilities of Home Assistant and smart home automation. The technology is constantly evolving, and there are always new and exciting ways to make your home smarter and more convenient.