In today’s world, we are becoming increasingly aware of the impact that our environment has on our health. While outdoor air pollution often dominates headlines, the quality of the air inside our homes can be just as, if not more, important.
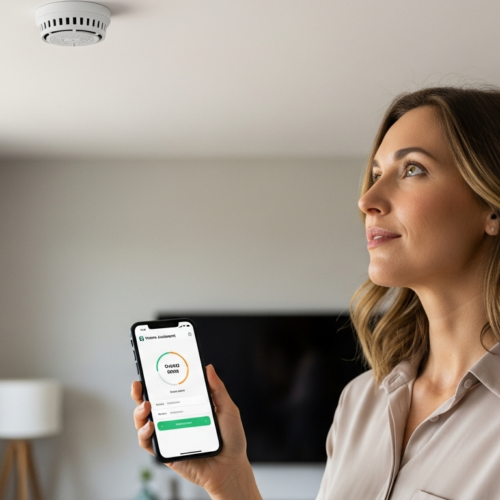
With the rise of smart home technology, monitoring and improving indoor air quality has become more accessible than ever. This article will guide you through how to use air quality sensors home assistant to create a healthier living environment.
By integrating air quality sensors with Home Assistant, you can gain valuable insights into the air you breathe and automate actions to maintain optimal conditions. Let’s take a look at how to improve your indoor environment with a home assistant air quality dashboard.
Understanding Indoor Air Quality and Its Impact
Indoor air quality refers to the condition of the air inside buildings, including homes, offices, and schools. Various pollutants can compromise indoor air quality, leading to a range of health problems.
Common indoor air pollutants include particulate matter (PM2.5 and PM10), volatile organic compounds (VOCs), carbon monoxide (CO), radon, and allergens like dust mites and mold. Exposure to these pollutants can trigger allergies, asthma, respiratory infections, and even long-term health issues like cardiovascular disease and cancer.
Children, the elderly, and individuals with pre-existing respiratory conditions are particularly vulnerable to the adverse effects of poor indoor air quality. Prolonged exposure to pollutants can impair cognitive function, reduce productivity, and diminish overall well-being.
Addressing indoor air quality is essential for creating healthier, more comfortable living spaces. Monitoring air quality and taking proactive steps to mitigate pollutants can significantly improve health outcomes and quality of life.
The sources of indoor air pollution are diverse and can vary depending on the building’s location, construction materials, and occupants’ activities. Combustion sources like gas stoves, fireplaces, and furnaces can release carbon monoxide and nitrogen dioxide. These can pose immediate and long-term health risks if not properly ventilated.
Building materials such as asbestos, lead-based paint, and formaldehyde-containing products can also contribute to indoor air pollution. Asbestos, though now largely banned, can still be found in older buildings and poses a serious health hazard if disturbed. Formaldehyde is often emitted from pressed wood products, causing respiratory irritation and other health issues.
Household cleaning products, personal care items, and pesticides can release VOCs into the air. These chemicals can cause a range of symptoms, from headaches and nausea to more severe health problems with prolonged exposure. Choosing natural and low-VOC alternatives can help reduce the levels of these pollutants in your home.
Biological pollutants such as mold, bacteria, and viruses can thrive in damp or poorly ventilated environments. Mold growth can release spores into the air, triggering allergic reactions and respiratory problems. Maintaining proper humidity levels and ensuring adequate ventilation can help prevent the growth of these biological pollutants.
Choosing the Right Air Quality Sensor
Selecting the appropriate air quality sensor is the first step in monitoring and improving your indoor environment. With a wide variety of sensors available, it’s important to consider your specific needs and priorities.
Different sensors measure different pollutants, so identify the pollutants of concern in your home. If you live in an area with high levels of outdoor air pollution, particulate matter sensors may be a priority.
For homes with gas appliances or potential sources of VOCs, consider sensors that measure carbon monoxide and volatile organic compounds. Accuracy and reliability are also important factors when selecting an air pollution sensor.
Look for sensors with good reviews and certifications from reputable organizations. Consider the sensor’s compatibility with Home Assistant, as well as its ease of integration and data reporting capabilities.
When choosing an air quality sensor, consider the range of pollutants it can detect. Some sensors focus solely on particulate matter, while others offer a broader range of measurements, including VOCs, carbon dioxide, and humidity. A comprehensive sensor can provide a more complete picture of your indoor air quality.
Accuracy is paramount when selecting an air quality sensor. Look for sensors that have been independently tested and certified to meet industry standards. A more accurate sensor provides more reliable data, allowing you to make informed decisions about improving your indoor air quality.
Consider the sensor’s ease of use and data reporting capabilities. Some sensors come with user-friendly mobile apps that allow you to view real-time data and historical trends. Others offer integration with smart home platforms like Home Assistant, enabling you to automate actions based on air quality levels.
Think about the sensor’s power source and connectivity options. Some sensors are battery-powered and connect via Wi-Fi, while others require a wired connection. Choose a sensor that fits your home’s infrastructure and your preferences for data accessibility.
Integrating Air Quality Sensors with Home Assistant
Home Assistant is a powerful open-source home automation platform that allows you to integrate various smart devices and services. Integrating your air quality sensors with Home Assistant enables you to monitor air quality data in real-time and automate actions to improve your indoor environment.
Many air quality sensors offer direct integration with Home Assistant via Wi-Fi or Zigbee. Some sensors may require a custom integration or configuration, while others can be easily added through the Home Assistant user interface.
| Sensor Type | Protocol | Home Assistant Integration |
|---|---|---|
| Airthings Wave Plus | Bluetooth | Official Integration |
| PurpleAir PA-II | Wi-Fi | Custom Integration |
| Xiaomi Mi Air Purifier | Wi-Fi | Official Integration |
| Sensirion SPS30 | I2C | Custom DIY Sensor |
Once your sensors are integrated, Home Assistant will display the air quality data on your dashboard. You can customize the dashboard to show the specific pollutants you want to monitor, as well as historical data and trends.
The process of integrating air quality sensors with Home Assistant typically involves adding the sensor as a new device or entity. This can be done through the Home Assistant user interface or by manually configuring the sensor in the configuration.yaml file. Each sensor has its own specific integration method, so it’s important to consult the sensor’s documentation for detailed instructions.
Once the sensor is added to Home Assistant, you can create entities that represent the different pollutants being measured. These entities will display the real-time data from the sensor, allowing you to monitor air quality levels in your home. You can also customize the entities to display historical data and trends, providing a more comprehensive view of your indoor air quality.
Home Assistant also allows you to group multiple sensors together, creating a more comprehensive air quality monitoring system. This can be useful if you have sensors in different rooms of your home or if you want to combine data from multiple sensors to get a more accurate reading. By grouping sensors together, you can create a single entity that displays the average air quality level across your entire home.
In addition to displaying air quality data, Home Assistant can also be used to control air purifiers and other devices that improve indoor air quality. You can create automations that automatically turn on an air purifier when pollutant levels exceed certain thresholds or adjust ventilation based on air quality data. This allows you to proactively maintain optimal indoor air quality without constant manual intervention.
Setting Up Alerts and Automations Based on Air Quality
One of the key benefits of integrating air quality sensors with Home Assistant is the ability to set up alerts and automations based on air quality levels. You can configure Home Assistant to send you notifications when pollutant levels exceed certain thresholds.
For example, you can receive an alert when particulate matter levels rise above the recommended limit, prompting you to take action. You can also automate actions based on air quality data, such as turning on an air purifier when pollutant levels increase.
Home Assistant allows you to create complex automations using its visual automation editor or YAML configuration. You can set up automations to adjust ventilation, control humidifiers, and even send alerts to your phone or other devices.
By automating these actions, you can proactively maintain optimal indoor air quality without constant manual intervention. This ensures a healthier and more comfortable living environment for you and your family.
Setting up alerts in Home Assistant involves creating triggers based on the state of your air quality sensor entities. You can define thresholds for different pollutants and configure Home Assistant to send you a notification when those thresholds are exceeded. Notifications can be sent via various channels, including email, SMS, and push notifications to your mobile device.
Automations in Home Assistant can be used to control various devices based on air quality levels. For example, you can set up an automation to turn on an air purifier when particulate matter levels rise above a certain threshold. You can also configure Home Assistant to adjust ventilation by opening windows or turning on exhaust fans when pollutant levels increase.
Home Assistant’s automation editor allows you to create complex automations using a visual interface. You can define triggers, conditions, and actions to create sophisticated routines that respond to changes in air quality. For example, you can set up an automation to turn on an air purifier when you are home and particulate matter levels are high, but only if the outdoor air quality is better.
Consider integrating your air quality sensors with other smart home devices to create a more comprehensive air quality control system. For example, you can integrate your sensors with your smart thermostat to automatically adjust ventilation based on air quality levels. You can also integrate your sensors with your smart lighting system to create visual alerts when pollutant levels exceed certain thresholds.
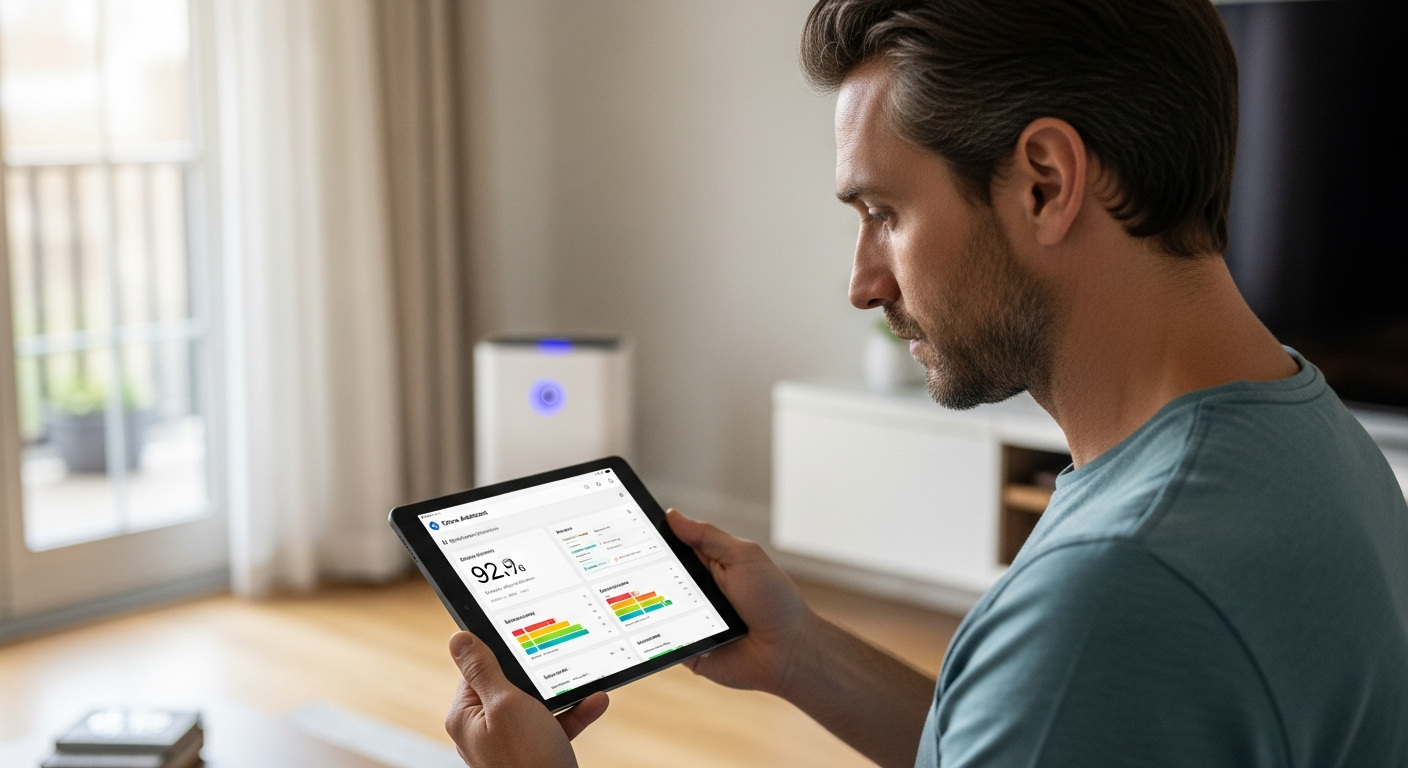
Creating a Home Assistant Air Quality Dashboard
A well-designed Home Assistant air quality dashboard provides a clear and concise overview of your indoor air quality data. The dashboard should display real-time data from your air quality sensors, as well as historical trends and alerts.
You can customize the dashboard to show the specific pollutants you want to monitor, such as PM2.5, VOCs, and carbon monoxide. Use graphs and charts to visualize historical data and identify patterns over time.
Consider adding color-coded indicators to show whether air quality levels are within acceptable ranges. For example, you can use green to indicate good air quality, yellow for moderate, and red for poor.
Include alerts and notifications on the dashboard to quickly identify any potential issues. A well-designed dashboard provides a quick and easy way to monitor your indoor air quality and take action when necessary.
When designing your Home Assistant air quality dashboard, consider using different card types to display the data in a visually appealing and informative way. For example, you can use the “sensor” card to display real-time data from your air quality sensors. You can also use the “history graph” card to display historical trends over time.
Consider using the “gauge” card to display air quality levels as a percentage of the recommended limit. This can provide a quick and easy way to assess whether air quality levels are within acceptable ranges. You can also use the “conditional” card to display different information based on air quality levels. For example, you can display a warning message when pollutant levels exceed certain thresholds.
Use custom icons and labels to make your dashboard more visually appealing and easier to understand. For example, you can use different icons to represent different pollutants. You can also use custom labels to provide more context for the data being displayed.
Organize your dashboard in a logical and intuitive way. Group related information together and use clear headings to make it easy to find what you’re looking for. Consider creating multiple dashboards for different rooms or areas of your home.
Interpreting Air Quality Data
Understanding the data provided by your air quality sensors is crucial for making informed decisions about your indoor environment. Different pollutants have different health effects and recommended exposure limits.
Particulate matter (PM2.5 and PM10) is a common pollutant that can cause respiratory problems and cardiovascular disease. The EPA recommends keeping PM2.5 levels below 12 μg/m3 and PM10 levels below 50 μg/m3.
- PM2.5: Fine inhalable particles, diameter of 2.5 micrometers or less
- PM10: Inhalable particles, diameter of 10 micrometers or less
- VOCs: Volatile organic compounds, emitted from various household products
- CO: Carbon monoxide, a colorless, odorless gas
- Radon: A radioactive gas that can seep into homes from the ground
Volatile organic compounds (VOCs) are emitted from various household products, such as paints, cleaning supplies, and furniture. High levels of VOCs can cause irritation, headaches, and even long-term health problems.
When interpreting air quality data, it’s important to understand the units of measurement being used. Particulate matter is typically measured in micrograms per cubic meter (μg/m3). VOCs are often measured in parts per billion (ppb) or parts per million (ppm). Carbon monoxide is measured in parts per million (ppm).
Compare your air quality data to the recommended exposure limits provided by organizations like the EPA and the World Health Organization (WHO). These organizations provide guidelines for safe levels of different pollutants. Exceeding these limits can pose a health risk.
Consider the context in which the data is being collected. Air quality levels can vary depending on the time of day, the season, and the activities taking place in your home. For example, cooking and cleaning can release pollutants into the air.
Look for trends in your air quality data over time. This can help you identify potential sources of pollution and take steps to mitigate them. For example, if you notice that particulate matter levels consistently rise in the evening, you may want to investigate your fireplace or heating system.
Improving Indoor Air Quality
Once you have a good understanding of your indoor air quality, you can take steps to improve it. There are several strategies you can use to reduce pollutants and create a healthier living environment.
Ventilation is key to reducing indoor air pollution. Open windows and doors regularly to allow fresh air to circulate.
Use exhaust fans in kitchens and bathrooms to remove pollutants generated during cooking and showering. Air purifiers with HEPA filters can effectively remove particulate matter from the air.
Choose low-VOC paints, cleaning supplies, and furniture to reduce the emission of volatile organic compounds. Control humidity levels to prevent the growth of mold and dust mites.
Regularly clean and maintain your HVAC system to ensure it is functioning properly. Change air filters regularly to remove dust and other pollutants. Consider upgrading to a higher-efficiency air filter to capture more particles.
Avoid smoking indoors, as tobacco smoke is a major source of indoor air pollution. If you must smoke, do so outdoors and away from windows and doors. Consider quitting smoking altogether to improve your health and the health of those around you.
Control humidity levels in your home to prevent the growth of mold and dust mites. Use a dehumidifier in damp areas, such as basements and bathrooms. Ensure proper ventilation to reduce humidity levels.
Test your home for radon, a radioactive gas that can seep into homes from the ground. Radon is a leading cause of lung cancer. If you find elevated levels of radon, take steps to mitigate it, such as installing a radon mitigation system.
DIY Air Quality Sensors with Home Assistant
For those who enjoy tinkering, building your own air quality sensors and integrating them with Home Assistant can be a rewarding project. DIY sensors can be customized to measure specific pollutants and offer a cost-effective alternative to commercial sensors.
Popular DIY air quality sensor projects include using sensors like the Sensirion SPS30 for particulate matter and the BME680 for VOCs. These sensors can be connected to a microcontroller like an ESP32 or Raspberry Pi, which then transmits the data to Home Assistant.
You’ll need some basic programming skills to set up the microcontroller and configure the data transmission. There are many online tutorials and guides available to help you get started with DIY air quality sensor projects.
Building your own sensors allows you to tailor your air quality monitoring system to your specific needs and interests. Plus, it’s a great way to learn more about air quality and home automation.
When building your own air quality sensor, start by selecting the right sensor for your needs. Consider the pollutants you want to measure and the accuracy you require. Research different sensors and choose one that is well-suited for your project.
Choose a microcontroller that is compatible with your sensor and Home Assistant. The ESP32 and Raspberry Pi are popular choices for DIY air quality sensor projects. These microcontrollers are relatively easy to program and offer good connectivity options.
Use a reliable power supply to ensure your sensor is functioning properly. A stable power supply is essential for accurate readings. Consider using a battery backup to ensure your sensor continues to function during power outages.
Enclose your sensor in a protective case to protect it from dust and other environmental factors. A well-designed case can also improve the accuracy of your sensor by providing a stable environment.
Advanced Automations for Air Quality Control
Beyond basic alerts and automations, Home Assistant allows for more advanced control of your indoor air quality. You can create complex automations that take into account multiple factors, such as time of day, occupancy, and weather conditions.
For example, you can set up an automation to automatically open windows when the outdoor air quality is good and the indoor air quality is poor. You can also integrate your air quality sensors with your HVAC system to automatically adjust ventilation and filtration based on air quality levels.
Consider using machine learning algorithms to predict air quality levels and proactively take action. Home Assistant’s integration with Node-RED allows you to create sophisticated automations using a visual programming interface.
By leveraging these advanced features, you can create a truly intelligent air quality control system that optimizes your indoor environment for health and comfort. It’s a good idea to check your air quality sensors home assistant setup on a regular basis.
One advanced automation involves integrating your air quality sensors with weather data to predict potential air quality issues. By monitoring weather patterns, you can anticipate periods of high pollution and take proactive measures to protect your indoor air quality.
Consider using occupancy sensors to adjust ventilation and filtration based on whether or not people are present in the room. This can help conserve energy and improve air quality by only ventilating and filtering when necessary.
Integrate your air quality sensors with your smart blinds to automatically adjust window coverings based on sunlight and air quality levels. This can help reduce heat gain and improve air quality by blocking out harmful pollutants.
Use machine learning algorithms to learn your preferences and automatically adjust your air quality control system to your liking. This can create a personalized and optimized air quality experience.
Troubleshooting Common Issues
Integrating air quality sensors with Home Assistant can sometimes present challenges. Here are some common issues and how to troubleshoot them.
If your sensor is not connecting to Home Assistant, check the Wi-Fi or Zigbee connection. Make sure the sensor is properly configured and that the Home Assistant integration is up to date.
If the data is not displaying correctly, verify that the sensor is sending data in the correct format. Check the Home Assistant logs for any error messages related to the sensor.
If your automations are not working as expected, double-check the automation triggers and conditions. Make sure the sensor readings are within the expected ranges and that the automation actions are correctly configured.
If you are experiencing connectivity issues, try restarting your sensor and your Home Assistant server. This can often resolve temporary connectivity problems.
Check the sensor’s documentation for troubleshooting tips and common issues. The sensor’s manufacturer may have specific recommendations for resolving connectivity or data display problems.
Consult the Home Assistant community forums for help with troubleshooting your air quality sensor integration. Other users may have experienced similar issues and can offer solutions.
If you are still unable to resolve the issue, consider contacting the sensor’s manufacturer for support. They may be able to provide more specific guidance based on your sensor model.
Conclusion
Monitoring and improving indoor air quality is essential for creating a healthier living environment. By integrating air quality sensors with Home Assistant, you can gain valuable insights into the air you breathe and automate actions to maintain optimal conditions.
From choosing the right sensors to setting up alerts and automations, this article has provided a comprehensive guide to using air quality sensors home assistant effectively. Take control of your indoor air quality and create a healthier home for you and your family.
By taking proactive steps to monitor and improve your indoor air quality, you can create a healthier and more comfortable living environment. Investing in air quality sensors and integrating them with Home Assistant is a worthwhile investment in your health and well-being.
Remember to regularly monitor your air quality data and adjust your strategies as needed. Air quality conditions can change over time, so it’s important to stay informed and adapt your approach accordingly.