Smart home automation brings convenience and efficiency to our daily lives. One of the most effective ways to personalize your smart home experience is through temperature-based automations. By leveraging temperature sensors and integrating them with Home Assistant, you can create a responsive and comfortable living environment that adapts to your preferences and the changing seasons.
This approach allows you to automate heating, cooling, and ventilation systems, optimizing energy consumption and ensuring a consistently pleasant atmosphere. Let’s explore how to set up Home Assistant temperature based automation for a truly smart and comfortable home.
With a local-first approach, your automations remain reliable and responsive, even without an internet connection. This article will guide you through selecting the right temperature sensors, integrating them into Home Assistant, and creating custom automations that cater to your specific needs.
Selecting a Reliable Temperature Sensor
Choosing the right temperature sensor is the first step in creating effective temperature-based automations. Several factors come into play when selecting a sensor, including accuracy, range, connectivity, and integration with Home Assistant.
A reliable sensor should provide accurate readings within a reasonable margin of error, typically ±0.5°C or better. Consider the sensor’s operating range to ensure it covers the expected temperature variations in your home, especially if you plan to use it in extreme environments like attics or basements.
Connectivity is another important aspect to consider. Common options include Zigbee, Z-Wave, Wi-Fi, and Bluetooth. Zigbee and Z-Wave are mesh networking protocols known for their reliability and low power consumption, making them ideal for battery-powered sensors.
Wi-Fi sensors offer direct connectivity to your home network, but they tend to consume more power. Bluetooth sensors are suitable for short-range applications and may require a Bluetooth hub for remote access and integration with Home Assistant.
Finally, ensure that the sensor is compatible with Home Assistant. Many popular sensors have built-in integrations, while others may require custom configurations or community-developed integrations.
Think about the physical characteristics of the sensor as well. Will it be discreet and blend into your home decor, or will it be an eyesore? Some sensors are designed to be wall-mounted, while others are meant to be placed on a shelf or table.
Battery life is also a critical consideration, particularly for wireless sensors. Look for sensors with long battery life to minimize the need for frequent replacements. Some sensors may even offer the option of being powered by a USB connection.
Consider the price point of the sensor. While it’s tempting to go for the cheapest option, investing in a higher-quality sensor can save you headaches in the long run. A more expensive sensor may offer better accuracy, reliability, and features.
Read reviews from other users to get an idea of the sensor’s performance in real-world conditions. Pay attention to comments about accuracy, reliability, and ease of integration with Home Assistant.
Don’t forget about the sensor’s update frequency. How often does it report temperature readings? A more frequent update frequency can provide more granular data for your automations.
Integrating Temperature Data into Home Assistant
Once you’ve selected your temperature sensor, the next step is to integrate it into Home Assistant. The integration process varies depending on the sensor’s connectivity and the available integrations.
For Zigbee and Z-Wave sensors, you’ll need a compatible hub, such as a Conbee II or a Z-Wave USB stick. After setting up the hub, you can use the ZHA (Zigbee Home Automation) or Z-Wave JS integration in Home Assistant to discover and add your sensor.
Wi-Fi sensors often have their own dedicated integrations. You can typically add them through the Home Assistant configuration panel by providing the sensor’s IP address or login credentials.
Bluetooth sensors may require a bit more configuration. You might need to use the Bluetooth integration in Home Assistant and configure the sensor’s MAC address manually.
After the sensor is successfully integrated, Home Assistant will display its temperature readings as an entity. You can then use this entity in your automations and dashboards.
Before you begin the integration process, make sure your Home Assistant instance is up to date. Using the latest version of Home Assistant ensures compatibility with the widest range of devices and integrations.
If you’re using a custom integration, follow the instructions provided by the integration’s developer. Custom integrations may require you to install additional dependencies or configure specific settings.
Pay attention to the naming conventions used by Home Assistant when creating entities. Use descriptive and consistent names for your temperature sensors to make them easier to identify and manage.
Consider grouping your temperature sensors into logical groups or areas. This can simplify the process of creating automations that affect multiple sensors at once.
After you’ve integrated your temperature sensor, test it thoroughly to ensure it’s reporting accurate data and that the integration is working correctly. Monitor the sensor’s readings over time to identify any potential issues.
Creating Temperature-Based Automations
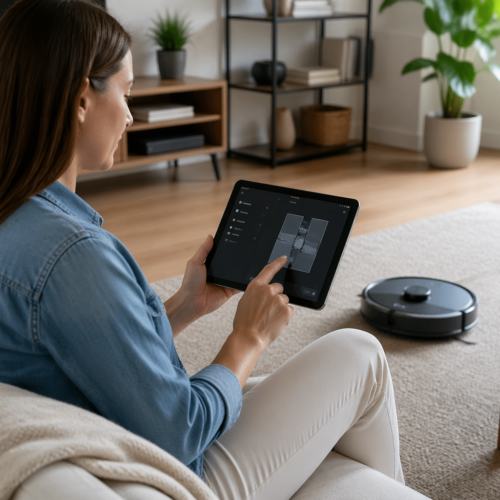
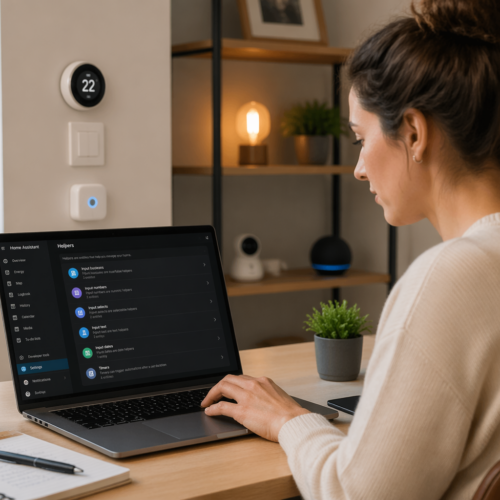
With your temperature sensor integrated, you can now create automations that respond to temperature changes. Home Assistant provides a flexible automation engine that allows you to define triggers, conditions, and actions based on temperature readings.
You can create automations through the Home Assistant user interface or by editing the YAML configuration files directly. The user interface offers a visual way to build automations, while the YAML configuration provides more advanced customization options.
| Component | Description | Example |
|---|---|---|
| Trigger | The event that starts the automation | Temperature above 25°C |
| Condition | The requirements that must be met for the automation to proceed | Time is between 9 AM and 5 PM |
| Action | The task that is performed when the trigger and conditions are met | Turn on the air conditioner |
| Entity | A representation of a device or service in Home Assistant | temperature.living_room |
To create a temperature-based automation, you’ll need to define a trigger that monitors the temperature sensor. You can set the trigger to activate when the temperature rises above or falls below a certain threshold.
Think about the specific goals you want to achieve with your temperature-based automations. Do you want to maintain a consistent temperature throughout your home? Do you want to optimize energy efficiency? Or do you want to create a more comfortable living environment?
Start with simple automations and gradually add complexity as you become more comfortable with the process. Don’t try to implement too many automations at once, as this can be overwhelming.
Use descriptive names for your automations to make them easier to identify and manage. A well-named automation will be much easier to understand and troubleshoot in the future.
Test your automations thoroughly before relying on them to control critical systems. Verify that the triggers, conditions, and actions are working as expected.
Document your automations to help you remember how they work and why you created them. This can be especially helpful if you have a large number of automations.
Setting Up Thresholds and Triggers
Setting up appropriate thresholds and triggers is crucial for effective temperature based automation. The thresholds determine when your automations activate, while the triggers define the specific events that initiate the automation.
Consider your personal comfort preferences and the typical temperature ranges in your home when setting thresholds. For example, you might set a cooling threshold of 25°C (77°F) and a heating threshold of 20°C (68°F).
You can use different types of triggers to initiate your automations. A numeric state trigger activates when the temperature crosses a specific threshold. A state trigger activates when the temperature sensor’s state changes.
You can also use time-based conditions to restrict your automations to certain hours of the day. This can be useful for preventing the air conditioner from running overnight or ensuring that the heating system only operates during waking hours.
Another approach involves using the “for” parameter in your trigger. This requires the temperature to remain above or below the threshold for a specified duration before the automation activates. This helps prevent false triggers caused by momentary temperature fluctuations.
Think carefully about the hysteresis of your thresholds. Hysteresis is the difference between the temperature at which an automation turns on and the temperature at which it turns off. A larger hysteresis can prevent rapid cycling of your heating and cooling systems.
Consider using different thresholds for different times of day or different days of the week. For example, you might set a lower heating threshold during the day when you’re at work and a higher threshold in the evening when you’re at home.
Experiment with different trigger types and threshold values to find what works best for your home and your preferences. Don’t be afraid to make adjustments as needed.
Use the Home Assistant automation editor to visualize your triggers and conditions. This can help you identify potential issues and ensure that your automations are working as expected.
Keep track of your energy consumption and comfort levels to evaluate the effectiveness of your thresholds and triggers. Make adjustments as needed to optimize your energy efficiency and comfort.
Examples: Cooling and Heating Automations
Let’s look at some specific examples of cooling and heating automations. These examples demonstrate how to use temperature sensors to control your thermostat control and maintain a comfortable indoor climate.
For a cooling automation, you can set a trigger that activates when the temperature in the living room exceeds 25°C. The action could be to turn on the air conditioner and send a notification to your phone.
- Turn on the living room air conditioner
- Send a notification to your phone
- Adjust fan speed based on temperature
- Close blinds to reduce solar heat gain
- Monitor temperature trends to anticipate cooling needs
For a heating automation, you can set a trigger that activates when the temperature in the bedroom drops below 20°C. The action could be to turn on the space heater and adjust the thermostat to a comfortable setting.
Consider a cooling automation that adjusts the thermostat based on the outdoor temperature. If the outdoor temperature is relatively cool, you could open windows instead of turning on the air conditioner.
Think about a heating automation that preheats your home before you wake up in the morning. This ensures that your home is warm and comfortable when you start your day.
Implement an automation that turns off the heating or cooling when you open a window. This prevents energy waste and ensures that your climate control systems are not working against each other.
Create an automation that adjusts the thermostat based on the number of people in the room. If there are multiple people in the room, you could increase the cooling to maintain a comfortable temperature.
Develop an automation that sends you a notification if the temperature in your home exceeds a certain threshold. This can help you identify potential problems and take corrective action before they escalate.
Advanced Temperature Control Strategies
Beyond basic cooling and heating automations, you can implement more advanced temperature control strategies. These strategies involve using multiple sensors, predictive algorithms, and dynamic adjustments to optimize your climate automation.
One approach is to use multiple temperature sensors in different rooms to create a zone-based heating and cooling system. This allows you to maintain different temperatures in different areas of your home, optimizing comfort and energy efficiency.
Another strategy involves using weather forecasts to anticipate temperature changes. You can integrate a weather service into Home Assistant and use the forecast data to proactively adjust your heating and cooling systems.
For example, if the forecast predicts a hot day, you can start cooling your home early in the morning to prevent it from overheating. Similarly, if the forecast predicts a cold night, you can increase the heating in the evening to ensure a comfortable sleep.
You can also use machine learning algorithms to learn your temperature preferences and automatically adjust your heating and cooling systems. These algorithms can analyze your past behavior and environmental conditions to predict your ideal temperature settings.
Implement a system that learns your occupancy patterns and adjusts the temperature accordingly. This can help you save energy by only heating or cooling rooms that are occupied.
Use historical temperature data to predict future temperature changes. This can help you proactively adjust your heating and cooling systems to maintain a consistent temperature.
Integrate your temperature control system with other smart home devices, such as smart blinds and ceiling fans. This allows you to create more comprehensive and automated climate control solutions.
Consider using a PID (proportional-integral-derivative) controller to fine-tune your temperature control system. A PID controller can help you maintain a more stable and consistent temperature.
Explore the use of advanced sensors, such as thermal cameras, to detect temperature variations within your home. This can help you identify areas that are losing heat or gaining heat and take corrective action.
Integrating Humidity Sensors
While temperature is a primary factor in home comfort, humidity also plays a significant role. Integrating humidity sensors into your Home Assistant setup can enhance your climate control strategies.
High humidity levels can make a room feel warmer than it actually is, while low humidity levels can cause dryness and discomfort. By monitoring humidity levels, you can adjust your heating and cooling systems to maintain a more comfortable environment.
You can create automations that activate a dehumidifier when the humidity exceeds a certain threshold. Conversely, you can activate a humidifier when the humidity drops below a certain level.
Some advanced thermostats, like the Ecobee, include built-in humidity sensors. You can use these sensors in combination with your temperature sensors to create more sophisticated climate automations.
For example, you might set an automation that adjusts the thermostat based on both temperature and humidity. This ensures that your home remains comfortable regardless of the weather conditions.
Consider using a dew point calculation to determine the optimal humidity level for your home. The dew point is the temperature at which water vapor in the air will condense into liquid water.
Implement an automation that prevents condensation from forming on your windows. This can help prevent mold growth and protect your home from damage.
Use humidity sensors to monitor the moisture levels in your basement or crawl space. This can help you identify potential water leaks and prevent structural damage.
Integrate your humidity sensors with your ventilation system. This allows you to automatically adjust the ventilation rate to maintain optimal humidity levels.
Consider using different humidity thresholds for different rooms in your home. For example, you might set a higher humidity threshold for your bathroom and a lower threshold for your bedroom.
Optimizing Energy Efficiency
Temperature-based automations can significantly improve your home’s energy efficiency. By automating your heating and cooling systems, you can reduce energy waste and lower your utility bills.
One way to optimize energy efficiency is to use occupancy sensors in conjunction with your temperature sensors. This allows you to only heat or cool rooms that are occupied.
For example, you can set an automation that turns off the heating or cooling in a room when it is unoccupied. This prevents energy waste in areas that are not being used.
Another strategy is to use smart thermostats that learn your schedule and adjust the temperature accordingly. These thermostats can automatically lower the temperature when you are away from home and raise it when you are about to return.
You can also use energy monitoring tools to track your energy consumption and identify areas where you can improve efficiency. By analyzing your energy usage patterns, you can fine-tune your temperature-based automations to minimize energy waste.
Consider using a setback thermostat to automatically lower the temperature when you are asleep or away from home. This can significantly reduce your heating and cooling costs.
Implement an automation that closes your blinds or curtains during the hottest part of the day. This can help reduce solar heat gain and lower your cooling costs.
Use a smart plug to control the power to your space heater or air conditioner. This allows you to remotely turn off the device if you accidentally leave it running.
Consider using a heat pump instead of a traditional furnace or air conditioner. Heat pumps are more energy-efficient and can save you money on your utility bills.
Regularly maintain your heating and cooling systems to ensure they are operating efficiently. This includes cleaning or replacing air filters and checking for leaks.
Troubleshooting Common Issues
While setting up temperature-based automations is generally straightforward, you may encounter some common issues. Here are some troubleshooting tips to help you resolve these issues and ensure your automations run smoothly.
If your temperature sensor is not reporting accurate readings, check its placement. Make sure it is not exposed to direct sunlight or drafts, as these can affect its accuracy.
If your automations are not triggering as expected, double-check your thresholds and conditions. Ensure that the temperature is actually crossing the threshold and that all conditions are being met.
If your automations are triggering too frequently, adjust the “for” parameter in your trigger. This will prevent false triggers caused by momentary temperature fluctuations.
If you are experiencing connectivity issues with your temperature sensor, check its battery level and network connection. Ensure that the sensor is within range of your hub or Wi-Fi network.
Finally, consult the Home Assistant community forums for assistance. Other users may have encountered similar issues and can provide valuable insights and solutions.
Check the logs in Home Assistant for error messages or warnings. These logs can often provide clues about what is causing the problem.
Try restarting your Home Assistant instance. This can often resolve minor issues.
Make sure your temperature sensor is compatible with your Home Assistant setup. Check the documentation for your sensor to ensure it is properly configured.
If you are using a custom integration, make sure it is up to date. Outdated integrations can sometimes cause problems.
Test your automations in a controlled environment before deploying them to your entire home. This can help you identify potential problems before they affect your comfort or energy efficiency.
Conclusion
Temperature-based automations offer a powerful way to personalize your smart home experience. By selecting the right temperature sensors, integrating them into Home Assistant, and creating custom automations, you can create a comfortable and energy-efficient living environment.
Whether you’re looking to automate your heating and cooling systems, optimize energy consumption, or simply maintain a consistent indoor climate, temperature-based automations can help you achieve your goals. With a little planning and experimentation, you can transform your home into a truly smart and responsive space that adapts to your needs and preferences.