Imagine stepping outside to a perfectly watered lawn, even when you’re miles away. That’s the promise of smart irrigation, and with the smart irrigation home assistant integration, it’s easier than ever to achieve. This article will guide you through automating your smart sprinkler system using Home Assistant, ensuring your lawn stays lush while conserving water.
We’ll explore everything from choosing the right smart controller to setting up automated schedules based on real-time weather data. Get ready to transform your yard care routine with this powerful combination.
By the end of this guide, you’ll have a fully automated smart sprinkler system managed by Home Assistant. Say goodbye to guesswork and hello to a greener, healthier, and more water-efficient lawn.
Benefits of Smart Irrigation Systems
Smart irrigation systems offer a multitude of benefits compared to traditional timers. They go beyond simply turning on and off at preset times, adjusting watering schedules based on actual needs.
One of the most significant advantages is water conservation. By using weather data and soil moisture sensors, these systems prevent overwatering, reducing water waste and lowering your water bill.
Smart irrigation systems also promote healthier plant growth. Consistent and appropriate watering prevents both drought stress and root rot, leading to a thriving landscape.
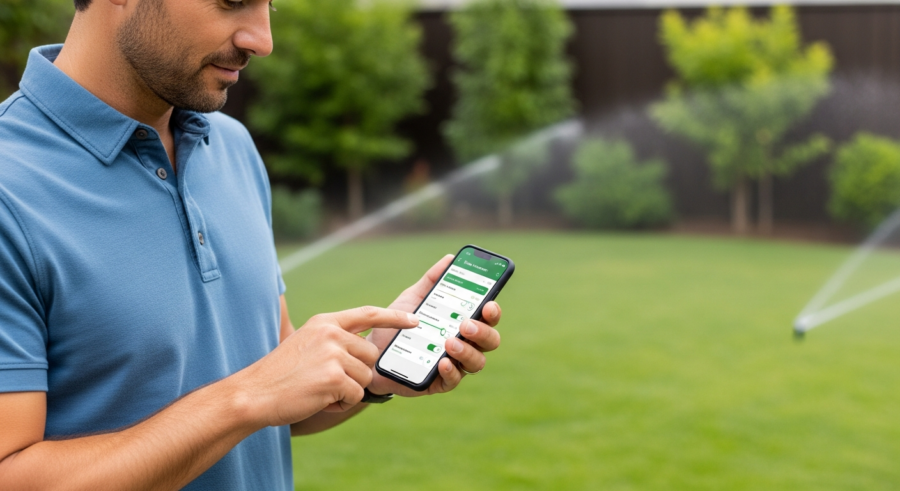
Convenience is another key benefit, as you can control your sprinkler system from anywhere using your smartphone or other smart devices. Adjustments are easy, whether you’re on vacation or simply want to fine-tune your watering schedule from the comfort of your couch.
Beyond the immediate benefits, smart irrigation systems contribute to environmental sustainability. By minimizing water waste, they help conserve a precious resource and reduce the strain on local water supplies.

The long-term cost savings can also be substantial. While the initial investment in a smart irrigation system may be higher than a traditional timer, the reduced water bills quickly offset the cost.
Furthermore, a well-maintained and efficiently watered landscape increases property value. A lush, green lawn and thriving garden are attractive to potential buyers and enhance the overall curb appeal of your home.
Smart irrigation systems also allow for targeted watering, ensuring that each zone receives the precise amount of water it needs. This is particularly beneficial for properties with diverse plant types and varying soil conditions.
The ability to monitor and adjust watering schedules remotely provides peace of mind, especially when you’re away from home. You can rest assured that your lawn and garden are receiving the proper care, regardless of your location.
These systems also offer valuable data insights into your watering habits. By tracking water usage and identifying areas for improvement, you can further optimize your irrigation strategy and maximize water conservation.
Finally, smart irrigation systems contribute to a more sustainable lifestyle. By reducing water waste and promoting responsible resource management, you can make a positive impact on the environment.
Choosing a Compatible Smart Irrigation Controller
Selecting the right smart irrigation controller is crucial for successful integration with Home Assistant. Not all controllers are created equal, and compatibility is key to seamless automation.
Look for controllers that offer local control options, such as a direct API or MQTT support. Cloud-based controllers can work, but they rely on an internet connection and may introduce delays or privacy concerns.
Popular options include Rachio, RainMachine, and OpenSprinkler. Rachio offers a user-friendly interface and reliable performance, while RainMachine excels in leveraging weather data for optimal watering.
OpenSprinkler is a fully open-source option, providing maximum flexibility and control for advanced users. Consider your technical expertise and desired level of customization when making your choice.
Before making a purchase, thoroughly research the compatibility of the controller with Home Assistant. Check the Home Assistant documentation and community forums for user experiences and integration guides.
Consider the number of zones your irrigation system requires. Ensure the controller you choose supports the necessary number of zones for your property.
Evaluate the ease of use of the controller’s interface and mobile app. A user-friendly interface will make it easier to manage your irrigation system and adjust settings as needed.
Look for controllers that offer advanced features such as weather-based adjustments, soil moisture sensor integration, and flow monitoring. These features can further enhance the efficiency and effectiveness of your irrigation system.
Read customer reviews and ratings to get an idea of the controller’s reliability and performance. Pay attention to comments about the controller’s integration with Home Assistant and its overall ease of use.
Check the warranty and support options offered by the manufacturer. A good warranty and responsive customer support can provide peace of mind in case of any issues.
Finally, consider your budget and choose a controller that offers the best value for your money. Compare the features and prices of different controllers to find one that meets your needs and fits your budget.
Understanding Local Control vs. Cloud-Based Systems
When choosing a smart irrigation controller, understanding the difference between local control and cloud-based systems is important. This decision impacts performance, privacy, and reliability.
Local control means the controller communicates directly with your Home Assistant instance on your local network. This offers faster response times and continues to function even if your internet connection is down.
Cloud-based systems, on the other hand, rely on the manufacturer’s servers to process commands. While convenient, this introduces a dependency on their infrastructure and raises concerns about data privacy.
If you prioritize privacy and reliability, opt for a controller with local control capabilities. This ensures your irrigation system remains functional and secure, regardless of external factors.
With local control, your data remains within your home network, reducing the risk of unauthorized access or data breaches. This is particularly important for users who are concerned about their privacy.
Local control also eliminates the dependency on the manufacturer’s servers, which can be subject to outages or maintenance. This ensures that your irrigation system continues to function even if the manufacturer’s servers are unavailable.
Cloud-based systems, while convenient, can introduce latency and delays in communication. This can be frustrating when you’re trying to make quick adjustments to your watering schedule.
Furthermore, cloud-based systems may require you to create an account with the manufacturer and share your personal information. This raises concerns about data privacy and the potential for your data to be used for marketing purposes.
Local control offers greater flexibility and customization options. You can integrate your irrigation system with other smart home devices and create complex automations without relying on the manufacturer’s platform.
When evaluating smart irrigation controllers, carefully consider the trade-offs between local control and cloud-based systems. Choose the option that best aligns with your priorities and technical expertise.
Ultimately, local control provides greater control, privacy, and reliability, making it the preferred choice for many Home Assistant users.
Integrating Your Irrigation System with Home Assistant
Once you’ve chosen a compatible controller, integrating it with Home Assistant is the next step. The process varies depending on the controller, but generally involves installing a custom integration or using a built-in component.
For Rachio, you’ll need to obtain an API key from your Rachio account and add it to your Home Assistant configuration. RainMachine requires enabling local access and providing the controller’s IP address.
| Controller | Integration Method | Key Requirements |
|---|---|---|
| Rachio | Official Integration | API Key |
| RainMachine | Custom Component or API | Local Access Enabled, IP Address |
| OpenSprinkler | MQTT or API | MQTT Broker Details or API Key |
| Hunter Hydrawise | Official Integration | Hydrawise Account Credentials |
OpenSprinkler can be integrated via MQTT or its API, requiring you to configure an MQTT broker or obtain an API key. Follow the specific instructions for your chosen controller to ensure a smooth integration process.
Before starting the integration process, ensure that your Home Assistant instance is up to date. This will ensure compatibility with the latest integrations and features.
Read the documentation for your chosen controller’s Home Assistant integration carefully. The documentation will provide detailed instructions on how to install and configure the integration.
If you’re using a custom component, you’ll need to download the component files and place them in the appropriate directory in your Home Assistant configuration folder. Restart Home Assistant after installing the custom component.
When configuring the integration, you’ll typically need to provide your API key, IP address, or other credentials. Ensure that you enter these details correctly to avoid errors.
After configuring the integration, Home Assistant should automatically discover your smart irrigation controller. You can then add the controller to your Home Assistant dashboard and start controlling your irrigation system.
If you encounter any issues during the integration process, consult the Home Assistant documentation and community forums for troubleshooting tips. There are many helpful resources available online to assist you.
Once your irrigation system is integrated with Home Assistant, you can start creating automations and schedules to manage your watering.
Regularly check for updates to the Home Assistant integration for your smart irrigation controller. Updates may include bug fixes, new features, and improved performance.
Configuring Zones and Valves in Home Assistant
After integrating your smart sprinkler system, the next step is configuring zones and valves within Home Assistant. This allows you to control each sprinkler zone individually.
Each zone will appear as a separate entity in Home Assistant, typically as a switch or valve. You can rename these entities to match the corresponding areas of your yard, making them easier to identify.
For example, you might have zones named “Front Lawn,” “Back Garden,” and “Flower Beds.” Ensure each zone is correctly associated with the physical sprinkler valve it controls.
This setup enables you to create targeted watering schedules and automations for each specific area of your landscape. You can then tailor the watering duration and frequency based on the plant types and soil conditions in each zone.
Take the time to accurately label each zone in Home Assistant. This will make it much easier to manage your irrigation system and create automations.
Consider using descriptive names that clearly identify the area each zone covers. For example, instead of “Zone 1,” use “Front Lawn – South Side.”
If you have multiple valves controlling a single zone, you can group them together in Home Assistant. This allows you to control all the valves for a zone with a single command.
You can also create virtual zones in Home Assistant by combining multiple physical zones. This can be useful for creating larger watering areas or for simplifying your automations.
Use the Home Assistant entity registry to manage your zones and valves. The entity registry allows you to rename entities, change their icons, and assign them to specific areas in your home.
Regularly review your zone configurations to ensure they are accurate and up to date. This will help prevent errors and ensure that your irrigation system is functioning properly.
Consider adding notes to each zone in Home Assistant to document its specific characteristics. This can include information about the plant types, soil conditions, and watering requirements for each zone.
Setting Up Watering Schedules and Automations
With your zones configured, you can now set up watering schedules and automations in Home Assistant. This is where the real power of smart irrigation comes into play, allowing you to customize your watering based on various factors.
Start by creating simple time-based schedules using Home Assistant’s automation features. You can specify the days of the week, start times, and duration for each zone’s watering cycle.
- Create time-based schedules
- Utilize weather-based adjustments
- Integrate soil moisture sensors
- Set up manual override options
- Monitor water usage
To enhance your automations, incorporate weather data to skip watering on rainy days or adjust watering duration based on temperature. Consider integrating soil moisture sensors for even more precise control, watering only when the soil is dry.
When creating time-based schedules, consider the best time of day to water your lawn and garden. Watering in the early morning is generally recommended to minimize evaporation.
Use Home Assistant’s automation editor to create complex watering schedules that adjust based on multiple factors. You can combine time-based triggers with weather conditions and soil moisture levels.
Consider using Home Assistant’s scripting feature to create reusable watering routines. This allows you to easily apply the same watering schedule to multiple zones.
Experiment with different watering durations and frequencies to find the optimal settings for your lawn and garden. Monitor your plants closely to ensure they are receiving the right amount of water.
Use Home Assistant’s notification system to receive alerts when your watering schedules are running or when any issues are detected. This can help you stay informed about the status of your irrigation system.
Regularly review and adjust your watering schedules as needed. Plant growth, weather conditions, and soil moisture levels can all change over time, requiring adjustments to your watering strategy.
Consider using Home Assistant’s template sensors to create custom sensors that track your water usage and provide insights into your watering habits.
By carefully planning and implementing your watering schedules and automations, you can create a truly smart and efficient irrigation system that saves you water and money.
Using Weather Data for Smart Irrigation
Integrating weather data into your smart irrigation system is essential for efficient water use. By using real-time weather information, you can avoid watering when it’s raining or adjust watering based on temperature and humidity.
Home Assistant offers several weather integrations, such as OpenWeatherMap, AccuWeather, and Weatherbit. Choose one that provides accurate and reliable data for your location.
Once you’ve set up a weather integration, you can create automations that check the forecast before watering. For example, you can skip watering if the forecast predicts rain or reduce watering duration on cooler days.
You can also use weather data to adjust watering based on evapotranspiration rates, which measure the amount of water lost from the soil and plants. This ensures your lawn receives the optimal amount of water, regardless of the weather conditions.
When selecting a weather integration, consider the frequency of updates and the accuracy of the data. Look for integrations that provide real-time data and reliable forecasts.
Use Home Assistant’s template sensors to extract specific weather data points, such as precipitation probability, temperature, and humidity. This allows you to use this data in your automations.
Create automations that skip watering if the precipitation probability is above a certain threshold. This will prevent overwatering and save water on rainy days.
Adjust watering duration based on temperature. Reduce watering duration on cooler days and increase it on hotter days. This will help ensure that your plants receive the right amount of water, regardless of the temperature.
Use evapotranspiration data to calculate the amount of water your plants need. This will help you fine-tune your watering schedules and ensure that your plants are receiving the optimal amount of water.
Consider using a weather station to collect hyperlocal weather data. This will provide you with even more accurate and reliable weather information for your specific location.
Regularly review your weather-based automations to ensure they are functioning properly. Adjust the thresholds and settings as needed to optimize your watering strategy.
Integrating Soil Moisture Sensors for Precision Watering
For the most precise irrigation automation, consider integrating soil moisture sensors. These sensors measure the moisture content of the soil, providing real-time feedback on when and how much to water.
Popular soil moisture sensors include Zigbee or Z-Wave-based sensors, which can be easily integrated into Home Assistant. Place the sensors strategically throughout your yard, focusing on areas with different plant types or sun exposure.
Configure automations in Home Assistant to water only when the soil moisture level drops below a certain threshold. This prevents overwatering and ensures your plants receive the exact amount of water they need.
Soil moisture sensors are particularly useful for areas with varying soil types or microclimates. They provide a level of precision that weather-based adjustments alone cannot achieve, leading to healthier plants and significant water savings.
When choosing soil moisture sensors, consider their accuracy, range, and durability. Look for sensors that are designed for outdoor use and can withstand the elements.
Calibrate your soil moisture sensors to ensure accurate readings. This may involve comparing the sensor readings to manual soil moisture measurements.
Place your soil moisture sensors strategically throughout your yard, focusing on areas with different plant types, sun exposure, and soil conditions. This will provide you with a comprehensive picture of your soil moisture levels.
Use Home Assistant’s template sensors to create custom sensors that track your soil moisture levels and provide insights into your watering needs.
Create automations that trigger watering when the soil moisture level drops below a certain threshold. Adjust the threshold based on the plant types and soil conditions in each zone.
Consider using a combination of weather data and soil moisture sensors to optimize your watering strategy. This will provide you with the most accurate and reliable information for making watering decisions.
Regularly monitor your soil moisture levels and adjust your watering schedules as needed. This will help ensure that your plants are receiving the right amount of water, regardless of the weather conditions.
Manual Overrides and Remote Control
While automation is powerful, it’s also essential to have manual override options for your smart irrigation system. This allows you to adjust watering schedules or manually activate zones as needed.
Home Assistant provides several ways to implement manual overrides. You can create dashboard controls to manually turn on or off individual zones, or adjust the watering duration for a specific cycle.
Consider adding input sliders to your dashboard to adjust watering duration percentages. This allows you to quickly increase or decrease watering times without modifying the underlying automation.
Remote control is another key benefit, enabling you to manage your irrigation system from anywhere with an internet connection. This is particularly useful when you’re traveling or need to make adjustments based on real-time observations.
Create a user-friendly dashboard in Home Assistant with clear and intuitive controls for your irrigation system. This will make it easy to manually override your watering schedules.
Add buttons to your dashboard to manually turn on or off individual zones. This will allow you to quickly water specific areas of your lawn or garden as needed.
Use input sliders to adjust the watering duration for each zone. This will allow you to fine-tune your watering schedules based on real-time conditions.
Consider adding a switch to your dashboard to disable all watering schedules. This can be useful if you’re going on vacation or if you want to temporarily suspend all watering.
Set up remote access to your Home Assistant instance so you can control your irrigation system from anywhere with an internet connection. This can be done using a VPN or a cloud-based service like Nabu Casa.
Use Home Assistant’s mobile app to control your irrigation system from your smartphone or tablet. This will allow you to make adjustments to your watering schedules on the go.
Regularly test your manual override controls to ensure they are functioning properly. This will help you avoid any surprises when you need to manually adjust your watering schedules.
Troubleshooting Irrigation System Issues
Even with a well-configured smart irrigation system, issues can arise. Knowing how to troubleshoot common problems can save you time and frustration.
One common issue is a zone not watering. Check the valve to ensure it’s properly connected and functioning, and verify that the zone is enabled in Home Assistant.
Another problem can be uneven watering, indicating a clogged sprinkler head or low water pressure. Clean the sprinkler heads and check your water pressure to resolve this issue.
If you’re experiencing connectivity problems, ensure your smart controller is connected to your Wi-Fi network and that Home Assistant can communicate with it. Restarting the controller and your Home Assistant instance can often resolve these issues.
If a zone is not watering, check the wiring connections to the valve. Ensure that the wires are securely connected and that there are no breaks or shorts in the wiring.
Inspect the valve itself for any signs of damage or malfunction. If the valve is stuck or leaking, it may need to be replaced.
Check the water pressure to your irrigation system. Low water pressure can prevent the sprinklers from functioning properly.
Clean the sprinkler heads regularly to remove any debris or buildup that may be clogging them. This will help ensure that the sprinklers are distributing water evenly.
If you’re experiencing connectivity problems, try restarting your smart irrigation controller and your Home Assistant instance. This can often resolve temporary connectivity issues.
Check the Home Assistant logs for any error messages related to your smart irrigation controller. This can provide valuable clues about the cause of the problem.
Consult the documentation for your smart irrigation controller and the Home Assistant integration for troubleshooting tips. There are many helpful resources available online to assist you.
If you’re unable to resolve the issue yourself, contact the manufacturer of your smart irrigation controller or seek assistance from the Home Assistant community.
Monitoring Water Usage and Conservation
One of the significant advantages of a smart irrigation system is the ability to monitor water usage. By tracking how much water each zone consumes, you can identify areas for further optimization and conservation.
Some smart controllers provide built-in water usage data, which can be accessed through their APIs and displayed in Home Assistant. If your controller doesn’t offer this feature, you can estimate water usage based on the watering duration and flow rate of each sprinkler head.
Create dashboards in Home Assistant to visualize your water usage data. Track daily, weekly, and monthly water consumption to identify trends and areas where you can reduce water waste.
Consider setting up alerts to notify you of unusually high water usage, which could indicate a leak or malfunctioning sprinkler head. By actively monitoring your water consumption, you can save water and money while maintaining a healthy lawn.
If your smart irrigation controller provides water usage data, integrate it with Home Assistant to track your water consumption in real-time.
If your controller doesn’t provide water usage data, estimate your water consumption based on the watering duration and flow rate of each sprinkler head. You can use Home Assistant’s template sensors to calculate your water usage.
Create a dashboard in Home Assistant to visualize your water usage data. Track daily, weekly, and monthly water consumption to identify trends and areas where you can reduce water waste.
Set up alerts to notify you of unusually high water usage. This could indicate a leak or malfunctioning sprinkler head.
Compare your water usage to previous years to track your progress in water conservation. This will help you identify areas where you can further optimize your watering strategy.
Consider installing a flow meter to accurately measure your water consumption. This will provide you with more precise data for tracking and analysis.
Regularly review your water usage data and adjust your watering schedules as needed. This will help you ensure that you’re using water efficiently and conserving water.
Advanced Automation Techniques
Once you’ve mastered the basics, explore advanced automation techniques to further optimize your smart irrigation system. This can involve integrating additional sensors, creating complex watering schedules, and using machine learning algorithms.
Consider integrating rain sensors to provide an additional layer of protection against overwatering. These sensors physically detect rainfall and can override your watering schedules, regardless of weather forecasts.
Experiment with dynamic watering schedules that adjust based on plant growth stages. For example, you can increase watering frequency during peak growing seasons and reduce it during dormancy.
Explore using machine learning algorithms to predict optimal watering schedules based on historical weather data, soil moisture levels, and plant health. This level of automation can lead to significant water savings and healthier plants.
Integrate your smart irrigation system with other smart home devices, such as smart lights and smart thermostats. This will allow you to create more complex and integrated automations.
Use Home Assistant’s Node-RED integration to create visual automations for your smart irrigation system. This can make it easier to design and manage complex watering schedules.
Experiment with using different types of sensors, such as leaf wetness sensors and solar radiation sensors, to further optimize your watering strategy.
Explore using machine learning algorithms to predict plant health based on sensor data. This will allow you to proactively address any issues before they become serious.
Consider using a drone to inspect your lawn and garden for any signs of stress or disease. This can help you identify areas that need more attention.
Share your smart irrigation automations with the Home Assistant community. This will help others learn from your experience and improve their own smart irrigation systems.
Continuously experiment with new automation techniques to further optimize your smart irrigation system. The possibilities are endless.
Conclusion
Automating your smart sprinkler system with the smart irrigation home assistant integration offers numerous benefits, from water conservation to healthier plant growth. By choosing a compatible controller, integrating it with Home Assistant, and setting up smart schedules, you can transform your yard care routine.
Remember to leverage weather data and soil moisture sensors for precise watering, and don’t forget to set up manual override options for flexibility. With a little effort, you can create a truly smart and efficient irrigation system that saves you time, money, and water.
Embrace the power of smart home automation to create a greener, healthier, and more sustainable landscape. Your lawn and your wallet will thank you.
The journey to a perfectly automated smart irrigation system is an ongoing process of learning and refinement. Don’t be afraid to experiment and adapt your strategies as needed.
By embracing the power of technology and data, you can create a landscape that is both beautiful and sustainable.
The benefits of a smart irrigation system extend beyond just water conservation and cost savings. It also contributes to a healthier environment and a more sustainable lifestyle.