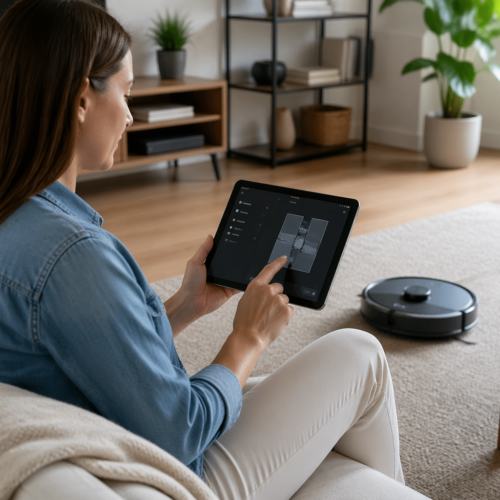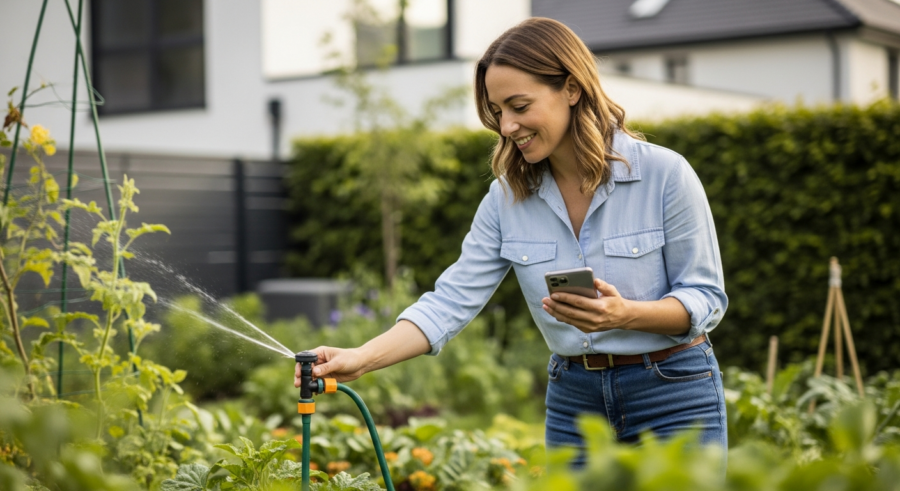
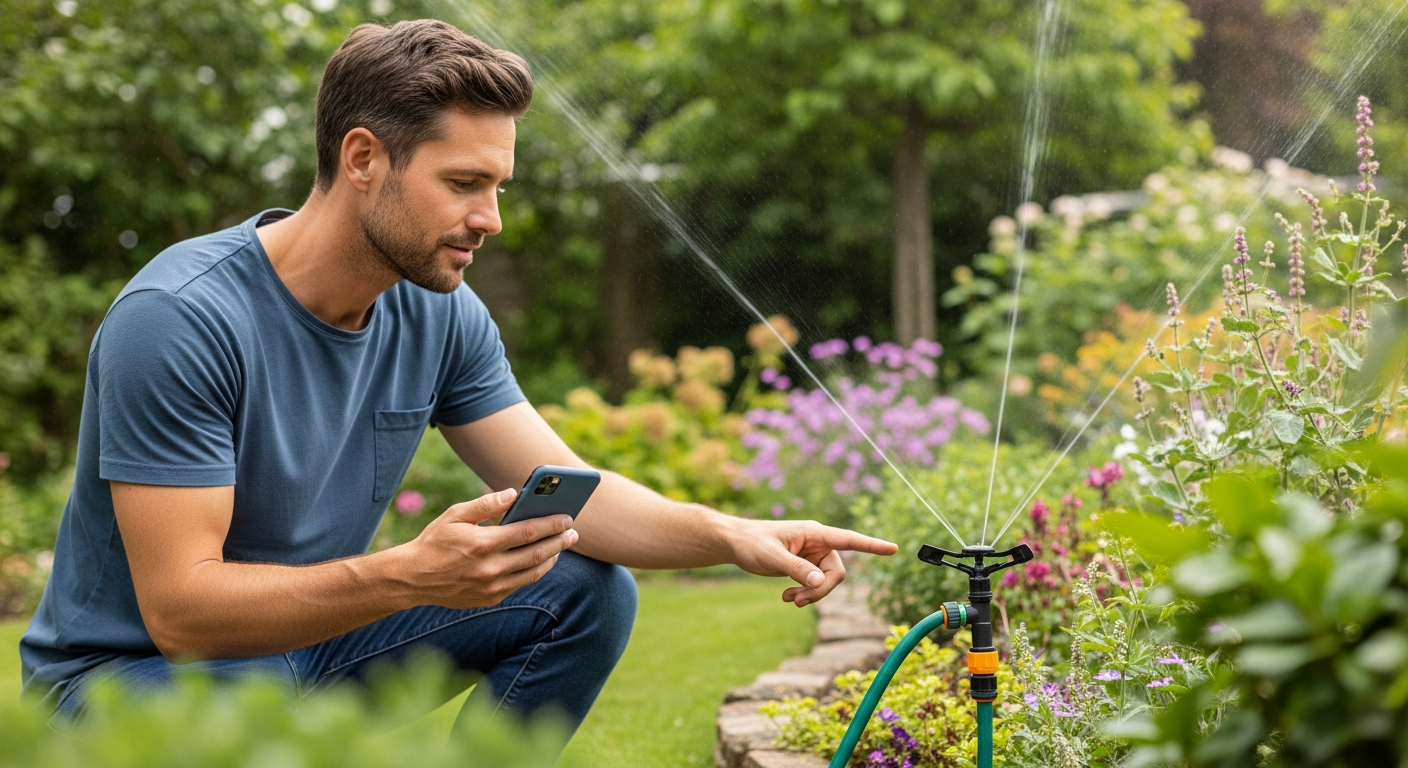
Imagine stepping into your garden and being greeted by lush, healthy plants, all thriving without you lifting a finger. This isn’t a dream; it’s the reality you can achieve with smart home automation. By integrating Home Assistant with your garden’s watering system, you can create a self-sufficient, intelligent landscape that responds to the environment and your plants’ needs.
With a little setup and the right components, you can automate your watering schedule, monitor soil conditions, and even adjust watering based on the weather forecast. Let’s get started on how you can bring your garden into the age of smart home technology, saving you time, water, and ensuring your plants always get the perfect amount of hydration with Home Assistant garden watering automation.
This guide will walk you through the process of setting up a smart watering system using Home Assistant, covering everything from choosing the right equipment to creating custom automation schedules. We’ll explore how to integrate soil moisture sensors, respond to weather conditions, and even set up manual overrides for those times when you want to take control.
Choosing the Right Watering System
Before diving into the tech, it’s important to select a watering system that fits your garden’s needs. Consider the size of your garden, the types of plants you’re growing, and your water pressure.
Drip irrigation is an excellent choice for targeted watering, delivering water directly to the roots of your plants, minimizing waste. Sprinkler systems, on the other hand, are better suited for larger areas and lawns, providing broader coverage.
For a smart setup, you’ll need a watering system that can be controlled electronically. Solenoid valves are the key here, as they can be opened and closed remotely using a controller connected to Home Assistant.
Brands like Rain Bird and Orbit offer valves that are compatible with most smart controllers. Make sure the valves you choose are rated for outdoor use and can handle your water pressure to ensure longevity and reliability.
When choosing between drip irrigation and sprinkler systems, think about the specific needs of your plants. Drip irrigation is ideal for plants that prefer consistent moisture at their roots, such as vegetables and flowers. Sprinklers are often used for lawns because they can cover a large area quickly.
Consider the layout of your garden when planning your watering system. For irregularly shaped gardens, drip irrigation can be customized to fit the unique contours. Sprinklers may require more careful placement to avoid overspray or underwatering certain areas.
Water pressure is another crucial factor to consider. Drip irrigation systems typically require lower water pressure than sprinkler systems. Ensure that your water pressure is sufficient for the system you choose to avoid performance issues.
Don’t forget to think about future expansion. Choose a system that can be easily expanded as your garden grows. This will save you time and money in the long run.
Selecting a Smart Controller
The smart controller is the brain of your automated watering system, connecting your valves to Home Assistant. Several options are available, each with its own strengths and weaknesses.
Consider controllers like the Rachio 3 Smart Sprinkler Controller, which integrates directly with Home Assistant and offers advanced features like weather-based adjustments. Alternatively, you can use a more DIY approach with an ESP32 or Raspberry Pi, paired with relays to control the valves.
The DIY approach requires more technical knowledge but offers greater flexibility and customization. You can program the controller to respond to specific sensor data and integrate with other smart home devices.
Whichever controller you choose, ensure it’s compatible with Home Assistant and can handle the number of zones you need to control. Setting up a Home Assistant garden watering automation is easier than you think.
When evaluating smart controllers, consider their ease of use and setup. Some controllers offer intuitive mobile apps that make it easy to program watering schedules and monitor system performance. Others may require more technical expertise to configure.
Think about the level of integration you want with Home Assistant. Some controllers offer seamless integration, allowing you to control all aspects of your watering system directly from Home Assistant. Others may require more complex configuration.
Consider the long-term cost of ownership. Some controllers require subscription fees for advanced features like weather-based adjustments. Others offer a one-time purchase price with no ongoing fees.
Don’t forget to research the controller’s reliability and customer support. Read reviews and ask for recommendations from other smart home enthusiasts to ensure you choose a controller that will meet your needs.
Integrating Soil Moisture Sensors
Soil moisture sensors are vital for a truly intelligent watering system. These sensors measure the moisture content of the soil, providing valuable data to Home Assistant.
By monitoring soil moisture levels, you can avoid overwatering or underwatering, ensuring your plants receive the precise amount of water they need. This is a game changer for your irrigation system.
| Sensor | Pros | Cons |
|---|---|---|
| Xiaomi Mi Flora | Affordable, easy to integrate | Limited range, requires Bluetooth |
| Vegetronix VH400 | Durable, accurate | More expensive, requires wiring |
| DIY ESP32 Sensor | Highly customizable, cost-effective | Requires technical knowledge |
| Aquacheck | Wireless communication, durable | Expensive, requires a dedicated gateway |
Integrating these sensors with Home Assistant allows you to create automations that trigger watering when the soil moisture drops below a certain threshold. This ensures your plants only get watered when they actually need it, saving water and promoting healthier growth.
When choosing soil moisture sensors, consider their accuracy and reliability. Look for sensors that provide consistent and accurate readings over time. This will ensure that your watering system is responding to the actual needs of your plants.
Think about the placement of your soil moisture sensors. Place them in areas that are representative of the overall moisture levels in your garden. Avoid placing them in areas that are excessively wet or dry.
Consider the depth at which you place your soil moisture sensors. Different plants have different root depths, so it’s important to place the sensors at the appropriate depth to measure the moisture levels in the root zone.
Don’t forget to calibrate your soil moisture sensors. This will ensure that the readings are accurate and that your watering system is responding appropriately. Follow the manufacturer’s instructions for calibration.
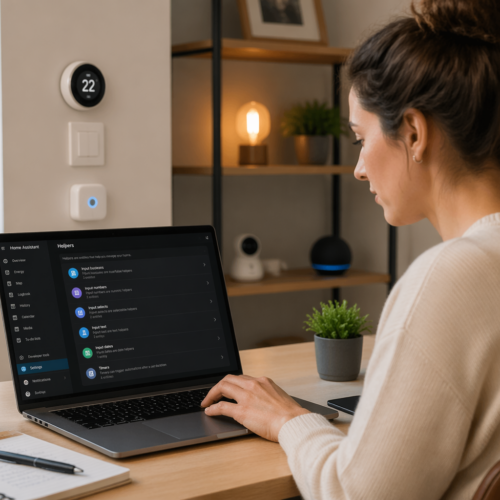
Connecting Sensors to Home Assistant
Connecting your soil moisture sensors to Home Assistant depends on the type of sensor you’ve chosen. For sensors like the Xiaomi Mi Flora, you’ll need a Bluetooth integration.
Install the Xiaomi integration in Home Assistant and follow the instructions to pair your sensors. Once paired, you’ll be able to see the soil moisture readings in Home Assistant and use them in your automations.
For wired sensors like the Vegetronix VH400, you’ll need to connect them to an ESP32 or Arduino board. Use a compatible analog-to-digital converter (ADC) to read the sensor data.
Then, use the ESPHome integration in Home Assistant to create a custom sensor that reads the data from the ESP32 and sends it to Home Assistant. This method requires some coding but offers greater control and flexibility.
When connecting Bluetooth sensors, consider the range of the Bluetooth signal. Ensure that your Home Assistant hub is within range of the sensors to maintain a reliable connection. You might need a Bluetooth repeater if the distance is too great.
For wired sensors, pay attention to the wiring diagrams and ensure that you are connecting the sensors correctly. Incorrect wiring can damage the sensors or the controller.
When using ESPHome, take advantage of the configuration options to customize the sensor readings. You can set up filters to smooth out the data and reduce noise.
Test the sensor readings in Home Assistant to ensure that they are accurate and responsive. Monitor the readings over time to identify any issues or inconsistencies.
Creating a Watering Automation Schedule
With your watering system and soil moisture sensors connected, it’s time to create an automation schedule. This schedule will determine when and how long your plants are watered.
Start by creating a simple automation that triggers watering when the soil moisture drops below a certain level. Use the “Numeric state” trigger in Home Assistant to monitor the soil moisture sensor.
Set the “Below” threshold to a value that indicates dry soil. Then, use the “Call service” action to turn on your watering valve.
Add a “Wait for time” action to specify how long the valve should stay on. Finally, add another “Call service” action to turn off the valve, completing the watering cycle.
When creating your automation schedule, consider the specific needs of your plants. Different plants have different watering requirements, so it’s important to tailor the schedule to their individual needs.
Use the “Time pattern” trigger in Home Assistant to schedule watering at specific times of the day. This can be useful for ensuring that your plants are watered during the coolest parts of the day to minimize evaporation.
Consider using the “Condition” feature in Home Assistant to add additional criteria to your automation schedule. For example, you can add a condition that prevents watering if it has rained recently.
Test your automation schedule thoroughly to ensure that it is working as expected. Monitor the soil moisture levels and adjust the schedule as needed to optimize watering.
Adjusting Watering Based on Weather Conditions
To make your watering system even smarter, integrate weather data into your automations. This allows you to adjust watering based on rainfall, temperature, and humidity.
Use the “Weather state” trigger in Home Assistant to check for rain. If rain is detected, skip the watering cycle for that day.
You can also use temperature data to adjust the watering duration. On hotter days, increase the watering time to compensate for increased evaporation.
Conversely, on cooler days, reduce the watering time to avoid overwatering. This dynamic adjustment ensures your plants always receive the optimal amount of water, regardless of the weather.
To integrate weather data, you’ll need to set up a weather integration in Home Assistant. Several options are available, including AccuWeather, OpenWeatherMap, and WeatherAPI.
Use the “Numeric state” trigger to monitor temperature and humidity levels. Set thresholds to trigger adjustments to your watering schedule based on these values.
Consider using the “Forecast” data from your weather integration to anticipate future weather conditions. This allows you to proactively adjust your watering schedule to prepare for upcoming heat waves or dry spells.
Regularly review your weather-based adjustments to ensure that they are effective. Monitor the soil moisture levels and adjust the thresholds as needed to optimize watering.
Setting Up Manual Overrides
While automation is great, sometimes you need to manually control your watering system. Setting up manual overrides allows you to turn on or off the watering valves as needed.
Create a simple switch in Home Assistant that controls the watering valve. Use the “Call service” action to turn the valve on or off when the switch is toggled.
- Add a dashboard card for easy access
- Use a physical button for quick control
- Integrate voice control via Alexa or Google Assistant
- Set a timer for manual watering
- Create a scene for specific watering needs
This manual override gives you complete control over your watering system, allowing you to respond to unexpected conditions or simply give your plants a little extra attention. With Home Assistant garden watering automation, you have total control.
When setting up manual overrides, consider the safety implications. Ensure that you have a way to prevent accidental activation of the watering system.
Use the “Lock” feature in Home Assistant to prevent unauthorized access to your manual override controls. This can be useful for preventing children or pets from accidentally turning on the watering system.
Consider adding a confirmation dialog to your manual override controls. This will require you to confirm your action before the watering system is activated.
Document your manual override controls clearly so that you and other users know how to use them properly. This will help to prevent confusion and ensure that the watering system is used safely and effectively.
Monitoring and Optimizing Your Watering System
Once your automated watering system is up and running, it’s important to monitor its performance. Track soil moisture levels, watering durations, and weather conditions to identify areas for optimization.
Use Home Assistant’s history graph to visualize your sensor data and watering events. Look for patterns and adjust your automation schedule accordingly.
For instance, if you notice that the soil moisture levels are consistently high, reduce the watering duration or frequency. Conversely, if the soil is often dry, increase the watering time or add more frequent watering cycles.
Regularly inspect your watering system for leaks or clogs. Address any issues promptly to ensure efficient water usage and prevent damage to your plants.
Set up alerts in Home Assistant to notify you of any anomalies or issues with your watering system. This can help you to identify problems early and prevent them from escalating.
Use the “Statistics” integration in Home Assistant to track key metrics such as water usage and soil moisture levels over time. This can help you to identify trends and optimize your watering schedule.
Consider using the “Energy” dashboard in Home Assistant to monitor the energy consumption of your watering system. This can help you to identify opportunities to reduce your energy costs.
Regularly review your watering system’s performance and make adjustments as needed to ensure that it is meeting the needs of your plants and conserving water.
Expanding Your Smart Garden
Automated watering is just the beginning of what you can do with a smart garden. Consider adding other sensors and devices to further enhance your garden’s intelligence.
Light sensors can be used to monitor sunlight levels and adjust watering based on the amount of sun your plants are receiving. Temperature and humidity sensors can help you fine-tune your watering schedule to match the specific needs of your plants.
You can even add smart irrigation system controllers that integrate directly with Home Assistant, providing advanced features like zone-specific watering schedules and real-time water usage monitoring. This is a smart irrigation system taken to the next level.
By combining these technologies, you can create a truly intelligent garden that responds to the environment and optimizes water usage for healthy, thriving plants. The possibilities are endless with a Home Assistant garden watering automation.
Consider adding a smart weather station to your garden to gather hyperlocal weather data. This can provide more accurate information for adjusting your watering schedule.
Explore the possibility of integrating smart plant monitors that provide detailed information about the health and growth of your plants. These monitors can track factors such as nutrient levels and leaf temperature.
Think about adding smart lighting to your garden to create a beautiful and functional outdoor space. You can use smart lights to highlight your plants and create a relaxing ambiance.
Don’t forget about pest control. Consider adding smart pest traps or deterrents to protect your plants from unwanted visitors.
Troubleshooting Common Issues
Even with the best planning, you may encounter some issues along the way. Here are some common problems and how to troubleshoot them.
If your soil moisture sensors aren’t reporting data, check the batteries or power supply. Ensure the sensors are properly connected to your controller and that the integration in Home Assistant is configured correctly.
If your watering valves aren’t turning on or off, check the wiring and power supply. Verify that the valves are compatible with your controller and that the automation schedule is configured correctly.
If your plants are still not getting enough water, consider adjusting the soil moisture thresholds or increasing the watering duration. Regularly monitor your system and make adjustments as needed to ensure optimal performance.
If you are experiencing connectivity issues with your sensors or controller, check your Wi-Fi network and ensure that all devices are within range. Consider using a Wi-Fi extender to improve coverage.
If you are having trouble with your Home Assistant configuration, consult the Home Assistant documentation and online forums for assistance. There are many helpful resources available to troubleshoot common issues.
If you suspect that your watering system is leaking, inspect all of the connections and pipes for signs of damage. Repair any leaks promptly to prevent water waste.
If you are experiencing issues with your weather integration, check your API keys and ensure that your location is configured correctly. Also, check the status of the weather service to ensure that it is operational.
Conclusion
Setting up a smart garden with Home Assistant is a rewarding project that can save you time, water, and effort. By automating your watering schedule and integrating sensor data, you can create a self-sufficient, intelligent landscape that responds to the environment and your plants’ needs.
With the right components and a little setup, you can transform your garden into a thriving oasis, all controlled from the palm of your hand. Embrace the power of smart home technology and unlock the full potential of your Home Assistant garden watering automation.
Remember to start small and gradually expand your smart garden as you become more comfortable with the technology. There is no need to implement every feature at once.
Don’t be afraid to experiment and try new things. The possibilities for smart garden automation are endless, so have fun and explore the full potential of your Home Assistant setup.