Home automation is no longer a futuristic dream; it’s a present-day reality accessible to everyone. With tools like Home Assistant, you can transform your home into a smart, responsive environment tailored to your specific needs. This guide focuses on a powerful installation method: Home Assistant Supervised, offering a robust and customizable experience for tech-savvy users.
The Supervised installation provides more control and flexibility compared to other methods. If you’re ready to take your home automation to the next level, keep reading to learn how to install Home Assistant Supervised on your system.
We’ll walk you through each step, from preparing your system to accessing the Home Assistant interface. Get ready to unlock the full potential of local-first smart home automation with this comprehensive tutorial.
Understanding Home Assistant Supervised
Home Assistant Supervised is a specific installation method that runs Home Assistant within a Docker container on a Linux operating system. It provides a fully featured experience, allowing you to manage and customize every aspect of your smart home setup.
Unlike other installation methods like Home Assistant OS or Home Assistant Container, Supervised offers greater control over the underlying operating system. This means you can install additional software, configure network settings, and tweak system parameters to your liking.
One of the key advantages of Home Assistant Supervised is its ability to run alongside other applications on the same machine. This can be particularly useful if you already have a Linux server running other services and want to integrate Home Assistant without dedicating an entire device to it.
The Supervised installation also provides access to add-ons, which are pre-packaged applications that extend the functionality of Home Assistant. These add-ons can include things like MQTT brokers, Node-RED, and various other tools that enhance your home automation capabilities.
It is important to note that the Supervised installation method requires a bit more technical expertise than other methods. You will need to be comfortable working with the command line and have a basic understanding of Linux system administration.

The level of customization offered by the Supervised installation allows for fine-tuning performance and security. You can optimize the system to meet your specific needs and ensure that your smart home is running as efficiently and securely as possible.
Another benefit is the ability to use your own hardware. You are not limited to specific devices or platforms, giving you the freedom to choose the hardware that best suits your budget and requirements.
Home Assistant Supervised also benefits from the large and active Home Assistant community. This community provides ample support, documentation, and resources to help you troubleshoot issues and learn new things.
Prerequisites for Supervised Installation
Before you begin the installation process, it’s essential to ensure your system meets the necessary prerequisites. A compatible operating system and sufficient hardware resources are key to a smooth and successful setup.
Home Assistant Supervised requires a Linux distribution that supports Docker and is compatible with the Home Assistant operating system requirements. Debian and Ubuntu are common choices, but other distributions may also work if they meet the necessary criteria.
Here’s a breakdown of the key prerequisites:
- A supported Linux distribution (Debian, Ubuntu, etc.)
- Docker installed and configured
- Sudo access for the user performing the installation
- A stable internet connection
- Sufficient hardware resources (CPU, RAM, storage)
It’s also important to note that Home Assistant Supervised is designed to run on a dedicated system. While it’s technically possible to run it alongside other applications, it’s generally recommended to avoid doing so to ensure stability and performance.
Regarding hardware, a Raspberry Pi 4 with at least 4GB of RAM is a popular choice for running Home Assistant Supervised. However, you can also use a more powerful server or virtual machine if you have more demanding requirements.
Make sure your chosen Linux distribution is up-to-date with the latest security patches and updates. This will help protect your system from potential vulnerabilities and ensure a more stable and secure Home Assistant installation.
A reliable network connection is also crucial for Home Assistant to communicate with your smart home devices and cloud services. Ensure that your system has a stable and fast internet connection before proceeding with the installation.
Before starting the installation, it’s a good idea to create a backup of your existing system. This will allow you to restore your system to its previous state if something goes wrong during the installation process.
Installing Docker and Dependencies
Docker is the foundation upon which Home Assistant Supervised operates. Installing Docker and its dependencies correctly is a critical step in the installation process.
The exact steps for installing Docker may vary depending on your Linux distribution. Here’s a general outline of the process, along with specific instructions for Debian and Ubuntu:
| Distribution | Command 1 | Command 2 | Command 3 |
|---|---|---|---|
| Debian/Ubuntu | sudo apt update | sudo apt install docker.io | sudo systemctl enable --now docker |
| CentOS/RHEL | sudo yum update | sudo yum install docker | sudo systemctl enable --now docker |
| Fedora | sudo dnf update | sudo dnf install docker | sudo systemctl enable --now docker |
| Other | Consult your distribution’s documentation | Consult your distribution’s documentation | Consult your distribution’s documentation |
After installing Docker, you’ll need to install a few additional dependencies required by Home Assistant Supervised. These dependencies typically include software packages like `jq`, `curl`, and `apt-transport-https`.
On Debian and Ubuntu, you can install these dependencies using the following command: `sudo apt install jq curl apt-transport-https software-properties-common network-manager dbus apparmor`. Make sure to run this command before proceeding to the next step.
It is crucial to ensure that Docker is running and enabled to start on boot. This can be verified using the command `sudo systemctl status docker`.
After installing the dependencies, it is recommended to reboot your system. This ensures that all the changes are applied correctly and that Docker is running smoothly.
If you encounter any issues during the Docker installation process, consult the official Docker documentation for your specific Linux distribution. The Docker documentation provides detailed instructions and troubleshooting tips for various platforms.
Properly configuring Docker is essential for the stability and performance of your Home Assistant Supervised installation. Take the time to ensure that Docker is installed and configured correctly before proceeding to the next step.
Downloading and Installing Home Assistant
With Docker and the necessary dependencies in place, you’re now ready to download and install Home Assistant Supervised. This involves downloading the installation script and running it with the appropriate privileges.
First, download the installation script using the following command: `wget https://raw.githubusercontent.com/home-assistant/supervised-installer/master/installer.sh`. This will download the `installer.sh` script to your current directory.
Next, make the script executable using the command: `chmod +x installer.sh`. This will grant the script the necessary permissions to run on your system.
Finally, run the installation script with sudo privileges using the command: `sudo ./installer.sh`. This will start the Home Assistant Supervised installation process, which may take some time depending on your system’s hardware and internet connection.
The installation script will automatically download and configure the necessary Docker containers for Home Assistant Supervised. It will also set up the systemd services to ensure that Home Assistant starts automatically on boot.
During the installation process, you may be prompted to answer a few questions about your system configuration. Answer these questions carefully, as they can affect the performance and stability of your Home Assistant installation.
It is important to monitor the output of the installation script for any error messages. If you encounter any errors, consult the Home Assistant documentation or community forums for assistance.
After the installation is complete, it is recommended to reboot your system. This will ensure that all the changes are applied correctly and that Home Assistant is running smoothly.
The installation process may take anywhere from 15 minutes to an hour, depending on your system’s hardware and internet connection. Be patient and allow the script to complete its execution.
Configuring Network Settings
Proper network configuration is crucial for Home Assistant to communicate with your devices and be accessible from your network. You’ll need to ensure that Home Assistant is configured with a static IP address and that the necessary ports are open.
The easiest way to configure a static IP address is through your router’s DHCP settings. Look for an option to assign a static IP address to a specific device based on its MAC address.
Here’s how to configure a static IP, open ports, and set up DNS:
- Assign a static IP address to your Home Assistant instance in your router’s DHCP settings.
- Open port 8123 on your firewall to allow access to the Home Assistant web interface.
- Configure your DNS settings to point to a local DNS server or a public DNS server like Google DNS (8.8.8.8).
- Consider setting up a dynamic DNS service if you want to access Home Assistant from outside your local network.
- Ensure that your Home Assistant instance can access the internet to download updates and add-ons.
After configuring your network settings, restart your Home Assistant instance to apply the changes. You should now be able to access Home Assistant from your local network using the static IP address you assigned.
If you are using a firewall, make sure to allow traffic on port 8123. This is the default port that Home Assistant uses for its web interface.
For remote access, consider setting up a VPN server on your router or using a service like DuckDNS. This will allow you to securely access your Home Assistant instance from anywhere in the world.
It is also important to ensure that your Home Assistant instance has a stable and reliable network connection. A wired connection is generally preferred over Wi-Fi for better performance and stability.
Regularly check your network settings to ensure that they are still configured correctly. Changes to your router or network configuration can affect the accessibility of your Home Assistant instance.
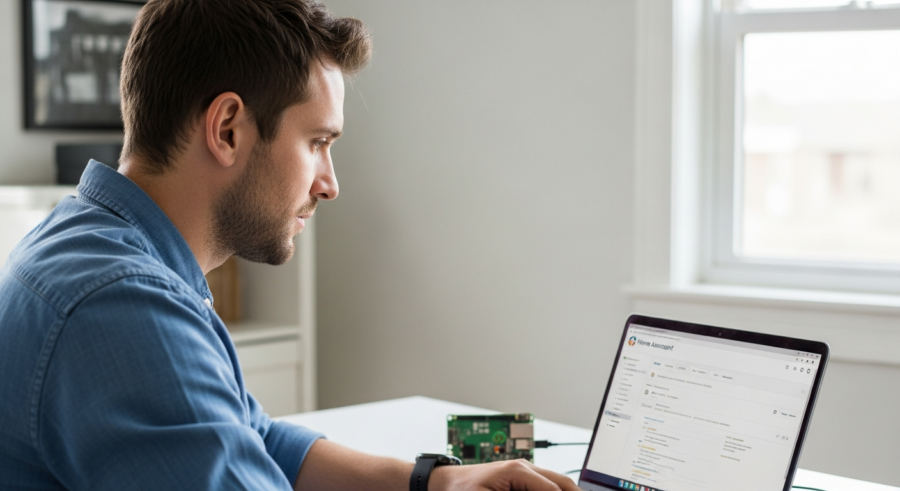
Accessing the Home Assistant Interface
Once the installation is complete and your network settings are configured, you can access the Home Assistant interface through your web browser. This is where you’ll configure your smart home devices and create automations.
To access the Home Assistant interface, open your web browser and navigate to `http://yourhomeassistantip:8123`. Replace `yourhomeassistantip` with the static IP address you assigned to your Home Assistant instance.
The first time you access the interface, you’ll be greeted with a setup wizard that will guide you through the initial configuration process. This includes setting up your user account, configuring your location, and discovering devices on your network.
Follow the on-screen instructions to complete the setup wizard. Once you’ve completed the setup wizard, you’ll be presented with the Home Assistant dashboard, where you can start adding devices, creating automations, and customizing your smart home experience.
If you are unable to access the Home Assistant interface, double-check your network settings and ensure that port 8123 is open on your firewall. Also, verify that your Home Assistant instance is running and accessible from your network.
The Home Assistant interface is designed to be intuitive and user-friendly. However, it may take some time to familiarize yourself with all the features and options available.
The dashboard is the central hub of the Home Assistant interface. From here, you can view the status of your devices, control your lights and appliances, and monitor your home’s environment.
The configuration panel allows you to customize your Home Assistant installation, add new integrations, and configure your user settings. This is where you’ll spend most of your time setting up and customizing your smart home.
Troubleshooting Common Issues
Even with careful planning and execution, you may encounter issues during the installation process. Here are some common problems and their solutions.
First, if the installation script fails to run, double-check that you’ve made it executable using the `chmod +x installer.sh` command. Also, ensure that you’re running the script with sudo privileges using `sudo ./installer.sh`.
Here are some more troubleshooting tips:
- If you can’t access the Home Assistant interface, ensure that port 8123 is open on your firewall.
- If Home Assistant can’t discover your devices, make sure they’re on the same network and that they’re compatible with Home Assistant.
- If you’re experiencing performance issues, try increasing the amount of RAM allocated to your Home Assistant instance.
- Check the Home Assistant logs for error messages that can provide clues about the cause of the problem.
- Consult the Home Assistant community forums for assistance with specific issues.
Remember to consult the Home Assistant documentation and community forums for more detailed troubleshooting information. Don’t hesitate to ask for help if you’re stuck; the Home Assistant community is known for being helpful and supportive.
Another common issue is Docker failing to start. Check the Docker logs for any error messages and try restarting the Docker service.
If you are having trouble with device discovery, make sure that your devices are on the same network as your Home Assistant instance and that they are configured to allow discovery.
Performance issues can often be resolved by increasing the amount of RAM allocated to your Home Assistant instance or by optimizing your configuration.
Always check the Home Assistant logs for error messages. These logs can provide valuable insights into the cause of the problem and help you find a solution.
Updating Home Assistant Supervised
Keeping your Home Assistant installation up to date is essential for security and stability. The Supervised installation method makes updating relatively straightforward.
Home Assistant will notify you when a new version is available. You can then initiate the update process through the Home Assistant web interface.
To update Home Assistant Supervised, follow these steps:
- Log in to your Home Assistant web interface.
- Check for update notifications in the top right corner of the screen.
- Click on the notification to access the update panel.
- Follow the on-screen instructions to initiate the update process.
- Monitor the update process to ensure it completes successfully.
It’s always a good idea to back up your Home Assistant configuration before performing an update. This will allow you to restore your configuration if something goes wrong during the update process.
The update process may take some time, depending on the size of the update and the speed of your internet connection. Be patient and allow the update to complete without interruption.
After the update is complete, it is recommended to restart your Home Assistant instance to ensure that all the changes are applied correctly.
If you encounter any issues during the update process, consult the Home Assistant documentation or community forums for assistance.
Regularly check for updates to ensure that your Home Assistant installation is always running the latest version. This will help protect your system from potential security vulnerabilities and ensure that you have access to the latest features and improvements.
Exploring Add-ons and Integrations
One of the key benefits of Home Assistant is its extensive library of add-ons and integrations. These tools allow you to extend the functionality of Home Assistant and integrate with a wide range of devices and services.
Add-ons are pre-packaged applications that run within the Home Assistant environment. They can include things like MQTT brokers, Node-RED, and various other tools that enhance your home automation capabilities.
Integrations, on the other hand, allow Home Assistant to communicate with specific devices and services. There are integrations available for a vast array of smart home devices, cloud services, and other platforms.
To explore add-ons and integrations, navigate to the “Configuration” panel in the Home Assistant web interface. From there, you can browse the available add-ons and integrations and install the ones that meet your needs.
Some popular add-ons include the Samba share add-on, which allows you to access your Home Assistant configuration files from your computer, and the Let’s Encrypt add-on, which provides free SSL certificates for secure remote access.
There are integrations available for a wide range of smart home devices, including lights, switches, sensors, thermostats, and cameras. You can also integrate with cloud services like Google Assistant, Amazon Alexa, and IFTTT.
Experiment with different add-ons and integrations to find the ones that best suit your needs. The Home Assistant community is a great resource for finding new and interesting add-ons and integrations.
When installing add-ons and integrations, be sure to read the documentation carefully. This will help you understand how to configure and use them correctly.
Securing Your Home Assistant Installation
Security is paramount when setting up a smart home system. You’ll want to take steps to protect your Home Assistant installation from unauthorized access and potential security vulnerabilities.
One of the first things you should do is enable two-factor authentication (2FA) for your Home Assistant user account. This will add an extra layer of security, making it more difficult for unauthorized users to gain access to your system.
Here are some more tips to improve security:
- Enable two-factor authentication (2FA) for your Home Assistant user account.
- Use a strong, unique password for your Home Assistant user account.
- Keep your Home Assistant installation up to date with the latest security patches.
- Use HTTPS to encrypt communication between your web browser and your Home Assistant instance.
- Consider using a VPN to access your Home Assistant instance remotely.
By taking these steps, you can significantly improve the security of your Home Assistant installation. This will help protect your smart home devices and your personal data from potential threats.
It is also important to regularly review your Home Assistant configuration to ensure that there are no unnecessary or insecure settings.
Consider using a firewall to restrict access to your Home Assistant instance. This can help prevent unauthorized users from accessing your system from the internet.
Be careful when installing add-ons and integrations from untrusted sources. Only install add-ons and integrations from reputable developers and sources.
Regularly back up your Home Assistant configuration. This will allow you to restore your system to its previous state if something goes wrong or if your system is compromised.
Conclusion
Installing Home Assistant Supervised provides a powerful and customizable platform for local-first smart home automation. While the installation process may seem daunting at first, following these steps will set you up for success.
With Home Assistant Supervised, you have the flexibility to tailor your smart home experience to your exact needs. Enjoy the power of local control and the endless possibilities of home automation.
Remember to keep your system updated, secure, and backed up. This will ensure that your Home Assistant installation remains stable and reliable for years to come.
Explore the vast library of add-ons and integrations to extend the functionality of your Home Assistant installation. The possibilities are endless!
The Home Assistant community is a great resource for learning new things, troubleshooting issues, and sharing your experiences with others. Don’t hesitate to get involved and contribute to the community.