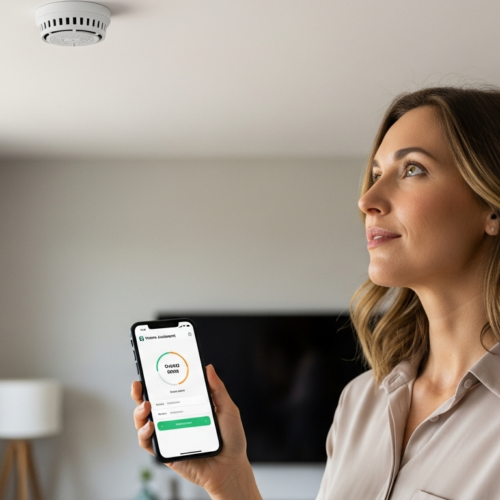
Smart home automation is rapidly becoming a cornerstone of modern living. Integrating your robot vacuums with Home Assistant can significantly streamline your cleaning routine. This not only simplifies your life but also ensures a consistently clean home environment.
Home Assistant acts as the central hub, orchestrating all your smart devices. By connecting your robot vacuums home assistant, you gain centralized control and automation capabilities. This article will guide you through the process of integrating your robot vacuum with Home Assistant, unlocking a new level of convenience and efficiency in your home.
We’ll explore the benefits, discuss how to choose compatible devices, and provide step-by-step instructions. You’ll also learn to set up cleaning schedules, monitor performance, and troubleshoot common issues. Let’s get started on transforming your cleaning routine with the power of smart home automation.
Benefits of Using Robot Vacuums with Home Assistant
Integrating your robot vacuum with Home Assistant offers a multitude of benefits. Centralized control is a major advantage, allowing you to manage all your smart home devices from a single interface. This eliminates the need to switch between multiple apps, simplifying your smart home experience.
One of the most significant advantages is the ability to create custom automation routines. Imagine your robot vacuum starts cleaning automatically after you leave for work. This level of automation saves time and ensures your home is always clean.
Home Assistant also lets you set up advanced scheduling options. You can schedule cleaning sessions based on specific days, times, or even events. This flexibility ensures your vacuum only runs when it’s most convenient for you.
Real-time monitoring is another key benefit, providing insights into your vacuum’s performance. You can track cleaning progress, battery levels, and error messages directly from the Home Assistant dashboard. This allows for proactive maintenance and timely intervention if any issues arise.
Beyond just convenience, Home Assistant integration can also lead to cost savings. By optimizing cleaning schedules and monitoring energy consumption, you can reduce your electricity bills. Furthermore, proactive maintenance can prevent costly repairs down the line.
Another often overlooked benefit is the improved air quality. Robot vacuums equipped with HEPA filters can remove dust, allergens, and other pollutants from your home. Home Assistant can help you track filter usage and remind you to replace them when needed.
The integration also offers enhanced security features. You can monitor the vacuum’s activity and receive alerts if it detects any unusual behavior. This can help you identify potential security breaches or unauthorized access to your home.
Ultimately, integrating your robot vacuum with Home Assistant provides a more holistic and intelligent approach to home cleaning. It’s about more than just automating a task; it’s about creating a smarter, healthier, and more secure living environment. This level of integration elevates your smart home experience to a new level.
Choosing a Compatible Robot Vacuum
Selecting the right robot vacuum is crucial for seamless integration with Home Assistant. Not all robot vacuums are created equal, and compatibility varies across brands and models. You need to ensure the vacuum you choose supports integration with Home Assistant.
Look for vacuums that explicitly mention Home Assistant compatibility in their specifications. Many popular brands, like iRobot, Roborock, and Ecovacs, offer models that work well with Home Assistant. Checking online forums and community discussions can provide valuable insights into real-world experiences.
Consider the features that are important to you, such as mapping capabilities and battery life. Some robot vacuums offer advanced features like multi-floor mapping and virtual no-go zones. Make sure these features are supported within the Home Assistant integration.
Also, think about the level of control you want to have over your vacuum. Do you want to be able to start, stop, and pause cleaning remotely? Some integrations offer more granular control than others, so research accordingly.
Before making a purchase, carefully review the Home Assistant integration documentation for the specific robot vacuum model you’re considering. This documentation will outline the available features and any limitations. It’s also a good idea to check the integration’s issue tracker to see if there are any known bugs or compatibility problems.
Pay attention to the communication protocol used by the robot vacuum. Some vacuums use Wi-Fi, while others use Bluetooth or Zigbee. Ensure that the communication protocol is compatible with your Home Assistant setup. Wi-Fi is generally the most reliable option for Home Assistant integration.
Consider the long-term support and maintenance of the robot vacuum. Will the manufacturer continue to provide firmware updates and support for the device? A vacuum with a strong track record of support is more likely to work reliably with Home Assistant in the future. Look for brands known for their commitment to software updates.
Finally, don’t forget to read user reviews and ratings. These reviews can provide valuable insights into the real-world performance and reliability of the robot vacuum. Look for reviews from users who have specifically integrated the vacuum with Home Assistant. This will give you a better understanding of the integration experience.
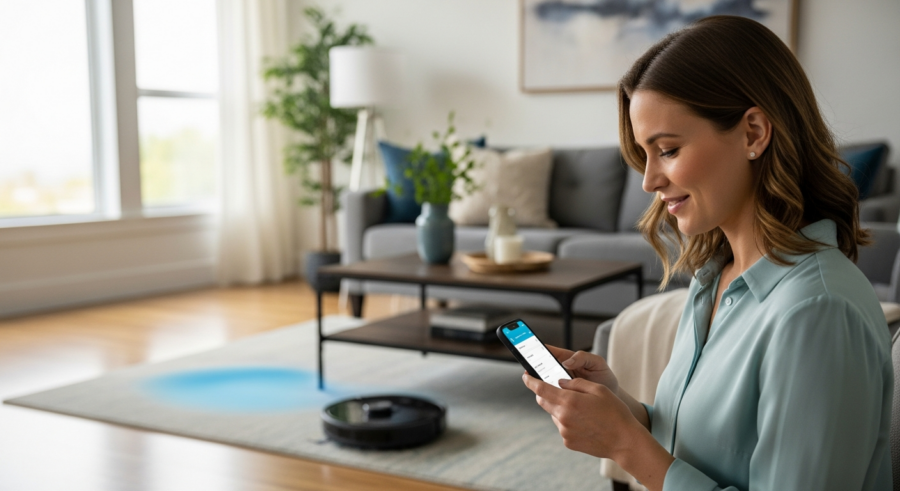
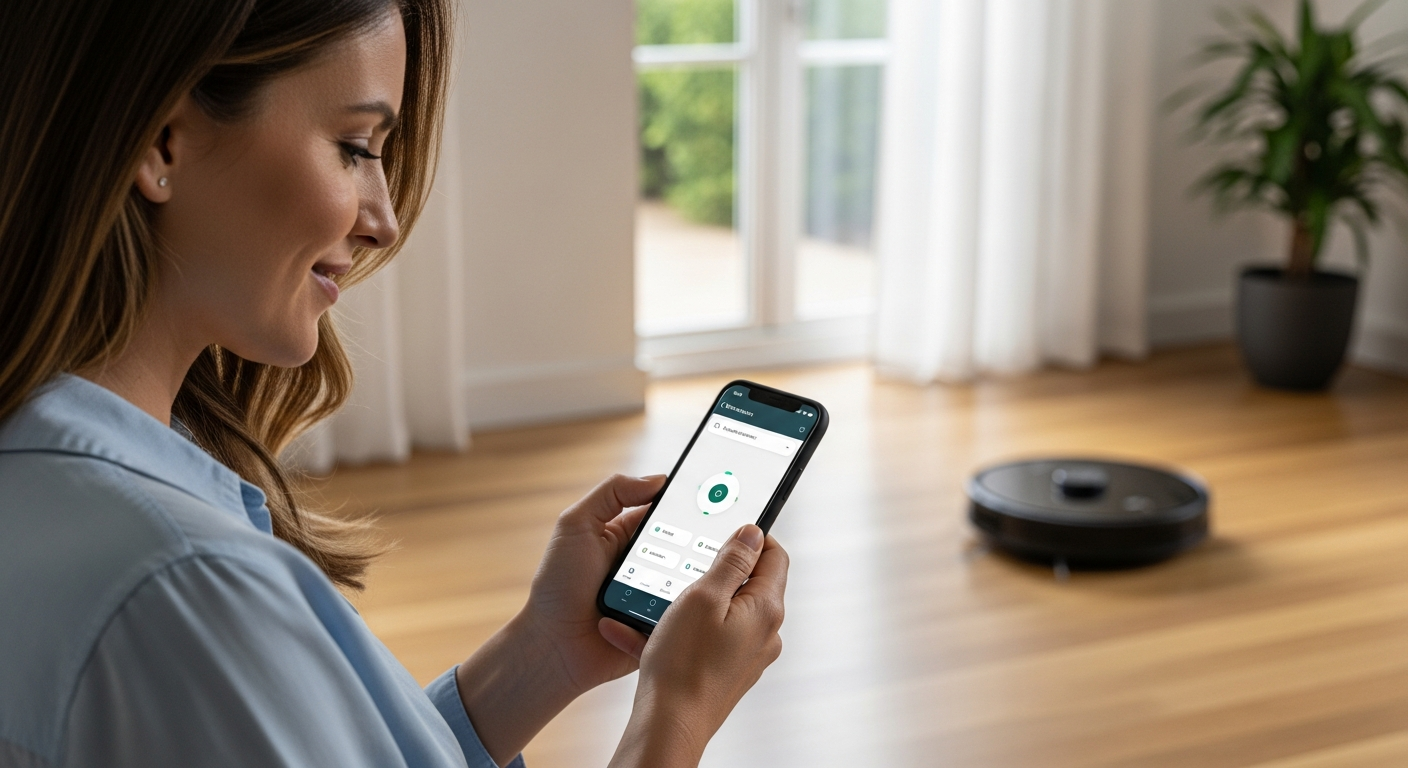
Connecting Your Robot Vacuum to Home Assistant
Once you’ve chosen a compatible robot vacuum, the next step is connecting it to Home Assistant. The process typically involves installing an integration or component within Home Assistant. The exact steps may vary depending on the brand and model of your vacuum.
First, you’ll need to locate the appropriate integration in the Home Assistant add-on store. Search for the brand of your robot vacuum, such as “iRobot” or “Roborock.” Follow the installation instructions provided by the integration, which often involve entering your vacuum’s credentials.
| Robot Vacuum Brand | Integration Name | Setup Steps |
|---|---|---|
| iRobot Roomba | iRobot Roomba | Enter Roomba username and password. |
| Roborock | Xiaomi Miio | Obtain token using Mi Home app. |
| Ecovacs Deebot | Ecovacs | Enter Ecovacs username and password. |
| Neato Botvac | Neato | Enter Neato username and password. |
Some integrations may require you to obtain a token or API key from the vacuum manufacturer. This usually involves logging into your account on the manufacturer’s website and generating the necessary credentials. Be sure to follow the integration’s documentation carefully.
Before starting the integration process, ensure that your robot vacuum is connected to your Wi-Fi network. You’ll also need to have the vacuum’s app installed on your smartphone and be able to control the vacuum through the app. This confirms that the vacuum is properly configured and ready to be integrated with Home Assistant.
When entering your credentials into the Home Assistant integration, double-check that you’re using the correct username and password. Incorrect credentials are a common cause of integration failures. If you’re unsure of your credentials, try resetting your password through the vacuum manufacturer’s website or app.
After installing the integration, you may need to restart Home Assistant for the changes to take effect. Restarting Home Assistant ensures that the integration is properly loaded and initialized. This is especially important after installing new integrations or making configuration changes.
If you encounter any issues during the integration process, consult the Home Assistant logs for error messages. These logs can provide valuable clues about the nature of the problem. You can also search online forums and community discussions for solutions to common integration problems. The Home Assistant community is a valuable resource for troubleshooting integration issues.
Setting Up Cleaning Schedules and Zones
After successfully connecting your robot vacuum to Home Assistant, you can begin setting up cleaning schedules. This allows you to automate your cleaning routine based on your preferences. Home Assistant offers powerful automation capabilities to create complex schedules.
Start by creating a new automation in Home Assistant. You can trigger the automation based on time, day of the week, or even events like your presence at home. For example, you can set the vacuum to start cleaning every weekday at 9 AM, after you’ve left for work.
Many robot vacuums support zoned cleaning, allowing you to specify which areas to clean. This is particularly useful for targeting high-traffic areas or specific rooms. You can define zones within the Home Assistant interface and include them in your cleaning schedules.
Consider creating different schedules for different days of the week. Maybe you want a deep clean on weekends and a quick clean on weekdays. Home Assistant’s flexibility allows you to customize your cleaning routine to perfectly match your lifestyle.
When creating cleaning schedules, think about your daily routines and habits. Are there specific times when you’re typically not home? Schedule your cleaning sessions during those times to minimize disruption. Consider factors like noise levels and foot traffic when planning your schedules.
Take advantage of Home Assistant’s conditional automations to create more intelligent cleaning schedules. For example, you can set the vacuum to only clean if certain conditions are met, such as the presence of dust or the absence of people. This ensures that your vacuum only runs when it’s truly needed.
Experiment with different cleaning zones to optimize your cleaning routine. Identify high-traffic areas that require more frequent cleaning. Create zones for these areas and schedule them to be cleaned more often. This ensures that your home is always clean, even in the busiest areas.
Don’t be afraid to adjust your cleaning schedules and zones as needed. Your cleaning needs may change over time, so it’s important to be flexible. Regularly review your schedules and zones to ensure they’re still meeting your needs. This will help you maintain a consistently clean home with minimal effort.
Advanced Automation Examples
Beyond basic scheduling, Home Assistant enables advanced automation scenarios. You can create automations that trigger the robot vacuum based on various conditions. This allows for a truly smart and responsive cleaning system.
One example is triggering the vacuum when you leave home. Using Home Assistant’s presence detection, the vacuum can start cleaning as soon as the last person leaves. This ensures the vacuum only runs when no one is around, minimizing disruption.
Another advanced automation involves integrating the robot vacuum with other smart home devices. For instance, you can set the vacuum to start cleaning after your smart lights turn off for the night. This creates a seamless and automated experience.
You can even integrate your vacuum with voice assistants like Google Assistant or Amazon Alexa. This allows you to start, stop, or pause cleaning using voice commands. “Hey Google, start the vacuum” becomes a simple and convenient way to manage your cleaning routine.
Consider integrating your robot vacuum with your smart home security system. For example, you can set the vacuum to stop cleaning if the alarm is triggered. This can help prevent the vacuum from interfering with the security system and potentially causing false alarms.
Create automations that respond to specific events, such as spills or messes. Integrate your vacuum with smart sensors that can detect these events. For example, a water leak sensor could trigger the vacuum to clean up the spill immediately. This can help prevent water damage and keep your home clean.
Use Home Assistant’s scripting capabilities to create complex cleaning routines. You can create scripts that combine multiple actions, such as starting the vacuum, adjusting the cleaning mode, and sending notifications. This allows you to create highly customized cleaning routines that meet your specific needs.
Explore the possibilities of integrating your robot vacuum with other smart home platforms. Home Assistant can connect to a wide range of devices and services, allowing you to create truly integrated automations. The possibilities are endless when you combine the power of Home Assistant with your imagination.
Monitoring Robot Vacuum Performance
Home Assistant provides tools to monitor your robot vacuum’s performance. This allows you to track cleaning progress and identify potential issues. Real-time data helps you optimize your cleaning schedules and ensure your vacuum is running efficiently.
Most integrations display key metrics like battery level, cleaning duration, and area covered. You can create custom dashboards in Home Assistant to visualize this data. This provides a quick and easy way to assess your vacuum’s performance at a glance.
- Check battery level regularly
- Monitor cleaning duration
- Track area covered per session
- Review error logs for issues
- Observe cleaning patterns for inefficiencies
Set up notifications to alert you of important events, such as low battery or error messages. This allows you to proactively address any issues before they escalate. Timely notifications ensure your vacuum is always ready to clean.
Create graphs and charts to visualize your robot vacuum’s performance over time. This can help you identify trends and patterns. For example, you might notice that your vacuum’s battery life is decreasing over time. This could indicate that it’s time to replace the battery.
Use Home Assistant’s energy monitoring capabilities to track your robot vacuum’s energy consumption. This can help you identify ways to reduce your energy bills. You might discover that certain cleaning modes consume more energy than others. You can then adjust your cleaning schedules to minimize energy consumption.
Monitor the frequency and duration of error messages. This can help you identify potential maintenance issues. For example, frequent brush errors might indicate that the brushes need to be cleaned or replaced. Addressing these issues promptly can prevent more serious problems.
Compare your robot vacuum’s performance to its specifications. Is it cleaning the area it’s supposed to clean in the time it’s supposed to clean it? If not, there may be an issue with the vacuum’s performance. This could indicate that it’s time to contact the manufacturer for support.
Troubleshooting Robot Vacuum Issues
Despite careful planning, you may encounter issues when integrating your robot vacuum with Home Assistant. Common problems include connectivity issues and integration errors. Troubleshooting these issues requires a systematic approach.
Start by checking the vacuum’s network connection. Ensure it’s connected to your Wi-Fi network and has a strong signal. Restarting the vacuum and your router can often resolve connectivity problems.
If the integration is not working correctly, review the Home Assistant logs for error messages. These logs can provide valuable clues about the nature of the problem. Consult the integration’s documentation for troubleshooting tips.
Sometimes, the issue may be with the vacuum’s firmware. Check for firmware updates and install them if available. Keeping your vacuum’s firmware up to date can resolve compatibility issues and improve performance.
If you’re still having trouble, try removing and reinstalling the Home Assistant integration. This can often resolve issues caused by corrupted files or incorrect configurations. Be sure to follow the integration’s documentation carefully when reinstalling it.
Check the Home Assistant community forums for solutions to common problems. Other users may have encountered the same issues and found solutions. The Home Assistant community is a valuable resource for troubleshooting integration problems.
Ensure that your Home Assistant installation is up to date. Outdated versions of Home Assistant may not be compatible with the latest robot vacuum integrations. Updating Home Assistant can resolve compatibility issues and improve performance.
If all else fails, contact the robot vacuum manufacturer for support. They may be able to provide specific troubleshooting steps for your device. Be sure to have your vacuum’s model number and serial number handy when contacting support.
Maintaining Your Robot Vacuum
Regular maintenance is essential to keep your robot vacuum running smoothly. A well-maintained vacuum will perform better and last longer. Simple maintenance tasks can prevent many common issues.
Empty the dustbin regularly to prevent it from overfilling. A full dustbin can reduce suction power and affect cleaning performance. Check and clean the brushes frequently to remove hair and debris.
Inspect the wheels for any obstructions that may hinder movement. Remove any tangled hair or debris from the wheels. Clean the sensors regularly to ensure accurate navigation.
Replace the filters as recommended by the manufacturer. Clean filters improve air quality and maintain suction power. Proper maintenance ensures your vacuum operates at peak efficiency.
Consider the environment your robot vacuum operates in. Homes with pets or high-shedding individuals may require more frequent maintenance. Adjust your cleaning and maintenance schedule accordingly to prevent issues.
Regularly inspect the charging contacts on both the robot vacuum and the charging dock. Clean any dirt or debris from the contacts to ensure a proper charge. A weak or intermittent connection can lead to charging problems.
If your robot vacuum has a water tank for mopping, clean the tank regularly to prevent mold and mildew growth. Use a mild detergent and warm water to clean the tank. Rinse thoroughly and allow to air dry before refilling.
Store your robot vacuum in a clean, dry place when not in use. Avoid storing it in direct sunlight or extreme temperatures. Proper storage can help extend the lifespan of your vacuum.
Security Considerations
When integrating smart devices with Home Assistant, security should be a primary concern. Robot vacuums collect data about your home’s layout and cleaning habits. Protecting this data is crucial for maintaining your privacy.
Use strong, unique passwords for your Home Assistant account and your robot vacuum. Enable two-factor authentication for added security. Keep your Home Assistant installation and integrations up to date with the latest security patches.
Review the privacy policies of the robot vacuum manufacturer and the Home Assistant integration. Understand what data is being collected and how it’s being used. Consider using a virtual private network (VPN) to encrypt your internet traffic.
Be mindful of the permissions you grant to the Home Assistant integration. Only grant the necessary permissions for the integration to function properly. Regularly audit your smart home devices and integrations to ensure they are secure.
Consider using a separate Wi-Fi network for your smart home devices. This can help isolate your smart home network from your main network, reducing the risk of security breaches. Use a strong password for your smart home Wi-Fi network.
Regularly review the activity logs of your robot vacuum and Home Assistant. Look for any suspicious activity, such as unauthorized access attempts or unusual cleaning patterns. Report any suspicious activity to the manufacturer and the Home Assistant community.
Be cautious about sharing your robot vacuum’s data with third-party services. Only share data with services that you trust and that have strong security practices. Review the privacy policies of these services carefully before sharing your data.
Educate yourself about smart home security best practices. Stay informed about the latest security threats and vulnerabilities. Take steps to protect your smart home devices and your privacy.
Conclusion
Integrating your robot vacuums home assistant is a worthwhile investment. The benefits of centralized control, custom automation, and real-time monitoring are significant. You can transform your cleaning routine and enjoy a consistently clean home with minimal effort.
By following the steps outlined in this article, you can successfully connect your robot vacuum to Home Assistant. You’ll be able to set up cleaning schedules, monitor performance, and troubleshoot common issues. Embrace the power of smart home automation and simplify your life today.
Remember to choose compatible devices, maintain your vacuum regularly, and prioritize security. With a little planning and effort, you can create a truly smart and efficient cleaning system. The integration of robot vacuums with Home Assistant is a game-changer for home automation.
Now you have the knowledge to integrate your robot vacuum with Home Assistant. You can take the first step towards a smarter, cleaner home. Enjoy the convenience and efficiency of a fully automated cleaning routine.
The journey of smart home automation is an ongoing process of learning and adapting. As technology evolves, new possibilities will emerge. Embrace the challenges and enjoy the rewards of a truly connected home.
Consider sharing your experiences and insights with the Home Assistant community. Your contributions can help others learn and grow. Together, we can build a smarter and more connected world.
The future of home cleaning is here. Robot vacuums and Home Assistant are leading the way. Embrace the change and experience the difference.
So, go ahead and integrate your robot vacuum with Home Assistant. You won’t regret it. Welcome to the future of home cleaning!