Imagine stepping into a home that intuitively adapts to your needs, enhancing comfort and saving energy. One simple yet powerful way to achieve this is through smart home automation triggered by your windows. By integrating window sensors with Home Assistant, you can create a system that responds intelligently when windows are opened or closed, optimizing ventilation and energy efficiency.
This article will guide you through the process of setting up a Home Assistant Window Open Automation, allowing you to automate actions based on the state of your windows. You’ll learn how to choose the right window sensor, integrate it into Home Assistant, and create automations that pause HVAC systems, send notifications, and even combine with climate control for optimal comfort.
Ready to transform your home into a smart, energy-efficient haven? Let’s get started with the exciting world of Home Assistant Window Open Automation and discover how it can revolutionize your living space.
Choosing the Right Window Sensor
The foundation of any successful Home Assistant Window Open Automation is a reliable window sensor. When selecting a window sensor, consider factors like connectivity, battery life, and compatibility with Home Assistant.
There are several types of window sensors available, each with its own advantages and disadvantages. Zigbee and Z-Wave sensors offer reliable, low-power connectivity, while Wi-Fi sensors are easy to integrate with existing networks. Wired sensors, while less common, provide a stable connection and eliminate the need for batteries.
For optimal performance, choose a sensor that is specifically designed for window use, as opposed to a generic door/window sensor. These sensors are typically smaller and easier to mount on window frames without interfering with their operation.
Consider the sensor’s battery life, especially if you plan to use multiple sensors throughout your home. Look for sensors that boast long battery life, or consider using rechargeable batteries to minimize waste and maintenance.
Also, think about the physical size and aesthetic of the sensor. You want something that blends in with your window frame and doesn’t look obtrusive. Some sensors are designed to be almost invisible when installed.

Another consideration is the sensor’s range. If you have a large home, you’ll need to ensure that the sensor can communicate reliably with your hub or Wi-Fi network from all window locations. Consider a mesh network for Zigbee or Z-Wave to extend the range if necessary.
Think about the mounting options as well. Some sensors use adhesive, while others require screws. Choose a mounting method that is appropriate for your window frames and that will provide a secure and long-lasting installation.
Finally, read reviews and compare prices before making a purchase. Look for sensors that have a proven track record of reliability and performance. Don’t be afraid to spend a little more for a higher-quality sensor, as it will save you headaches in the long run.
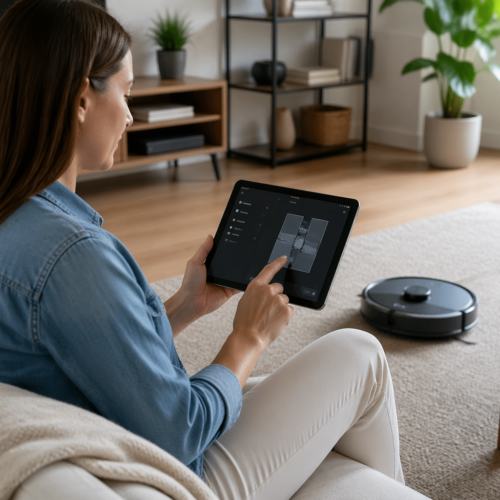
Integrating the Window Sensor into Home Assistant
Once you’ve chosen the right window sensor, the next step is to integrate it into your Home Assistant setup. The integration process will vary depending on the type of sensor you’ve selected.
For Zigbee and Z-Wave sensors, you’ll need a compatible hub, such as a Zigbee or Z-Wave USB dongle connected to your Home Assistant server. Follow the instructions provided by the sensor manufacturer to pair the sensor with your hub.
Wi-Fi sensors typically connect directly to your Wi-Fi network and require you to install a specific integration in Home Assistant. Search for the sensor’s brand or model in the Home Assistant integrations directory and follow the installation instructions.
Once the sensor is integrated, Home Assistant will automatically detect it and create a new entity. You can then rename the entity to something descriptive, such as “Living Room Window Sensor” or “Bedroom Window Sensor,” for easy identification.
After pairing, test the sensor to ensure it’s reporting the correct status to Home Assistant. Open and close the window and verify that the sensor’s state changes accordingly in the Home Assistant interface.
If you’re having trouble integrating the sensor, consult the Home Assistant documentation or the sensor manufacturer’s website for troubleshooting tips. There are also many online forums and communities where you can ask for help.
Make sure your Home Assistant instance is up to date. Older versions may not support the latest sensors or integrations. Regularly updating Home Assistant ensures compatibility and access to the newest features and security patches.
Consider using a static IP address for your Home Assistant server. This can prevent issues with network connectivity and ensure that your sensors can always communicate with Home Assistant reliably. You can configure a static IP address in your router’s settings.
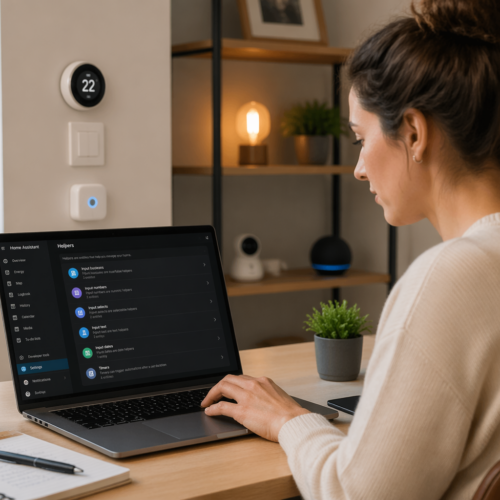
Setting Up Window Open/Close Automations
Now that your window sensor is integrated into Home Assistant, you can start creating automations that respond to its state. Automations in Home Assistant are triggered by events, conditions, and actions.
In this case, the trigger will be the window sensor changing its state from “closed” to “open” or vice versa. You can then define conditions that must be met for the automation to run, such as the time of day or the current temperature.
| Automation Trigger | Condition (Optional) | Action |
|---|---|---|
| Window sensor changes to “open” | Time is between 7 AM and 7 PM | Turn off the air conditioning in the room |
| Window sensor changes to “closed” | Time is between 7 AM and 7 PM | Turn on the air conditioning in the room |
| Window sensor changes to “open” | Outside temperature is below 68°F | Send a notification reminding to close the window at night |
| Window sensor changes to “open” | N/A | Increase the fan speed in the room to improve ventilation |
Finally, you can define the actions that will be performed when the automation is triggered and the conditions are met. These actions can include turning off the HVAC system, sending a notification, or adjusting the fan speed.
When creating automations, start with simple scenarios and gradually add complexity as you become more comfortable. This will help you to avoid errors and make it easier to troubleshoot any issues that arise.
Use descriptive names for your automations so you can easily identify them later. For example, instead of “Automation 1,” name it “Turn off AC when Living Room Window Opens.” This makes it much easier to manage and modify your automations over time.
Test your automations thoroughly after creating them to ensure they are working as expected. Open and close the window and verify that the correct actions are being performed. This will help you to catch any errors or unexpected behavior early on.
Consider using the Home Assistant automation editor’s visual interface for creating automations. It can simplify the process and make it easier to understand the flow of your automations. The visual editor is especially helpful for complex automations with multiple triggers, conditions, and actions.
Pausing HVAC Systems When Windows Open
One of the most common and energy-saving applications of Home Assistant Window Open Automation is to pause your HVAC system when a window is opened. This prevents your heating or cooling system from working against the open window, wasting energy and increasing your utility bills.
To set up this automation, use the window sensor’s “open” state as the trigger and the HVAC system’s “on” state as a condition. The action will be to turn off the HVAC system.
You can also add a delay to the automation to prevent it from triggering immediately when the window is opened. This allows for brief periods of ventilation without unnecessarily turning off the HVAC system.
For example, you can set a 5-minute delay, so the HVAC system only turns off if the window remains open for at least 5 minutes. Similarly, you can automate the HVAC system to turn back on when the window is closed, ensuring that your home remains comfortable.
Consider adding a condition based on the outside temperature. If the outside temperature is comfortable, you might want to disable the automation altogether and simply rely on natural ventilation.
You can also use different delays for different windows. For example, you might want a shorter delay for windows in rooms that are frequently occupied and a longer delay for windows in less frequently used rooms.
Think about integrating this automation with your smart thermostat. You can set the thermostat to a more energy-efficient mode when the windows are open and then automatically return it to its normal setting when the windows are closed.
Regularly review and adjust your automation settings to optimize their performance. As your needs and preferences change, you may need to tweak the delays, conditions, or actions to ensure that your system is working as efficiently as possible.
Creating Notifications for Open Windows
Another useful application of Home Assistant Window Open Automation is to create notifications that alert you when a window has been left open. This can be particularly helpful if you have children or pets who may open windows without realizing it, or if you simply tend to forget to close them.
To set up this automation, use the window sensor’s “open” state as the trigger and add a condition that checks the time of day. For example, you can set the automation to only send notifications if the window is open after 10 PM or before 6 AM.
- Send a push notification to your phone
- Send a message to your smart speaker
- Display a message on your smart display
- Send an email to your inbox
- Trigger an audible alert on your home security system
You can also customize the notification message to include the name of the window that is open and the duration it has been open. This will provide you with valuable information, allowing you to quickly address the issue.
Consider adding a condition based on the weather forecast. If rain is expected, you might want to send a more urgent notification to remind you to close the windows before the rain starts.
You can also customize the notification sound or vibration pattern to make it more noticeable. This can be especially helpful if you tend to miss notifications or if you are in a noisy environment.
Think about creating different notification levels based on the severity of the situation. For example, you might send a low-priority notification if a window has been open for a short period of time and a high-priority notification if it has been open for a longer period of time or if rain is expected.
Avoid sending too many notifications, as this can become annoying and lead you to ignore them. Carefully consider the conditions and actions of your automations to ensure that you are only receiving notifications when they are truly necessary.
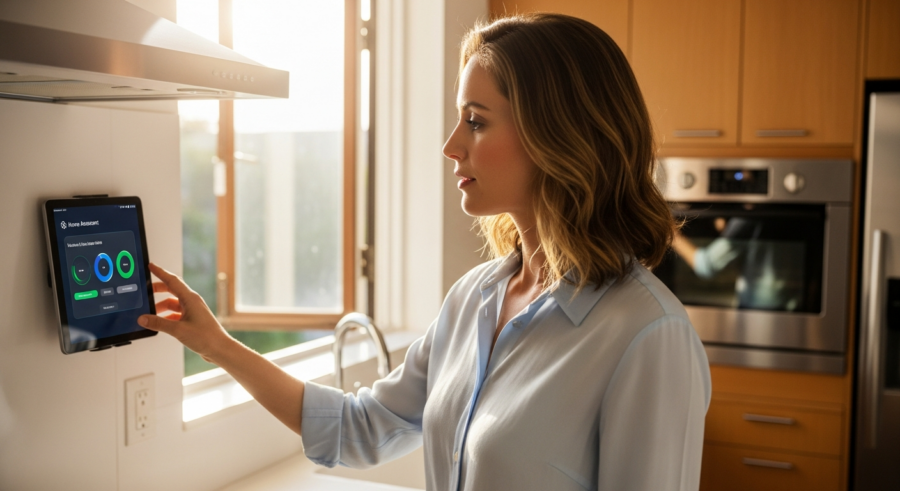
Combining Window Automation with Climate Control
For even greater control and energy efficiency, you can combine Home Assistant Window Open Automation with your existing climate control system. This allows you to create a more sophisticated system that automatically adjusts the temperature based on the state of your windows and other environmental factors.
For example, you can set up an automation that automatically lowers the thermostat when a window is opened and raises it again when the window is closed. This will help to maintain a consistent temperature in your home while minimizing energy waste.
You can also integrate window automation with your smart thermostat’s “away” mode. When you leave your home and set the thermostat to “away,” Home Assistant can automatically close all open windows and then engage the climate controls.
Another advanced scenario involves using weather data to predict when windows should be opened or closed. For instance, if the forecast calls for a cool night, Home Assistant could automatically open windows in the evening to naturally cool your home, reducing the need for air conditioning.
Consider using a PID (Proportional-Integral-Derivative) controller to fine-tune your climate control system. This can help to maintain a more stable temperature and prevent overshooting or undershooting your target temperature.
You can also integrate window automation with your smart fan system. For example, you might want to increase the fan speed when a window is opened to improve ventilation and circulate fresh air throughout the room.
Think about using machine learning to predict when windows are likely to be opened or closed based on your historical behavior. This can help to optimize your climate control system and further reduce energy waste.
Regularly monitor your energy consumption and adjust your automation settings as needed to optimize their performance. You can use the Home Assistant energy dashboard to track your energy usage and identify areas where you can save energy.
Advanced Automation Scenarios
Beyond the basic setups, you can explore more advanced scenarios to tailor your Home Assistant Window Open Automation to your specific needs. One such scenario is integrating window sensors with your lighting system.
You can create an automation that automatically turns on the lights in a room when a window is opened during the evening hours. This provides added visibility and safety, especially in areas like hallways or stairwells.
Another advanced scenario is to use window sensors to control motorized blinds or shades. You can set up an automation that automatically closes the blinds when a window is opened during the day to block out sunlight and reduce heat gain.
Conversely, you can automatically open the blinds when a window is closed to let in natural light. You could also incorporate air quality sensors into your automations, triggering window openings when indoor air quality drops below a certain threshold.
Integrate with a security system to trigger alarms if a window is opened unexpectedly during specific hours. This can enhance home security and provide peace of mind.
Use weather data to proactively manage window positions. For example, close windows automatically before a predicted storm or high wind event.
Consider integrating with voice assistants (like Alexa or Google Assistant) to allow voice control over window-related automations. This allows for hands-free operation and greater convenience.
Create a “vacation mode” that simulates occupancy by randomly opening and closing windows at different times of the day. This can deter potential burglars and make your home appear lived-in even when you’re away.
Troubleshooting Common Issues
While setting up Home Assistant Window Open Automation is generally straightforward, you may encounter some common issues. One common problem is unreliable sensor readings.
This can be caused by weak wireless signals, low battery levels, or physical obstructions. To troubleshoot this issue, try moving the sensor closer to the hub, replacing the battery, or removing any obstacles that may be interfering with the signal.
Another common issue is automations that don’t trigger as expected. This can be caused by incorrect trigger configurations, conflicting conditions, or errors in the automation code.
To troubleshoot this issue, carefully review the automation settings, check for any conflicting conditions, and examine the Home Assistant logs for any error messages. You can also use the Home Assistant automation debugger to step through the automation and identify the source of the problem.
Check the Home Assistant logs for clues about why an automation isn’t working. The logs often contain detailed information about errors or unexpected behavior.
Ensure that all devices (sensors, hubs, etc.) are running the latest firmware. Outdated firmware can sometimes cause compatibility issues or other problems.
Double-check the entity IDs used in your automations. A typo in an entity ID can prevent the automation from working correctly.
If you’re using Zigbee or Z-Wave, try re-pairing the sensor with the hub. This can sometimes resolve connectivity issues.
Tips for Optimizing Energy Efficiency
Home Assistant Window Open Automation can significantly improve your home’s energy efficiency, but there are additional steps you can take to maximize its impact. One important tip is to properly insulate your windows.
This will help to prevent heat loss in the winter and heat gain in the summer, reducing the load on your HVAC system. Consider using weather stripping, caulk, or window film to seal any gaps or cracks around your windows.
Another tip is to use energy-efficient window coverings, such as blinds, shades, or curtains. These coverings can help to block out sunlight and reduce heat gain during the day, as well as provide insulation at night.
You can also combine window automation with other energy-saving measures, such as using smart thermostats, LED lighting, and energy-efficient appliances. By implementing a comprehensive energy management strategy, you can significantly reduce your energy consumption and lower your utility bills.
Consider using double-paned or triple-paned windows for improved insulation. While this is a more expensive option, it can significantly reduce heat loss and gain, especially in older homes.
Plant trees or shrubs strategically around your home to provide shade during the summer months. This can help to reduce heat gain and lower your air conditioning bills.
Regularly clean your HVAC system’s air filters to ensure that it is running efficiently. Dirty air filters can restrict airflow and increase energy consumption.
Consider using a whole-house fan to quickly cool your home during the evening hours. This can be a more energy-efficient alternative to air conditioning, especially in climates with cool nights.
Conclusion
Home Assistant Window Open Automation is a powerful tool for enhancing comfort, improving energy efficiency, and creating a smarter home. By integrating window sensors with Home Assistant, you can create a system that intelligently responds to the state of your windows, optimizing ventilation and minimizing energy waste.
From pausing HVAC systems to sending notifications and combining with climate control, the possibilities are endless. Start experimenting with Home Assistant Window Open Automation today and discover the benefits of a truly smart and responsive home.