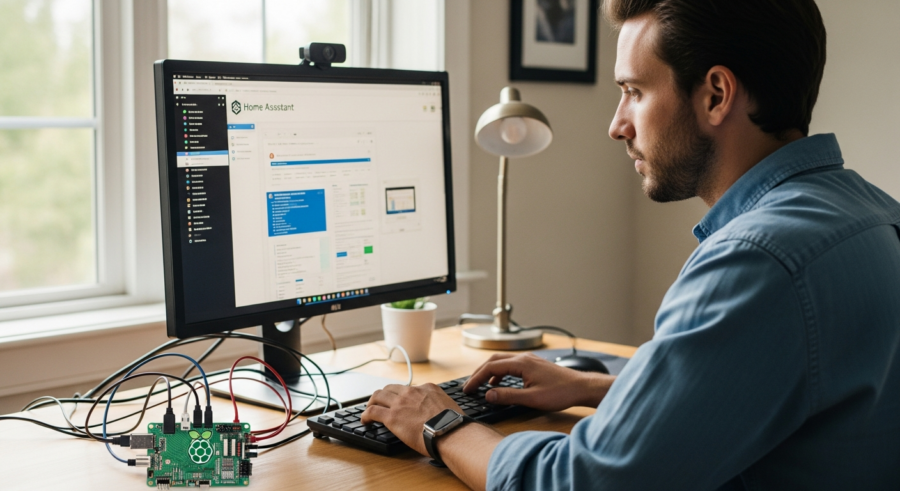
Home automation is becoming increasingly popular, and Home Assistant is a fantastic open-source platform to manage your smart home. However, accessing your Home Assistant instance remotely can be tricky. This is where DuckDNS comes in, providing a simple and free solution for dynamic DNS.
In this article, I’ll guide you through the process of setting up DuckDNS with Home Assistant, enabling you to control your smart home from anywhere in the world. We’ll cover everything from creating a DuckDNS account to securing your connection with HTTPS, ensuring a safe and reliable remote access experience.
By the end of this guide, you’ll have a fully functional setup, allowing you to monitor and control your lights, thermostats, and other smart devices remotely. This will significantly enhance the convenience and functionality of your Home Assistant setup, giving you peace of mind knowing you can always check in on your home.
Understanding DuckDNS and Dynamic DNS
Before we dive into the setup, it’s important to understand what DuckDNS and dynamic DNS are and why they’re necessary for remote access. Most home internet connections have a dynamic IP address, meaning it can change periodically.
This poses a problem for remote access because you can’t rely on a fixed IP address to connect to your Home Assistant instance. Dynamic DNS services like DuckDNS solve this issue by providing a stable hostname that automatically updates to point to your current IP address.
DuckDNS is a popular choice because it’s free, easy to set up, and integrates well with Home Assistant. It provides a subdomain under duckdns.org, which you can use to access your Home Assistant instance remotely, without having to remember or constantly update your IP address.
Without a service like DuckDNS, you’d have to manually check your IP address and update your Home Assistant configuration every time it changes, which is not practical. DuckDNS automates this process, ensuring that your remote access always works, regardless of your IP address.
Dynamic DNS is crucial for anyone who wants to access services hosted on their home network from the outside world. This is especially true for those with dynamic IP addresses assigned by their internet service provider (ISP). Imagine trying to access your security cameras while on vacation, only to find that your IP address has changed and you can’t connect.

DuckDNS simplifies this process by acting as a translator between your ever-changing IP address and a consistent, easy-to-remember domain name. Think of it as a constantly updating phone book that always has the correct number for your home network. This eliminates the frustration of constantly updating your connection details.
The beauty of DuckDNS lies in its simplicity and ease of integration with platforms like Home Assistant. Unlike some other dynamic DNS services, DuckDNS doesn’t require complex configurations or technical expertise. This makes it an ideal choice for users of all skill levels who want to take control of their remote access.
Furthermore, the fact that DuckDNS is free makes it an incredibly attractive option for home automation enthusiasts. You can enjoy the benefits of remote access without incurring any additional costs. This allows you to allocate your budget to other smart home devices and enhancements.
In essence, DuckDNS bridges the gap between your dynamic IP address and the need for a stable, accessible endpoint for your Home Assistant instance. This ensures that you can always stay connected to your smart home, no matter where you are or how often your IP address changes.
Consider the scenario where you want to integrate your smart home with voice assistants like Google Assistant or Amazon Alexa. These integrations often require a stable external address for Home Assistant to communicate with the cloud services. DuckDNS provides that stability, enabling seamless voice control of your smart home devices from anywhere.
Another important aspect is the privacy that DuckDNS provides. By using your own domain name, you are not relying on a third-party service to manage your remote access. This gives you more control over your data and ensures that your smart home activities are not being tracked or monitored by external entities.
Creating a DuckDNS Account
The first step in setting up DuckDNS with Home Assistant is to create a DuckDNS account. This is a simple process that only takes a few minutes.
Go to the DuckDNS website (www.duckdns.org) and sign in using one of the available authentication methods, such as Google, GitHub, or Reddit. Once you’re logged in, you’ll be able to create your DuckDNS domain.
Choose a subdomain that you like and that is available, then enter it in the “Domain” field and click “Add Domain”. Make sure to write down the domain name you choose, as you’ll need it later when configuring Home Assistant.
On the DuckDNS website, you’ll also find your token, which is a unique identifier for your account. Keep this token safe and secure, as it’s required for Home Assistant to update your IP address automatically. Don’t share your token with anyone.
With your DuckDNS account created and your domain name and token noted, you’re ready to move on to the next step: configuring DuckDNS in Home Assistant. This involves installing the DuckDNS add-on and configuring it with your domain and token.
When choosing your subdomain, consider something that is easy to remember and type. A shorter, more memorable domain will make it easier to access your Home Assistant instance on the go. You can also use a combination of letters and numbers to make your subdomain more unique.
The authentication methods offered by DuckDNS provide a convenient way to sign up without having to create a new account and password. Using your existing Google, GitHub, or Reddit account streamlines the process and reduces the number of credentials you need to manage. This is a welcome convenience for many users.
It’s crucial to understand the importance of your DuckDNS token. This token acts as a key that allows Home Assistant to update your IP address with DuckDNS. If someone gains access to your token, they could potentially redirect your domain to a different IP address, compromising your remote access. Therefore, treat your token with the utmost care.
Consider storing your DuckDNS token in a secure password manager to prevent accidental exposure. A password manager can also help you generate strong, unique passwords for all your online accounts, further enhancing your overall security posture. This is a best practice for managing sensitive information.
Before proceeding to the next step, double-check that you have correctly noted your DuckDNS domain name and token. A simple typo can prevent your remote access from working properly. Taking a moment to verify this information will save you time and frustration later on.
The DuckDNS website provides a clear and intuitive interface for managing your domains and tokens. You can easily add, remove, or modify your domains as needed. This flexibility allows you to adapt your remote access setup to your evolving needs.
Remember that DuckDNS is a free service, so it’s important to use it responsibly and respect the terms of service. Avoid using DuckDNS for any illegal or unethical activities. By being a responsible user, you contribute to the sustainability of this valuable service for the entire community.
Once you have created your DuckDNS account, consider exploring the other features offered by the DuckDNS website. You may find additional tools and resources that can further enhance your remote access experience. The DuckDNS website is a valuable resource for learning more about dynamic DNS and how it works.
Configuring DuckDNS in Home Assistant
Now that you have a DuckDNS account, the next step is to configure it within Home Assistant. This involves installing the DuckDNS add-on and providing your domain and token.
First, navigate to the Home Assistant Supervisor panel, then go to the Add-on Store. Search for “DuckDNS” and click on the DuckDNS add-on to install it.
| Configuration Option | Description | Example Value |
|---|---|---|
| domains | Your DuckDNS domain(s) | yourdomain.duckdns.org |
| token | Your DuckDNS token | xxxxxxxx-xxxx-xxxx-xxxx-xxxxxxxxxxxx |
| accept_terms | Accept DuckDNS terms of service | true |
| aliases | Optional aliases for your domain | {} |
After installing the add-on, go to the “Configuration” tab and enter your DuckDNS domain and token in the appropriate fields. Also, make sure to set “accept_terms” to “true” to accept the DuckDNS terms of service.
Finally, start the DuckDNS add-on and enable the “Start on boot” option to ensure it automatically starts whenever your Home Assistant instance restarts. With the DuckDNS add-on running, it will automatically update your DuckDNS domain with your current IP address.
The Home Assistant Supervisor panel is your central hub for managing add-ons and system settings. Familiarizing yourself with the Supervisor panel is essential for effectively managing your Home Assistant instance. It provides a user-friendly interface for installing, configuring, and updating add-ons.
The Add-on Store is a treasure trove of useful add-ons that extend the functionality of Home Assistant. From integrations with various smart home devices to tools for system monitoring and backup, the Add-on Store has something for everyone. Take some time to explore the Add-on Store and discover new ways to enhance your Home Assistant experience.
When configuring the DuckDNS add-on, pay close attention to the “domains” and “token” fields. Entering the wrong information will prevent the add-on from working correctly. Double-check your entries to ensure accuracy.
The “accept_terms” option is a crucial step in the configuration process. By setting this option to “true,” you acknowledge that you have read and agree to the DuckDNS terms of service. Failing to accept the terms of service will prevent the add-on from functioning.
Enabling the “Start on boot” option is highly recommended. This ensures that the DuckDNS add-on automatically starts whenever your Home Assistant instance restarts. This prevents you from having to manually start the add-on each time, ensuring continuous remote access.
After starting the DuckDNS add-on, monitor the add-on’s logs to ensure that it is running correctly. The logs will provide valuable information about the add-on’s status and any errors that may occur. Reviewing the logs regularly can help you identify and resolve issues quickly.
The DuckDNS add-on uses a cron job to periodically update your IP address with DuckDNS. By default, the cron job runs every few minutes. You can adjust the frequency of the cron job by modifying the add-on’s configuration. However, it’s generally recommended to leave the default setting unless you have a specific reason to change it.
If you have multiple DuckDNS domains, you can specify them in the “domains” field as a comma-separated list. This allows you to use the same DuckDNS add-on to update multiple domains. This is a convenient way to manage multiple remote access points.
Setting Up Port Forwarding on Your Router
With DuckDNS configured in Home Assistant, the next step is to set up port forwarding on your router. This allows external traffic to reach your Home Assistant instance.
The process for setting up port forwarding varies depending on your router model, but the general steps are the same. You’ll need to access your router’s configuration page, usually by typing your router’s IP address into a web browser.
Once you’re logged in to your router’s configuration page, look for a section labeled “Port Forwarding,” “NAT,” or something similar. Create a new port forwarding rule that forwards external port 8123 (or any other port you choose) to the internal IP address of your Home Assistant instance on port 8123.
It’s also recommended to forward port 443 to your Home Assistant instance if you plan to use HTTPS for secure remote access. This will allow you to access your Home Assistant instance using the secure HTTPS protocol.
Make sure to save the port forwarding rule and restart your router for the changes to take effect. With port forwarding set up, external traffic to your DuckDNS domain on port 8123 will be directed to your Home Assistant instance.
Finding your router’s IP address is usually as simple as typing “ipconfig” in your command prompt (Windows) or “ifconfig” in your terminal (macOS/Linux). Look for the “Default Gateway” address, which is typically your router’s IP.
The username and password for your router’s configuration page are often printed on a sticker on the router itself. If you’ve changed them and forgotten them, you may need to reset your router to its factory settings. Refer to your router’s manual for instructions on how to do this.
When creating a port forwarding rule, ensure that you specify the correct internal IP address of your Home Assistant instance. This is the IP address that your Home Assistant instance is using on your local network. You can find this IP address in your Home Assistant settings.
It’s generally recommended to use a static IP address for your Home Assistant instance to prevent its IP address from changing. You can configure a static IP address in your router’s settings or in your Home Assistant operating system.
Forwarding port 443 is essential for enabling HTTPS. This allows you to access your Home Assistant instance using a secure, encrypted connection. Without port 443 forwarding, your connection will be unencrypted and vulnerable to eavesdropping.
Some routers may require you to specify the protocol (TCP or UDP) for your port forwarding rules. For Home Assistant, you typically need to use the TCP protocol. Consult your router’s manual for more information.
After saving your port forwarding rules, test them to ensure that they are working correctly. You can use an online port checker tool to verify that port 8123 and 443 are open and accessible from the internet. This will confirm that your port forwarding rules are properly configured.
Be aware of the security implications of port forwarding. Opening ports on your router can potentially expose your Home Assistant instance to security vulnerabilities. It’s important to keep your Home Assistant instance and your router’s firmware up to date with the latest security patches.
Testing Your Remote Access
After setting up DuckDNS and port forwarding, it’s time to test your remote access to Home Assistant. This ensures that everything is configured correctly and that you can access your Home Assistant instance from outside your local network.
The easiest way to test your remote access is to use a device that is not connected to your local Wi-Fi network, such as your mobile phone using cellular data. Open a web browser on your phone and enter your DuckDNS domain followed by the port number (e.g., yourdomain.duckdns.org:8123).
If everything is configured correctly, you should see your Home Assistant login page. If you can access your Home Assistant instance, congratulations, you’ve successfully set up remote access using DuckDNS and port forwarding.
If you’re unable to access your Home Assistant instance, double-check your DuckDNS configuration, port forwarding rules, and router settings. Make sure that the DuckDNS add-on is running in Home Assistant and that your router is forwarding traffic to the correct IP address and port.
Before testing, ensure that your mobile phone’s Wi-Fi is completely disabled. This guarantees that you are accessing your Home Assistant instance through your cellular data connection, simulating a remote access scenario.
If you’re using a custom port other than 8123, make sure to include that port number in the URL when testing your remote access. For example, if you’re using port 8888, the URL would be yourdomain.duckdns.org:8888.
If you’re still unable to access your Home Assistant instance, try clearing your browser’s cache and cookies. Sometimes, cached data can interfere with the connection and prevent you from accessing the login page.
Another troubleshooting step is to try accessing your Home Assistant instance from a different device or network. This can help you isolate the problem and determine whether it’s related to your device, network, or Home Assistant configuration.
Check your Home Assistant logs for any error messages related to remote access. The logs can provide valuable clues about what’s going wrong and help you identify the root cause of the problem.
If you’ve recently made any changes to your Home Assistant configuration or router settings, try reverting those changes to see if they are causing the issue. Sometimes, a simple configuration error can prevent remote access from working properly.
Consider using a port scanning tool to verify that port 8123 (or your custom port) is open and accessible from the internet. This can help you confirm that your port forwarding rules are correctly configured.
If you’ve tried all of the above steps and you’re still unable to access your Home Assistant instance remotely, consider seeking help from the Home Assistant community. The community forums and online chat channels are a great resource for troubleshooting and getting assistance from experienced users.
Securing Your Home Assistant with HTTPS
While remote access is convenient, it’s important to secure your Home Assistant instance with HTTPS to protect your data and prevent unauthorized access. HTTPS encrypts the communication between your browser and your Home Assistant instance, making it more difficult for attackers to intercept your data.
To enable HTTPS, you’ll need to obtain an SSL certificate. Let’s Encrypt is a free and automated certificate authority that provides SSL certificates for free.
- Install the Let’s Encrypt add-on in Home Assistant
- Configure the add-on with your DuckDNS domain
- Set up the required port forwarding (port 80 and 443)
- Run the add-on to obtain the SSL certificate
- Configure Home Assistant to use the SSL certificate
Once you have an SSL certificate, you’ll need to configure Home Assistant to use it. This involves adding a few lines to your Home Assistant configuration file (configuration.yaml) to specify the location of your SSL certificate and private key.
After configuring Home Assistant to use the SSL certificate, restart your Home Assistant instance for the changes to take effect. You can then access your Home Assistant instance using HTTPS by entering your DuckDNS domain with “https://” in front (e.g., https://yourdomain.duckdns.org:8123).
HTTPS, or Hypertext Transfer Protocol Secure, is a critical security protocol for protecting your online communications. It ensures that data transmitted between your browser and the server is encrypted, preventing eavesdropping and tampering.
Let’s Encrypt simplifies the process of obtaining and managing SSL certificates. It’s a free, automated, and open certificate authority that is trusted by major web browsers. This makes it an ideal choice for securing your Home Assistant instance.
The Let’s Encrypt add-on in Home Assistant automates the process of obtaining and renewing SSL certificates. It handles the complexities of certificate management, making it easy for you to secure your Home Assistant instance with HTTPS.
Port 80 is used for HTTP traffic, while port 443 is used for HTTPS traffic. Forwarding both ports is necessary for the Let’s Encrypt add-on to verify your domain and issue an SSL certificate.
The configuration.yaml file is the main configuration file for Home Assistant. It contains settings for various aspects of your Home Assistant instance, including the SSL certificate configuration.
When configuring Home Assistant to use the SSL certificate, you’ll need to specify the paths to the certificate file (fullchain.pem) and the private key file (privkey.pem). These files are generated by the Let’s Encrypt add-on.
After restarting Home Assistant, verify that you can access your Home Assistant instance using HTTPS. Look for the padlock icon in your browser’s address bar, which indicates that the connection is secure.
It’s important to renew your SSL certificate regularly to ensure that it remains valid. The Let’s Encrypt add-on automatically renews your certificate before it expires. However, it’s a good practice to check the add-on’s logs periodically to ensure that the renewal process is working correctly.
By securing your Home Assistant instance with HTTPS, you protect your data and prevent unauthorized access. This is especially important if you’re accessing your Home Assistant instance from a public network or if you’re transmitting sensitive information, such as passwords or API keys.
Troubleshooting Common Issues
Setting up DuckDNS and remote access can sometimes be challenging, and you may encounter issues along the way. Here are some common problems and their solutions.
If your DuckDNS domain is not updating with your current IP address, make sure that the DuckDNS add-on is running in Home Assistant and that it’s configured correctly with your domain and token. Also, check your Home Assistant logs for any errors related to DuckDNS.
If you’re unable to access your Home Assistant instance remotely, double-check your port forwarding rules and router settings. Make sure that the correct ports are being forwarded to the correct IP address and port of your Home Assistant instance.
If you’re having issues with HTTPS, ensure that you have a valid SSL certificate and that Home Assistant is configured to use it correctly. Check your Home Assistant logs for any SSL-related errors.
Another common issue is DNS caching, which can cause your browser to use an old IP address for your DuckDNS domain. To resolve this, try clearing your browser’s cache or flushing your DNS cache on your computer.
If the DuckDNS add-on is not running, check the Home Assistant logs for any error messages that might indicate why it’s failing to start. Common causes include incorrect configuration settings, network connectivity issues, or conflicts with other add-ons.
If your port forwarding rules are not working, verify that your router’s firewall is not blocking the incoming traffic. Some routers have built-in firewalls that may need to be configured to allow access to your Home Assistant instance.
If you’re experiencing intermittent connectivity issues, check your internet connection for stability. A flaky internet connection can cause your DuckDNS domain to become temporarily unavailable, preventing you from accessing your Home Assistant instance remotely.
If you’re using a dynamic IP address, your IP address may have changed since you last configured DuckDNS. Verify that your DuckDNS domain is pointing to your current IP address. You can check your current IP address by visiting a website like whatismyip.com.
If you’re using a VPN, your VPN may be interfering with your remote access. Try disabling your VPN temporarily to see if it resolves the issue. If it does, you may need to configure your VPN to allow traffic to your Home Assistant instance.
If you’re using a firewall on your Home Assistant instance, make sure that it’s not blocking incoming traffic to port 8123 (or your custom port). You may need to create a firewall rule to allow access to your Home Assistant instance from the internet.
If you’re still unable to resolve the issue, try restarting your Home Assistant instance and your router. Sometimes, a simple restart can fix underlying problems and restore remote access.
Remember to consult the Home Assistant documentation and community forums for additional troubleshooting tips and solutions. The Home Assistant community is a valuable resource for getting help with common issues and finding answers to your questions.
Alternative Solutions for Remote Access
While DuckDNS is a popular and free solution for remote access, there are other alternatives available. These alternatives may offer additional features or be more suitable for certain use cases.
One alternative is Nabu Casa, a subscription-based service offered by the creators of Home Assistant. Nabu Casa provides secure remote access to your Home Assistant instance without the need for port forwarding or dynamic DNS configuration.
Another alternative is using a VPN (Virtual Private Network) to create a secure connection to your home network. With a VPN, you can access your Home Assistant instance as if you were on your local network, without exposing it directly to the internet.
Some routers also offer built-in VPN server functionality, allowing you to easily set up a VPN connection to your home network. Alternatively, you can use a dedicated VPN server like WireGuard or OpenVPN.
Each of these solutions has its own advantages and disadvantages, so it’s important to choose the one that best fits your needs and technical expertise. DuckDNS is a great option for those who want a free and simple solution, while Nabu Casa and VPNs offer more advanced features and security.
Nabu Casa offers a seamless and secure remote access experience, eliminating the complexities of port forwarding and dynamic DNS. It’s a great option for users who want a hassle-free solution and are willing to pay a subscription fee.
VPNs provide a secure and encrypted connection to your home network, allowing you to access all of your devices and services as if you were on your local network. This is a great option for users who want to protect their privacy and security while accessing their home network remotely.
WireGuard and OpenVPN are popular open-source VPN servers that offer a high level of security and performance. They can be installed on a Raspberry Pi or other server in your home network.
Another alternative is Tailscale, a zero-config VPN that makes it easy to create a secure connection between your devices and your home network. Tailscale is a great option for users who want a simple and easy-to-use VPN solution.
Cloudflare Tunnel provides a secure and encrypted tunnel between your Home Assistant instance and the Cloudflare network. This allows you to access your Home Assistant instance remotely without exposing it directly to the internet.
When choosing a remote access solution, consider your technical expertise, security requirements, and budget. DuckDNS is a great option for beginners, while Nabu Casa, VPNs, and Cloudflare Tunnel offer more advanced features and security for experienced users.
Remember to weigh the pros and cons of each solution before making a decision. Consider factors such as ease of setup, security, performance, and cost. The best solution for you will depend on your individual needs and preferences.
No matter which remote access solution you choose, it’s important to prioritize security. Use strong passwords, enable two-factor authentication, and keep your software up to date with the latest security patches. This will help protect your Home Assistant instance and your home network from unauthorized access.
Advanced Configuration Options
Once you have DuckDNS set up and working, you can explore some advanced configuration options to further customize your setup. These options can help improve security, performance, and usability.
One advanced option is to use a different port for external access to your Home Assistant instance. Instead of using the default port 8123, you can choose a different port and forward it to port 8123 on your Home Assistant instance. This can help prevent attackers from easily identifying your Home Assistant instance.
Another advanced option is to use a reverse proxy like Nginx or Apache to handle HTTPS encryption and caching. A reverse proxy can improve performance by caching static assets and reduce the load on your Home Assistant instance.
You can also configure Home Assistant to use a different base URL, which can be useful if you’re running multiple web applications on the same server. This allows you to access your Home Assistant instance using a specific URL path (e.g., yourdomain.duckdns.org/homeassistant).
Finally, you can set up dynamic DNS updates on your router instead of using the DuckDNS add-on in Home Assistant. This can be useful if you want to update your DuckDNS domain even when your Home Assistant instance is not running.
Using a non-standard port for external access adds a layer of obscurity to your Home Assistant setup. While it doesn’t provide foolproof security, it can deter casual attackers who are scanning for default ports.
A reverse proxy acts as an intermediary between your Home Assistant instance and the outside world. It can handle tasks such as SSL encryption, caching, and load balancing, improving performance and security.
Nginx and Apache are popular open-source reverse proxy servers that offer a wide range of features and configuration options. They can be configured to work with Home Assistant to provide a secure and efficient remote access experience.
Configuring a base URL allows you to access your Home Assistant instance using a specific URL path