Losing your Home Assistant setup can be a frustrating experience. Fortunately, with regular backups, you can quickly restore your system to its previous state. This guide will walk you through the process to restore Home Assistant backup, ensuring your smart home is back up and running smoothly.
We’ll cover everything from locating your backup files to troubleshooting common issues. Whether you’re a beginner or an experienced user, this step-by-step guide will help you through the entire process of Home Assistant recovery.
Home Assistant backups are essential for maintaining the stability and security of your smart home. By following these instructions, you can safeguard your configuration and data, providing peace of mind and minimizing downtime.
Understanding Home Assistant Backups
Home Assistant backups are comprehensive snapshots of your entire configuration. This includes your settings, integrations, automations, and historical data.
Regular backups ensure that you can quickly recover from hardware failures, software glitches, or accidental configuration changes. Think of them as insurance for your smart home setup, protecting you from losing valuable time and effort.
There are two primary types of backups in Home Assistant: full backups and partial backups. Full backups capture everything, while partial backups allow you to select specific components to save, like only your configuration files.
Full backups are generally recommended for complete protection, but partial backups can be useful for quickly saving specific changes or when dealing with limited storage space. Understanding the difference is key to effective Home Assistant Backup management.
A full backup will contain the complete state of your Home Assistant instance. This includes all of your configured devices, entities, automations, scripts, scenes, and user settings.

A partial backup, on the other hand, lets you choose exactly what to include. This is handy if you only want to back up your configuration files or a specific set of integrations.
It’s also important to understand the difference between a snapshot and a backup. While the terms are often used interchangeably, snapshots are typically stored locally, while backups can be stored remotely.
Consider setting up automated backups to run on a schedule. This ensures that you always have a recent backup available in case of an emergency, without having to manually initiate the process.
Also, consider where you will be storing your backups. While storing them locally is convenient, it’s best practice to also store them in a separate location, such as a cloud service, to protect against hardware failures.
Home Assistant allows you to create backups directly from the user interface. You can find the backup options under the Supervisor panel, where you can create a new backup or restore from an existing one.
When creating a backup, you have the option to include or exclude your media folder. If you have a large media library, excluding it from the backup can significantly reduce the backup size and time.
Locating Your Home Assistant Backup File
Finding your Home Assistant backup file is the first step in the restore process. By default, Home Assistant stores backups in the `/backup` directory within your configuration folder.
You can access this directory using the Samba share if you have it configured, or through the Home Assistant terminal. The backup files are typically named with a `.tar.gz` extension, indicating a compressed archive format.
If you’re using Home Assistant OS, the Samba share is the easiest way to access your backup files from a computer on your local network. Simply enable the Samba add-on, configure your credentials, and navigate to the `backup` folder.
Alternatively, you can use the Home Assistant terminal to list the files in the `/backup` directory and download them using a tool like `scp` or `wget`. Make sure you have appropriate permissions to access and transfer the files securely.
The exact location of your Home Assistant configuration folder depends on your installation method. For Home Assistant OS, it’s typically located at `/usr/share/hassio/homeassistant`.
If you’re using Home Assistant Supervised, the configuration folder might be in `/usr/share/docker/volumes/homeassistantconfig/data`. You can check the documentation for your specific installation method to confirm the location.
Once you’ve located the configuration folder, you can use a file manager or command-line tool to navigate to the `/backup` directory. You should see a list of files with the `.tar.gz` extension, which are your backup files.
If you’re using the Samba share, you can simply drag and drop the backup files to your computer. If you’re using the terminal, you can use the `scp` command to securely copy the files to your local machine.
Make sure to keep your backup files in a safe and secure location. Consider storing them on an external hard drive or in a cloud storage service to protect against data loss.
It’s also a good idea to rename your backup files with descriptive names that include the date and time of the backup. This makes it easier to identify the correct backup file when you need to restore your system.
Restoring a Backup During Initial Setup
Restoring a backup during the initial setup of Home Assistant is a straightforward process. This method is particularly useful when you’re setting up a new Home Assistant instance or recovering from a complete system failure.
During the initial setup wizard, Home Assistant will ask if you want to restore from a previous backup. If you have a backup file available, select this option and follow the prompts to upload your backup.
| Step | Action | Description |
|---|---|---|
| 1 | Start Setup | Begin the initial Home Assistant setup process. |
| 2 | Choose Restore | Select the option to restore from a backup. |
| 3 | Upload Backup | Upload your backup file (.tar.gz). |
| 4 | Wait | Allow Home Assistant to restore the backup. |
| 5 | Restart | Restart Home Assistant to complete the process. |
The system will then restore your configuration and data from the backup file. Be patient as this process can take some time, depending on the size of your backup.
Once the restore is complete, Home Assistant will restart, and you should be able to access your restored smart home setup. Ensure that all your devices and integrations are functioning correctly after the restore.
This method is especially convenient because it allows you to quickly get your Home Assistant instance back up and running with all your previous settings and configurations.
Make sure you have a stable internet connection during the restore process. A dropped connection can interrupt the restore and potentially corrupt your installation.
If you encounter any errors during the restore process, check the Home Assistant logs for more information. The logs can provide valuable clues about the cause of the error and how to fix it.
Before restoring a backup, it’s always a good idea to create a new backup of your current installation. This provides a safety net in case something goes wrong during the restore process.
After the restore is complete, take some time to verify that all your devices and integrations are working as expected. You may need to reconfigure some devices or integrations if they are not functioning correctly.
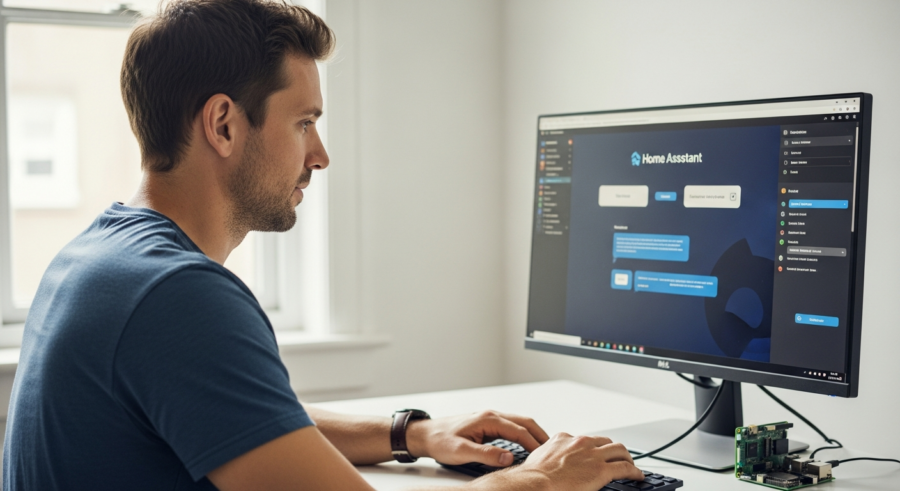
Restoring a Backup From the Home Assistant Interface
You can also restore a Home Assistant backup directly from the Home Assistant interface. This method is useful when you need to revert to a previous configuration without going through the initial setup process.
To restore from the interface, navigate to the “Supervisor” panel, then go to the “Snapshots” tab. Here, you’ll see a list of available backups and an option to upload a new one.
Select the backup you want to restore and click the “Restore” button. Home Assistant will prompt you to confirm the restore operation, as it will overwrite your current configuration.
After confirming, the system will begin restoring your backup. This process may take a while, so avoid interrupting it. Once the restore is complete, Home Assistant will automatically restart.
After the restart, verify that your smart home setup is functioning as expected. Check your devices, automations, and integrations to ensure everything is working correctly.
This method is generally faster than restoring during the initial setup, as it doesn’t require you to re-download the Home Assistant image or go through the initial configuration steps.
Before restoring a backup from the interface, make sure you have a recent backup of your current configuration. This allows you to easily revert to your current configuration if something goes wrong during the restore process.
During the restore process, Home Assistant will display a progress bar indicating the status of the restore. Avoid interrupting the restore process, as this can lead to data corruption or other issues.
If you encounter any errors during the restore process, check the Home Assistant logs for more information. The logs can provide valuable clues about the cause of the error and how to fix it.
After the restore is complete, it’s always a good idea to restart your Home Assistant instance to ensure that all changes are applied correctly. You can do this from the Supervisor panel.
Also, be aware that restoring a backup will overwrite your current configuration. Make sure you have a backup of your current configuration before restoring a backup, just in case you need to revert to it.
Understanding Home Assistant Recovery
Home Assistant recovery involves more than just restoring a backup. It also includes understanding how to diagnose and fix issues that may arise during or after the restore process.
Sometimes, a restore might not go as planned, leaving you with a partially functional or non-functional system. Knowing how to troubleshoot these problems is crucial for a successful recovery.
One common issue is corrupted backup files. If a backup file is damaged, Home Assistant may fail to restore it, or the restored system may exhibit unexpected behavior.
Another issue can be incompatible configurations. If you’re restoring a backup from an older version of Home Assistant, some configurations may not be compatible with the newer version.
Understanding the Home Assistant logging system is key to successful recovery. The logs contain valuable information about errors, warnings, and other events that can help you diagnose problems.
Familiarize yourself with the Home Assistant command-line interface (CLI). The CLI provides access to various diagnostic tools and commands that can help you troubleshoot your system.
Learn how to access and interpret the Home Assistant logs. The logs are typically stored in the `/config/home-assistant.log` file. You can view the logs using a text editor or the Home Assistant web interface.
If you encounter errors during the restore process, carefully examine the error messages in the logs. The error messages often provide clues about the cause of the error and how to fix it.
Be prepared to troubleshoot network connectivity issues. Sometimes, devices or integrations may fail to connect after a restore due to network configuration problems.
Also, understand how to safely edit the Home Assistant configuration files. Incorrectly editing the configuration files can lead to system instability or failure.
Troubleshooting Backup and Restore Issues
Encountering issues during the backup and restore process can be frustrating, but many problems have simple solutions. Here are some common troubleshooting steps to help you resolve these issues.
If a restore fails, the first step is to check the Home Assistant logs. The logs often contain error messages that can provide clues about the cause of the failure.
- Verify backup file integrity
- Check Home Assistant logs for errors
- Ensure sufficient storage space
- Update Home Assistant to the latest version
- Disable custom components during restore
Ensure that you have enough free storage space on your Home Assistant device. A lack of space can prevent the restore process from completing successfully.
If you suspect a corrupted backup file, try restoring from an older backup. If older backups restore successfully, the issue is likely with the most recent backup file.
If you’re restoring a backup from an older version of Home Assistant, some configurations may not be compatible with the newer version. Try updating your Home Assistant instance to the latest version before restoring the backup.
If you’re using custom components, try disabling them before restoring the backup. Some custom components may cause conflicts or errors during the restore process.
Verify the integrity of your backup file. You can use a checksum tool to verify that the backup file has not been corrupted during transfer or storage.
If you’re restoring a backup to a different hardware platform, you may need to adjust some of the configuration settings. For example, you may need to update the device paths for your Zigbee or Z-Wave devices.
If you’re still encountering issues, try searching the Home Assistant forums or online communities for solutions. Other users may have encountered similar problems and found ways to resolve them.
Consider using the Home Assistant Safe Mode. This mode disables all custom components and integrations, allowing you to troubleshoot your system without interference from third-party code.
Advanced Recovery Techniques
For more complex issues, you may need to employ advanced recovery techniques. These techniques can help you salvage your Home Assistant setup when standard methods fail.
One such technique is manually editing the configuration files. If you’re comfortable with YAML, you can directly modify the configuration files to fix errors or remove incompatible settings.
Another approach is to use the Home Assistant command-line interface (CLI) to diagnose and repair issues. The CLI provides access to various diagnostic tools and commands that can help you troubleshoot your system.
In some cases, you may need to perform a clean installation of Home Assistant and manually migrate your configuration. This involves setting up a new Home Assistant instance and copying over your configuration files, automations, and other settings.
Always back up your configuration files before making any manual changes. This provides a safety net in case something goes wrong during the advanced recovery process.
When manually editing configuration files, use a text editor that supports YAML syntax highlighting and validation. This can help you avoid errors and ensure that your configuration files are valid.
If you’re using the Home Assistant CLI, familiarize yourself with the available commands and options. The CLI documentation provides detailed information about each command and its usage.
When performing a clean installation of Home Assistant, make sure to follow the official installation instructions carefully. This will help you avoid common installation errors and ensure that your system is set up correctly.
When manually migrating your configuration, start by copying over the core configuration files, such as `configuration.yaml` and `secrets.yaml`. Then, gradually add your other configuration files and automations, testing each one to ensure that it’s working correctly.
Consider using a version control system, such as Git, to track your configuration changes. This allows you to easily revert to previous versions of your configuration files if something goes wrong.
Best Practices for Home Assistant Backups
Implementing best practices for Home Assistant backups ensures that you always have a reliable recovery option. Regular backups are the cornerstone of this strategy, but there are other steps you can take to enhance your backup process.
Schedule automatic backups to run regularly, such as daily or weekly. This ensures that you always have a recent backup available in case of an emergency.
Store your backups in multiple locations, such as on a local hard drive and in the cloud. This protects you from data loss due to hardware failure or other unforeseen events.
Test your backups periodically by restoring them to a test environment. This verifies that your backups are working correctly and that you can successfully restore your system when needed.
Consider using a dedicated backup device or service. This can provide an extra layer of protection against data loss and simplify the backup process.
Encrypt your backups to protect your sensitive data. This prevents unauthorized access to your configuration files and other personal information.
Document your backup process. This makes it easier to restore your system in the event of an emergency and ensures that you don’t forget any important steps.
Regularly review your backup strategy to ensure that it’s still meeting your needs. As your Home Assistant setup evolves, you may need to adjust your backup frequency or storage locations.
Consider using a backup naming convention that includes the date and time of the backup. This makes it easier to identify the correct backup file when you need to restore your system.
Monitor your backup process to ensure that it’s running correctly. Check the logs regularly to identify any errors or warnings.
Automating Your Backup Strategy
Automating your backup strategy simplifies the process and ensures that backups are performed consistently. Home Assistant offers several tools and integrations to help you automate your backups.
The built-in “Snapshot” feature allows you to schedule automatic backups at regular intervals. You can configure the frequency of backups, the number of backups to retain, and whether to include your media folder in the backup.
For more advanced automation, you can use the Home Assistant automation engine to create custom backup routines. This allows you to trigger backups based on specific events, such as system updates or configuration changes.
You can also use third-party integrations, such as Google Drive Backup or Dropbox Backup, to automatically upload your backups to the cloud. These integrations provide an extra layer of protection against data loss.
By automating your backup strategy, you can minimize the risk of data loss and ensure that you always have a recent backup available when you need it. This provides peace of mind and simplifies the recovery process.
When setting up automated backups, consider the frequency of backups. Daily backups are generally recommended, but you may need to adjust the frequency based on your usage patterns.
Also, consider the number of backups to retain. Retaining multiple backups allows you to revert to a previous configuration if necessary, but it also consumes more storage space.
If you’re using a cloud backup service, make sure to configure it correctly. This includes setting up the necessary credentials and permissions.
Test your automated backup strategy regularly to ensure that it’s working correctly. You can do this by restoring a backup to a test environment.
Monitor your automated backup process to identify any errors or warnings. Check the logs regularly to ensure that backups are being created successfully.
Conclusion
Restoring a Home Assistant backup is a critical skill for any smart home enthusiast. By following the steps outlined in this guide, you can confidently recover from system failures, configuration errors, and other unexpected issues.
Remember to regularly back up your Home Assistant configuration and store your backups in multiple locations. This ensures that you always have a reliable recovery option available.
With a solid backup and restore strategy in place, you can enjoy the benefits of Home Assistant without worrying about data loss or system downtime. Your smart home will be more resilient and reliable.
So, take the time to implement these best practices and automate your backup process. You’ll be well-prepared to handle any unexpected challenges that come your way, and you’ll keep your smart home running smoothly.
By understanding the different types of backups, how to locate your backup files, and how to restore them using various methods, you can ensure the longevity and stability of your Home Assistant setup.
Don’t underestimate the importance of regular backups. They are your safety net in case of any unexpected issues, and they can save you countless hours of troubleshooting and reconfiguration.
Take the time to implement a robust backup strategy today, and you’ll be well-prepared to handle any challenges that come your way in the future.
With a little planning and effort, you can ensure that your Home Assistant setup is always safe, secure, and ready to serve your smart home needs.