Embarking on the smart home adventure can be both exciting and a little daunting. Fortunately, devices like the Home Assistant Yellow make the process more accessible than ever before.
This comprehensive guide will walk you through each step of the setup Home Assistant Yellow, from unboxing to connecting your first smart devices. By the end, you’ll have a fully functional smart home hub that respects your privacy and puts you in control.
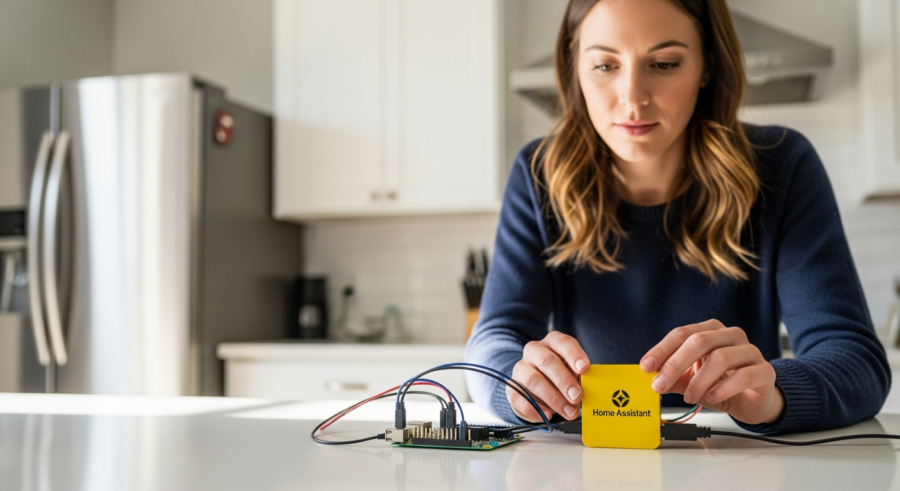
The Home Assistant Yellow is a local-first smart home hub, meaning it operates independently of cloud services. This ensures your data stays private and your smart home continues to function even if your internet connection goes down.
Unboxing and Inspecting Your Home Assistant Yellow
The first step is to unbox your Home Assistant Yellow and verify that all the necessary components are included. The box should contain the Home Assistant Yellow device itself, a power adapter, and possibly an Ethernet cable.
Carefully remove each item from the box and inspect them for any signs of damage. If anything is missing or damaged, contact the retailer or Home Assistant support for assistance.
Take a moment to familiarize yourself with the device’s ports and buttons. You’ll typically find an Ethernet port, a power input, USB ports, and possibly a reset button on the back or sides of the device.
The Home Assistant Yellow is designed to be compact and unobtrusive, so find a suitable location for it in your home. It should be easily accessible for connecting devices and within range of your Wi-Fi network if you plan to use Wi-Fi instead of a wired Ethernet connection.
Pay close attention to the packaging and make sure you retain any documentation or warranty information included. This will be useful if you encounter any issues during the setup process or need to contact customer support in the future.

Also, be mindful of static electricity when handling the Home Assistant Yellow device. Ground yourself by touching a metal object before handling the device to prevent any potential damage from electrostatic discharge.
Check the included power adapter to ensure it is compatible with your local power outlets. Using an incompatible power adapter can damage the device or pose a safety hazard.
If you received any additional accessories with your Home Assistant Yellow, such as mounting brackets or screws, set them aside for later use. These accessories can be helpful for installing the device in a more permanent location.
Connecting the Power Supply and Network Cable
Once you’ve unboxed and inspected your Home Assistant Yellow, it’s time to connect the power supply and network cable. Begin by plugging the power adapter into a wall outlet and then connect the other end to the power input on the Home Assistant Yellow.
Next, connect one end of the Ethernet cable to the Ethernet port on the Home Assistant Yellow and the other end to an available port on your router or network switch. A wired connection is generally more stable and reliable than Wi-Fi, especially for a smart home hub that needs to be always online.
If you prefer to use Wi-Fi, you can skip the Ethernet cable connection for now. You’ll be able to configure the Wi-Fi settings later through the web interface once the device is up and running.
After connecting the power and network, the Home Assistant Yellow should automatically power on. You might see some LEDs light up, indicating that the device is booting up and establishing a network connection.
Make sure the power outlet you’re using is functioning correctly. You can test it by plugging in another device to confirm it’s providing power.
If you’re using a power strip or surge protector, ensure it’s turned on and providing power to the outlet. Sometimes, power strips have a separate switch that needs to be flipped.
Check the Ethernet cable for any signs of damage, such as frayed wires or bent connectors. A damaged Ethernet cable can cause intermittent connectivity issues.
If you’re connecting the Ethernet cable to a network switch, make sure the switch is powered on and has available ports. Some switches require configuration before they can be used.
Accessing the Home Assistant Yellow Web Interface
With the Home Assistant Yellow powered on and connected to your network, the next step is to access its web interface. This is where you’ll perform the initial configuration and Connect Home Assistant Yellow to your smart devices.
Open a web browser on your computer or mobile device and enter `http://homeassistant.local:8123` in the address bar. If this doesn’t work, you may need to find the IP address assigned to your Home Assistant Yellow by your router.
To find the IP address, log in to your router’s administration interface and look for a list of connected devices. The Home Assistant Yellow should be listed with a name like “homeassistant” or “espressif”.
Once you have the IP address, enter it into your web browser’s address bar followed by “:8123” (e.g., `http://192.168.1.100:8123`). This should take you to the Home Assistant Yellow welcome screen.
Ensure your computer or mobile device is connected to the same network as the Home Assistant Yellow. This is crucial for the web interface to be accessible.
If you’re using a VPN, try disabling it temporarily to see if it’s interfering with the connection. Some VPNs can block local network traffic.
Clear your browser’s cache and cookies if you’re having trouble accessing the web interface. Sometimes, old cached data can cause conflicts.
Try using a different web browser to see if the issue is specific to your current browser. Chrome, Firefox, and Safari are all compatible with Home Assistant.
Troubleshooting Connection Issues
Sometimes, accessing the web interface can be tricky, especially if you’re not familiar with networking. Here are a few troubleshooting tips to help you overcome common connection issues.
First, make sure that your computer or mobile device is connected to the same network as the Home Assistant Yellow. If you’re using Wi-Fi, ensure that you’re connected to the correct network and that the signal strength is good.
| Problem | Possible Solution | Details |
|---|---|---|
| Cannot access `homeassistant.local:8123` | Use IP address instead | Find the IP address assigned by your router and use that in your browser. |
| Cannot find Home Assistant Yellow in router’s device list | Check network cable or Wi-Fi | Ensure the Ethernet cable is properly connected or that the Wi-Fi is configured correctly. |
| Web interface is slow or unresponsive | Restart Home Assistant Yellow | Try restarting the device by unplugging and plugging it back in. |
| Firewall blocking connection | Check firewall settings | Make sure your firewall isn’t blocking traffic to port 8123 on the Home Assistant Yellow. |
Double-check that you’ve entered the correct IP address in your web browser. A simple typo can prevent you from accessing the web interface.
If you’re still unable to connect, try pinging the Home Assistant Yellow from your computer. Open a command prompt or terminal and type “ping [IP address]” (replace [IP address] with the actual IP address of your Home Assistant Yellow).
If the ping fails, it indicates a network connectivity issue. This could be due to a problem with your router, Ethernet cable, or Wi-Fi connection.
Ensure that your router’s DHCP server is enabled. The DHCP server automatically assigns IP addresses to devices on your network. If it’s disabled, you may need to manually configure an IP address for your Home Assistant Yellow.
Initial Configuration and Account Setup
Once you’ve successfully accessed the web interface, you’ll be greeted with the initial Home Assistant Yellow Setup screen. This is where you’ll create your user account and configure some basic settings.
First, you’ll be prompted to create a user account with a username and password. Choose a strong password to protect your smart home from unauthorized access.
Next, you’ll be asked to set your location. This is important for Home Assistant to accurately determine sunrise and sunset times, which can be used in automations.
You can either manually enter your latitude and longitude or allow Home Assistant to automatically detect your location based on your IP address. After setting your location, you’ll be presented with a list of discovered devices on your network.
Consider enabling two-factor authentication (2FA) for your Home Assistant account. This adds an extra layer of security by requiring a code from your phone or another device in addition to your password.
If you have a Home Assistant Cloud subscription (Nabu Casa), you can connect your Home Assistant Yellow to the cloud for remote access and other features. This allows you to control your smart home from anywhere in the world.
During the initial setup, you’ll also have the option to customize the default dashboard. You can add or remove devices, change the layout, and create new dashboards to suit your needs.
Take some time to explore the different settings and options available during the initial configuration. This will help you tailor Home Assistant to your specific preferences and requirements.
Updating Home Assistant Yellow to the Latest Version
Before you start adding devices and creating automations, it’s always a good idea to update your Home Assistant Yellow to the latest version. This ensures that you have the latest features, bug fixes, and security patches.
To update Home Assistant, navigate to the “Configuration” panel in the sidebar and then click on “Updates”. If there’s an update available, you’ll see a notification with a button to install it.
Click the “Install” button and wait for the update process to complete. This may take several minutes, and your Home Assistant Yellow may restart during the process.
Once the update is complete, you’ll be running the latest version of Home Assistant. It’s recommended to check for updates regularly to keep your system secure and up-to-date.
Before initiating the update, it’s wise to create a backup of your current Home Assistant configuration. This allows you to revert to the previous version if anything goes wrong during the update process.
Avoid interrupting the update process once it has started. Power outages or network interruptions during the update can potentially corrupt your Home Assistant installation.
After the update, check the Home Assistant logs for any errors or warnings. This can help you identify potential issues and troubleshoot them before they cause problems.
If you encounter any problems during the update process, consult the Home Assistant documentation or community forums for assistance. There are many experienced users who can help you resolve common issues.
Exploring the Home Assistant Interface
Now that you’ve completed the initial setup and updated to the latest version, it’s time to explore the Home Assistant interface. The interface is designed to be intuitive and user-friendly, but it can still be helpful to understand the different sections and their functions.
The main screen is the “Overview” dashboard, which displays the current status of your devices and allows you to control them. You can customize this dashboard to show the devices and information that are most important to you.
The sidebar on the left provides access to different sections of Home Assistant, including “Configuration,” “Lovelace UI,” “Supervisor,” and “Logbook.” The “Configuration” section is where you’ll manage your integrations, devices, and automations.
The “Lovelace UI” section allows you to customize the look and feel of your dashboards. The “Supervisor” section is used for managing add-ons and system updates. The “Logbook” section displays a history of events and changes in your smart home.
Familiarize yourself with the different card types available in Lovelace UI. These cards allow you to display various types of information, such as device states, sensor readings, and graphs.
Explore the “Developer Tools” section in the sidebar. This section provides tools for testing services, viewing entity states, and monitoring events.
Learn how to use the “File Editor” add-on to directly edit configuration files. This is useful for advanced customization and troubleshooting.
Check out the Home Assistant documentation for detailed information on each section of the interface. The documentation is a valuable resource for learning about all the features and capabilities of Home Assistant.
Adding Your First Devices
With Home Assistant Yellow up and running, it’s time to Connect Home Assistant Yellow to your first smart devices. Home Assistant supports a wide range of devices from various manufacturers, so you’re likely to find integrations for your existing smart home devices.
To add a device, navigate to the “Configuration” panel in the sidebar and then click on “Integrations”. Home Assistant will automatically discover some devices on your network, but you can also manually add integrations by clicking the “Add Integration” button.
Select the integration for the device you want to add and follow the on-screen instructions. You may need to enter your device’s credentials or press a button on the device to pair it with Home Assistant.
Once the device is added, it will appear on your “Overview” dashboard, and you can control it from there. Repeat this process for each of your smart devices to build out your smart home ecosystem.
Before adding a device, make sure it is compatible with Home Assistant. Check the Home Assistant documentation or community forums to confirm that there is an integration available for your device.
When adding a device, follow the instructions carefully. Some integrations require specific configuration steps or credentials.
If you’re having trouble adding a device, check the Home Assistant logs for any errors or warnings. This can help you identify the cause of the problem.
Consider using device naming conventions to keep your devices organized. This will make it easier to manage your smart home as you add more devices.
Supported Device Types
Home Assistant boasts compatibility with an extensive array of smart home devices. This ensures you’re likely to find support for your preferred brands and technologies.
Here’s a glimpse into the types of devices that seamlessly integrate with Home Assistant:
- Smart lights (Philips Hue, LIFX)
- Smart thermostats (Nest, Ecobee)
- Smart locks (August, Yale)
- Smart switches and outlets (TP-Link, Sonoff)
- Smart sensors (motion, temperature, humidity)
- Smart media players (Sonos, Chromecast)
Beyond these common device types, Home Assistant extends its reach to encompass a diverse range of smart home technologies. This makes it a versatile hub for controlling your entire connected home.
Security cameras, doorbells, and alarm systems can be integrated to enhance your home’s security. This provides a centralized platform for monitoring and managing your security devices.
Home appliances like refrigerators, washing machines, and ovens can be connected to provide insights into their usage and performance. This allows you to optimize energy consumption and automate tasks.
Even garden irrigation systems and pool controllers can be integrated, allowing you to automate watering schedules and pool maintenance. This simplifies your outdoor chores and helps conserve water.
Creating Your First Automation
One of the most powerful features of Home Assistant is its ability to create automations. Automations allow you to automate tasks and create a truly smart home that responds to your needs.
To create an automation, navigate to the “Configuration” panel in the sidebar and then click on “Automations”. Click the “Add Automation” button to create a new automation.
You’ll need to define a trigger, a condition (optional), and an action for your automation. The trigger is what starts the automation, such as a specific time of day, a device state change, or a sensor reading.
The condition is an optional requirement that must be met for the automation to run. The action is what happens when the trigger is activated and the condition is met, such as turning on a light, sending a notification, or playing music.
Start with simple automations to get a feel for how they work. As you become more comfortable, you can create more complex automations.
Use descriptive names for your automations so you can easily identify them later. This will make it easier to manage your automations as you create more of them.
Test your automations thoroughly before relying on them. This will help you identify any potential problems and ensure that they work as expected.
Consider using the “Choose” action to create more complex automations with multiple branches. This allows you to perform different actions based on different conditions.
Example Automation: Turning on Lights at Sunset
Let’s create a simple automation that turns on your lights at sunset. First, give your automation a name, such as “Turn on Lights at Sunset”.
Next, select “Sun” as the trigger and set the event to “sunset”. You can also specify an offset to turn on the lights a certain amount of time before or after sunset.
For the action, select “Turn on” and choose the lights you want to control. Save the automation, and it will automatically turn on your lights every day at sunset.
This is just a simple example, but you can create much more complex automations to control various aspects of your smart home. Experiment with different triggers, conditions, and actions to create a truly personalized smart home experience.
Add a condition to only turn on the lights if someone is home. This can be achieved by using a presence detection sensor or a mobile app integration.
Use the “Transition” effect to gradually turn on the lights over a period of time. This creates a more natural and pleasing lighting effect.
Create a separate automation to turn off the lights at a specific time or when the sun rises. This ensures that the lights are not left on unnecessarily.
Consider using the “Color Temperature” action to adjust the color temperature of the lights based on the time of day. Warmer colors are more relaxing in the evening, while cooler colors are more energizing in the morning.
Conclusion
Setting up your Home Assistant Yellow might seem complex initially, but following this guide will make the process smooth. You’ve now taken the first steps toward creating a truly smart and personalized home.
With Home Assistant Yellow configuration complete, you’re now in control of your data and your smart home experience. Explore the vast ecosystem of integrations, create powerful automations, and enjoy the convenience and security of a local-first smart home.
Remember to regularly maintain your Home Assistant Yellow by checking for updates and reviewing the logs. This will help ensure that your smart home continues to function smoothly and securely.
Don’t be afraid to experiment with different features and integrations. The Home Assistant community is a valuable resource for learning new things and getting help with any problems you encounter.
As you become more experienced with Home Assistant, you can explore advanced topics such as custom components, scripting, and template sensors. These features allow you to create even more sophisticated and personalized smart home experiences.
Congratulations on setting up your Home Assistant Yellow! You’re now well on your way to creating a truly smart and connected home.